How to Install a Graphics Card in Your Laptop/PC?
Last Updated :
29 Nov, 2023
If you want to convert your conventional computer to a device where you can feel the best gaming experience, it is time to upgrade it. You might upgrade your RAM on the PC along with some other necessary changes, but one thing you should certainly upgrade is the Graphics Card of your Laptop or PC.
Upgrading the Graphics Card is essential to bring more life to the colours & brightness in the monitor. And for any monitor that is going to be used for gaming purposes, a good Installed Graphics Card is highly needed. And to put New Graphics Card you don’t need to rush to any technicians. Using a few simple steps you can upgrade it by yourself.
In this article, we will discuss the steps required for the upgradation of the Graphics Card on PCs.
Things To Remember Before Upgrading Graphics Card on PC
Before going into the installation process, we should keep in mind some points. If we do not abide by the points, the upgrade of the Graphics Card will not be successful. So, go through the following points mentioned.
1. Selecting Proper Graphics Card
- Check the Motherboard compatibility with which dimension the Graphics Card can be inserted.
- You can get the reference of dimensions from the old Graphics Card as well.
- Note down the number of PINs of the Graphics Card.
2. Carefully Hold Graphics Card
- Properly hold the Graphics Card.
- Hold two corners or two fans in the Graphics Card.
- Avoid holding the Golden Pins in the Graphics Card.
- Make Sure there is no fingerprint present at the Graphics Card Pin.
3. Danger from Static Electricity
Static Electricity can be a major problem. And if you are new to experimenting with CPU, be extremely cautious. After removing the plugs, the Static Electricity is present in the CPU Cabinet. If precautions are not taken, the computer parts might get damaged along with providing a shock to you. Ground yourself or use an ESD Wrist Strap for it.
How to Put Graphics Card on Your PC?
To install a Graphics Card on you PC, there are two work fields present. We will start with the Hradware Installation & later move to the Software Installation.
Section 1: Install Graphics Card Hardware
Step 1: Remove all the connections from the CPU Cabinet & leave the cabinet for a few minutes. This will flow all the currents stored in several parts of the computer.
Step 2: Press the Power Button of the cabinet to remove existing static electricity from the device. Then, open the cabinet.

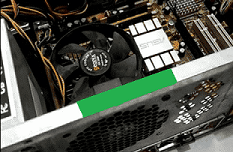
Step 3: Now, hold the metal part of the cabinet like the Cabinet Body to ground yourself along with the computer cabinet. The portion is marked with a green color.
Step 4: Now, you will find some Doors present in the cabinet that are marked as Plus. You have to remove the Vertical Door to remove the Plus Doors. Remove any one of the Plus Doors.

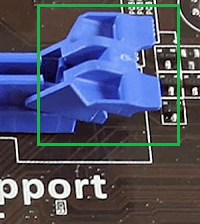
Step 5: You will get the Graphics Card Slot on the button of the Motherboard. Remove the Clips by pressing them gently to open the slots.
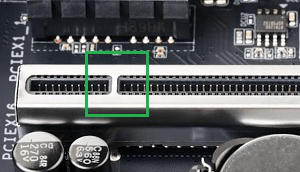
Step 6: Get the Notch present on the slots & put the graphics card in the slot. Make sure that the Notch gets placed in the Graphics Card gap smoothly.
Hence, we have successfully installed the Graphics Card Hardware on the PC.
Section 2: Install Graphics Card Software
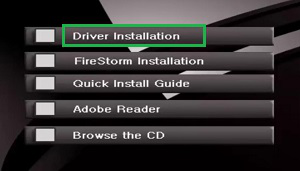
Step 1: Now, execute the CD driver that you have received with the Graphics Card. If it is not there download the executable file from the internet by using the Graphics Card brand. Now, execute the file and click on the Driver Installation option.
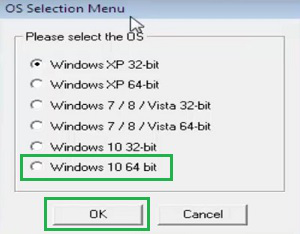
Step 2: Select the Operating System that you are having. Click OK.
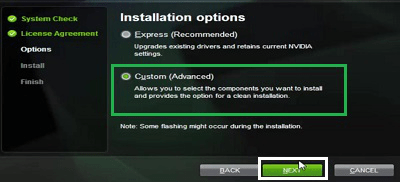
Step 3: Select Custom Option & click Next.
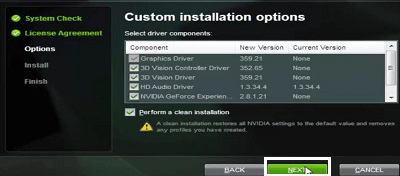
Step 4: Leave all the things as it is & click on Next.
Step 5: Click on the Restart Now button.
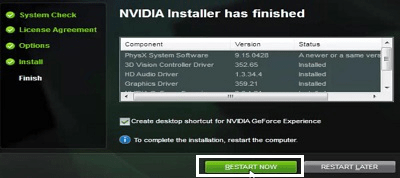
Hence, we have successfully installed the Graphics Card Software on the PC.
So, these are the simple steps you can use to get a new Graphics Card on your PC. Be careful with the Graphics Card holding process & the concern of Static Electricity. Otherwise, the process is very simple to execute & get a new version of your old computer. Installation of the software should be done carefully to complete the process.
FAQs: Install a Graphics Card on PC
1. What configuration of Graphics Card will be the best for a Gaming Computer?
The Graphics Card configuration is determined with the help of the Memory Space & its execution process. If you want to experience the best gaming feeling irrespective of budget, we would like to recommend a 1080p Graphics Card with 12 GB of memory space. However, you might go for the 8GB Graphics Card as well.
2. What are the things that should be taken care of while upgrading the Graphics Card?
The three major things that you should take care while upgrading your Graphics Card on your own are the following:
- You have to ground yourself & the cabinet to bypass the effect of Static Electricity.
- Make sure you have purchased the right dimension Graphics Card in the different cabinets with different shapes of Graphics Card.
- Do not hold the Graphics Card’s pin. Instead, hold the fans to insert into the cabinet.
3. How can I install the Graphics Card software on a PC using the CD Driver?
If you have the Graphics Card Software on the CD Driver, insert it into the device & let the system execute the file. Use the following guidelines to move ahead in the process.
- Click Driver Installation.
- Select the OS version & click OK.
- Click on Custom & select Next.
- Again Select Next
- Now, click on Restart Now & wait until the process gets completed.
Share your thoughts in the comments
Please Login to comment...