How to Implement Radio Button In React ?
Last Updated :
05 Oct, 2023
Implementing radio buttons in React is a fundamental task when it comes to designing interactive user interfaces. In this article, we’ll look at how to make a radio button in React. A radio button is a graphical user interface element that allows people to make an exclusive choice among numerous alternatives.
Prerequisites
Steps to Create a React Application
Step 1: Create a react application by using this command
npx create-react-app radioButtonApp
Step 2: After creating your project folder, i.e. radioButtonApp, use the following command to navigate to it:
cd radioButtonApp
Project Structure

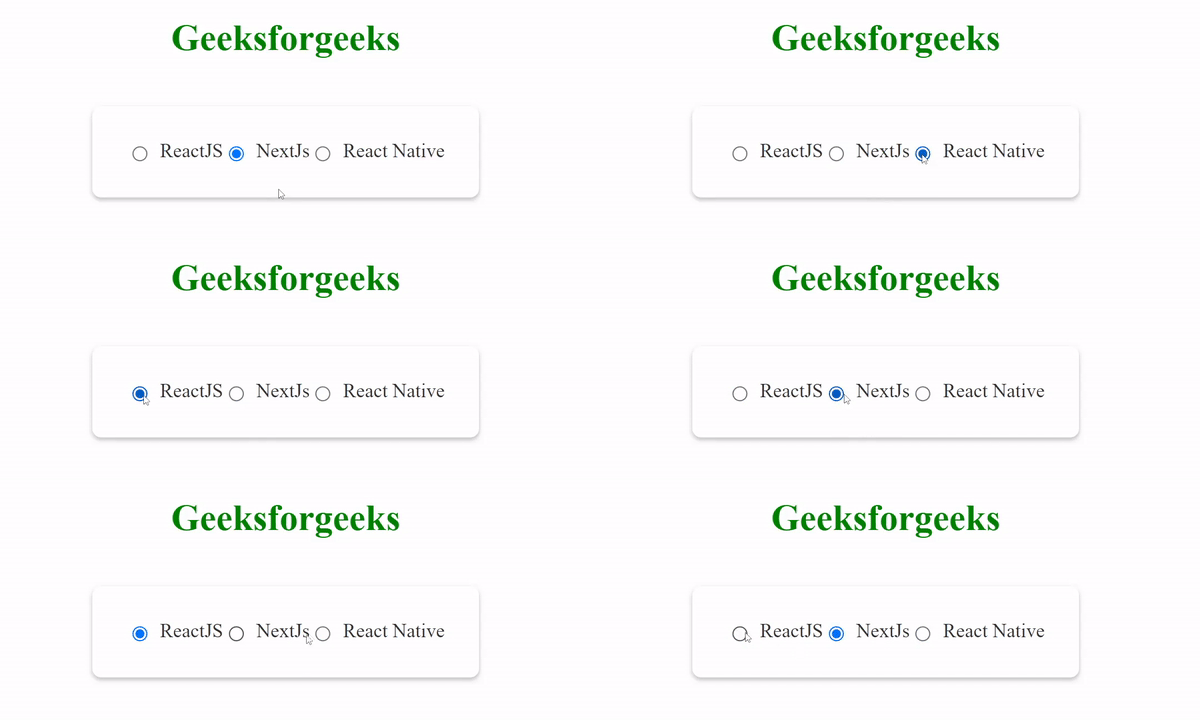
Example 1: This React example illustrates how to create a simple radio button group using the useState hook for state management. The component efficiently maintains a selected option and updates it based on user input. To enhance visual appeal and structure, internal CSS styles are implemented to center-align the radio buttons and labels within a container. By selecting one of the provided options—ReactJS, NextJs, or React Native—users can make a single choice as the state gets updated accordingly.
Javascript
import React, { useState } from "react";
function App() {
const [
selectedValue,
setSelectedValue,
] = useState("option1");
const handleRadioChange = (
value
) => {
setSelectedValue(value);
};
const styles = {
container: {
display: "flex",
flex: 1,
justifyContent: "center",
alignItems: "center",
},
heading: {
color: "green",
textAlign: "center",
},
radioGroup: {
display: "flex",
flexDirection: "row",
alignItems: "center",
justifyContent:
"space-around",
marginTop: "20px",
borderRadius: "8px",
backgroundColor: "white",
padding: "30px",
boxShadow:
"0px 2px 3.84px rgba(0, 0, 0, 0.25)",
},
radioButton: {
display: "flex",
flexDirection: "row",
alignItems: "center",
},
radioLabel: {
marginLeft: "8px",
fontSize: "17px",
color: "#333",
},
};
return (
<div>
<h1 style={styles.heading}>
Geeksforgeeks
</h1>
<div
style={styles.container}
>
<div
style={
styles.radioGroup
}
>
<div
style={
styles.radioButton
}
>
<input
type="radio"
id="option1"
value="option1"
checked={
selectedValue ===
"option1"
}
onChange={() =>
handleRadioChange(
"option1"
)
}
/>
<label
htmlFor="option1"
style={
styles.radioLabel
}
>
ReactJS
</label>
</div>
<div
style={
styles.radioButton
}
>
<input
type="radio"
id="option2"
value="option2"
checked={
selectedValue ===
"option2"
}
onChange={() =>
handleRadioChange(
"option2"
)
}
/>
<label
htmlFor="option2"
style={
styles.radioLabel
}
>
NextJs
</label>
</div>
<div
style={
styles.radioButton
}
>
<input
type="radio"
id="option3"
value="option3"
checked={
selectedValue ===
"option3"
}
onChange={() =>
handleRadioChange(
"option3"
)
}
/>
<label
htmlFor="option3"
style={
styles.radioLabel
}
>
React Native
</label>
</div>
</div>
</div>
</div>
);
}
export default App;
|
Steps to run
To open the application, use the Terminal and enter the command listed below.
npm start
OR
npm run start
Output:

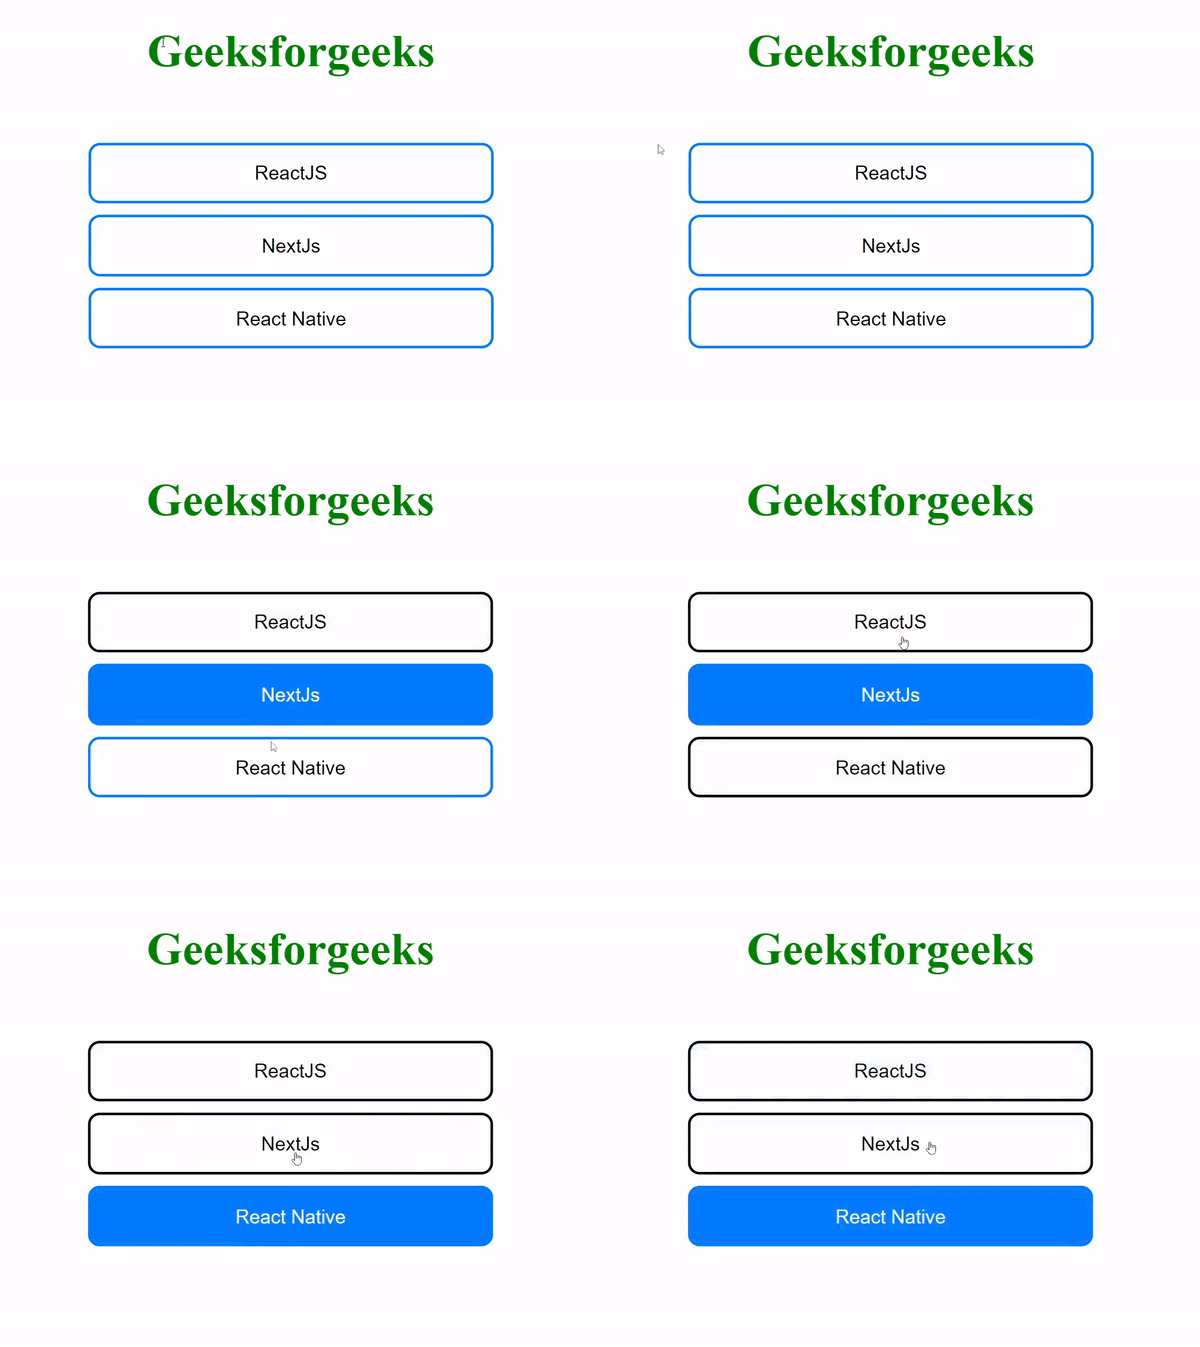
Example 2: In this example, the radio buttons are thoughtfully arranged in a list format, allowing users to easily choose one option from the available choices. There is even visual feedback when a selection is made, as the clicked radio button changes color to indicate the chosen option. To enhance user interaction, the application leverages React’s useState hook to manage and update the selected option’s state effectively.
Javascript
import React, { useState } from "react";
const styles = {
container: {
display: "flex",
justifyContent: "center",
alignItems: "center",
},
heading: {
color: "green",
textAlign: "center",
},
radioButton: {
padding: "12px 16px",
borderRadius: "8px",
margin: "8px",
border: "2px solid #007BFF",
background: "#fff",
display: "flex",
alignItems: "center",
justifyContent: "center",
width: "280px",
cursor: "pointer",
transition:
"background-color 0.3s, color 0.3s",
},
selected: {
background: "#007BFF",
color: "#fff",
borderColor: "#007BFF",
},
list: {
listStyleType: "none",
padding: 0,
textAlign: "center",
},
};
const CustomRadioButton = ({
label,
selected,
onSelect,
}) => (
<li>
<button
style={{
...styles.radioButton,
...(selected
? styles.selected
: {}),
}}
onClick={onSelect}
>
{label}
</button>
</li>
);
function App() {
const [
selectedValue,
setSelectedValue,
] = useState(null);
return (
<div>
<h1 style={styles.heading}>
Geeksforgeeks
</h1>
<div
style={styles.container}
>
<ul style={styles.list}>
<CustomRadioButton
label="ReactJS"
selected={
selectedValue ===
"option1"
}
onSelect={() =>
setSelectedValue(
"option1"
)
}
/>
<CustomRadioButton
label="NextJs"
selected={
selectedValue ===
"option2"
}
onSelect={() =>
setSelectedValue(
"option2"
)
}
/>
<CustomRadioButton
label="React Native"
selected={
selectedValue ===
"option3"
}
onSelect={() =>
setSelectedValue(
"option3"
)
}
/>
</ul>
</div>
</div>
);
}
export default App;
|
Output:

Share your thoughts in the comments
Please Login to comment...