How to get an Element by ID in ReactJS ?
Last Updated :
17 Dec, 2023
ReactJS, a popular JavaScript library for user interfaces, empowers developers with tools, such as the ref system, to manipulate the DOM by accessing elements using their unique IDs. This article explores the process of obtaining elements by ID in ReactJS for effective component interaction and manipulation.
Several methods can be used to Get an element by ID in React JS, which are listed below:
Prerequisites:
Steps to Create React Application:
Step 1: Create a react application by using this command
npx create-react-app getelementID-app
Step 2: After creating your project folder, i.e. getelementID-app, use the following command to navigate to it:
cd getelementID-app
Project Structure:
The updated dependencies in package.json file will look like:
"dependencies": {
    "react": "^18.2.0",
    "react-dom": "^18.2.0",
    "react-scripts": "5.0.1",
    "web-vitals": "^2.1.4",
}
Approach 1: Using document.getElementById()
In this approach, elements are retrieved by their unique IDs using the document.getElementById() method. It is a standard DOM function that proves effective.
Syntax:
const element = document.getElementById('yourElementId');
Example: Below is the code example of the above approach.
Javascript
import React, { Component } from 'react';
class App extends Component {
handleClick = () => {
const element = document.getElementById('myButton');
if (element) {
element.style.backgroundColor = 'green';
element.style.color = 'white';
element.style.border = 'none';
element.style.padding = '10px 20px';
element.style.borderRadius = '10px';
element.style.cursor = 'pointer';
// Add more styling properties as needed
}
};
render() {
return (
<div style={styles.container}>
<h1 style={styles.heading}>
Geekforgeeks
</h1>
<button id="myButton"
onClick={this.handleClick}>
Click me
</button>
</div>
);
}
}
export default App;
const styles = {
container: {
textAlign: 'center',
margin: 'auto',
padding: '20px',
width: 400,
}
};
|
Steps To Run Application: Run the application using the following command from the root directory of the project:
npm start
Output:
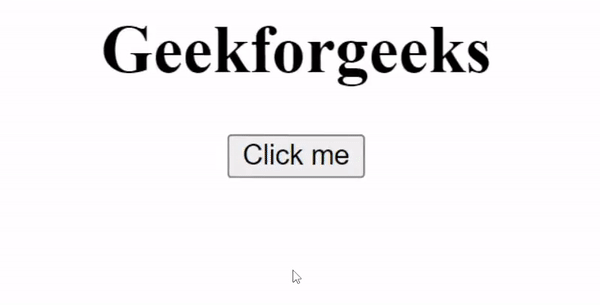
How to Get an element by ID in ReactJs Example 1
Approach 2: Using Refs
In this approach, in React involves creating a ref using React.createRef() and attaching it to an element through the ref attribute. Although not as common, it provides direct access to DOM nodes while keeping them encapsulated within React components.
Syntax:
const node = this.myCallRef.current;
Example: Below is the code example of the above approach.
Javascript
import React, { Component } from 'react';
class RefsExample extends Component {
constructor(props) {
super(props);
this.myButtonRef = React.createRef();
}
handleClick = () => {
if (this.myButtonRef.current) {
const buttonElement = this.myButtonRef.current;
buttonElement.style.backgroundColor = 'green';
buttonElement.style.color = 'white';
buttonElement.style.border = 'none';
buttonElement.style.padding = '10px 20px';
buttonElement.style.cursor = 'pointer';
buttonElement.style.borderRadius = '10px';
// Add more styling properties as needed
}
};
render() {
return (
<div style={styles.container}>
<h1 style={styles.heading}>
Geekforgeeks
</h1>
<button ref={this.myButtonRef}
onClick={this.handleClick}>
Click me
</button>
</div>
);
}
}
export default RefsExample;
const styles = {
container: {
textAlign: 'center',
margin: 'auto',
padding: '20px',
width: 400,
}
};
|
Steps To Run Application: Run the application using the following command from the root directory of the project:
npm start
Output:
Approach 3: Using React State
In this approach, React’s state mechanism is employed to manage element styles. When the button is clicked, the state is updated, modifying the button’s appearance. This maintains a declarative pattern and simplifies handling dynamic styling within React components.
Syntax:
this.setState((prevState, props) => ({
      counter: prevState.count + props.diff
}));
Example: Below is the code example of the above approach.
Javascript
import React, { Component } from 'react';
class App extends Component {
constructor(props) {
super(props);
this.state = {
buttonStyles: {
backgroundColor: 'green',
color: 'white',
border: 'none',
padding: '10px 20px',
cursor: 'pointer',
borderRadius: '10px',
},
};
}
handleClick = () => {
this.setState({
buttonStyles: {
backgroundColor: 'red',
color: 'white',
border: 'none',
padding: '10px 20px',
cursor: 'pointer',
borderRadius: '10px',
},
});
};
render() {
return (
<div style={styles.container}>
<h1 style={styles.heading}>
Geeksforgeeks
</h1>
<button
style={this.state.buttonStyles}
onClick={this.handleClick}
>
Click Me
</button>
</div>
);
}
}
const styles = {
container: {
textAlign: 'center',
margin: 'auto',
padding: '20px',
width: 400,
},
heading: {
fontSize: '24px',
marginBottom: '10px',
},
};
export default App;
|
Steps To Run Application: Run the application using the following command from the root directory of the project:
npm start
Output:

Share your thoughts in the comments
Please Login to comment...