How to deploy MERN application on Vercel ?
Last Updated :
16 Oct, 2023
Vercel is a platform that caters to front-end developers by providing fast and dependable infrastructure to support the creation of innovative designs. With their services, teams can efficiently develop, preview, and deploy user-friendly interfaces. They offer support for over 35 front-end frameworks and seamlessly integrate with various headless content, commerce, and database options. Their platform has zero configuration requirements, making it hassle-free for developers to use.
Features of Vercel
- Deploy your Project with automatic CI/CD.
- Get a Preview Deployment for every git push.
- Host your Node.js backend using their platform.
- Monitor your application performance over time with Vercel Analytics.
- Update content without redeploying.
- Improve the loading performance of your images.
- Serve content as fast as possible.
Steps to Deploy the MERN App on Vercel
Mern is a combination of front-end and back-end servers for the full-stack application. So to deploy the MERN application on Vercel it will be done in two parts i.e.,
Part 1: Deploying Backend made in Node JS for your MERN application
Step 1: Add the given vercel.json file in your backend directory first: Adding this file will enable Vercel configuration.
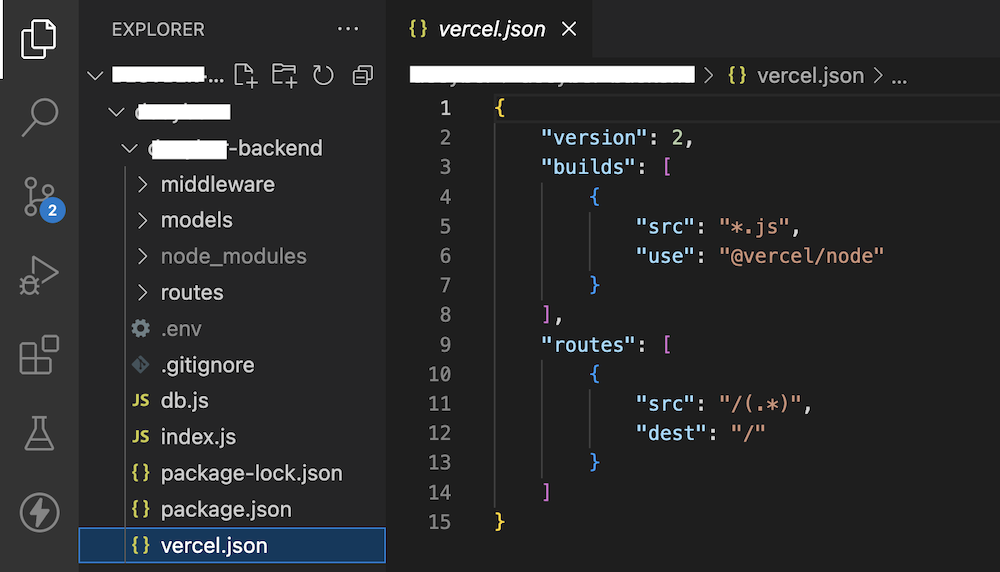
vercel.json file
Step 2: Deploy server-side i.e backend of your MERN app: Go to Vercel dashboard and click on the “Add New…” button and select the “Project” category.

Add New… button
Step 3: Import Your Git repository after linking your Github/Gitlab/BitBucket account with Vercel:
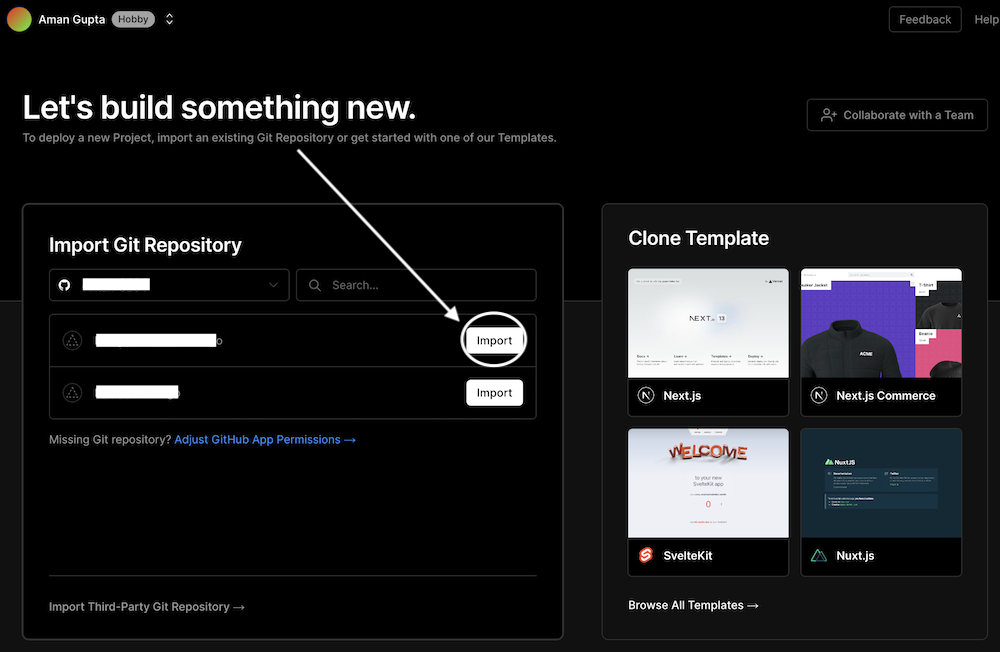
Importing Git Repository
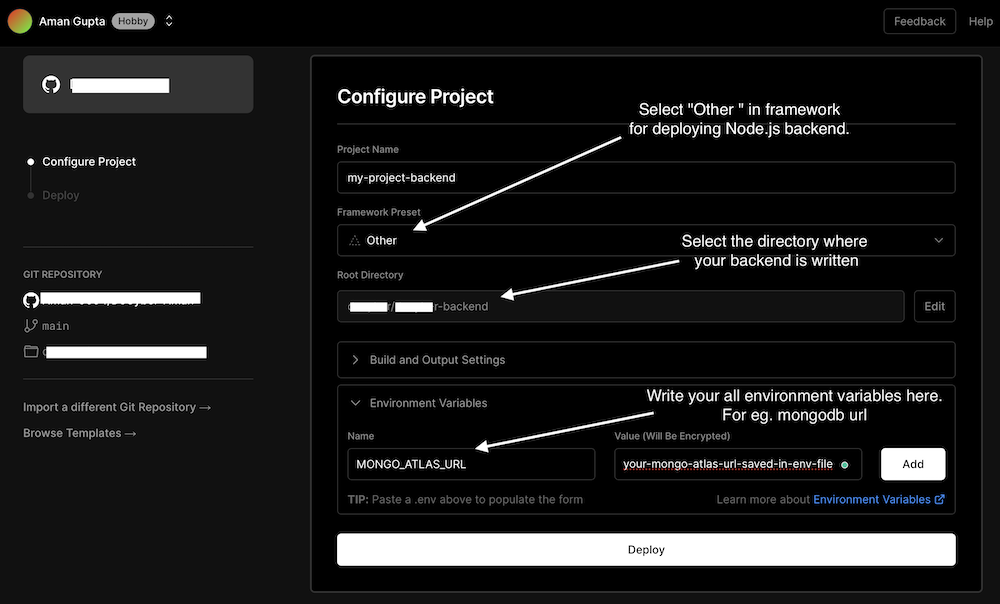
Step 4: Configure the Node.js backend of your MERN app:
- Write your project name. For eg. my-project-backend
- Select “Other” in the framework option. This will ensure that the setup and customization process will be specific to Node.js.
- Choose the backend directory of your project where the build command will be run by Vercel.
- Add your environmental variables. For eg. MONGO_ATLAS_URL: my-mongo-atlas-url
- Click on the “Deploy” button.
Backend Configuration
Congratulations! Your backend will be up and running within a minute after deployment.
Note: Don’t forget to save the deployment link of your server and replace it in your code wherever the local server link was provided.
Part 2: Deploying Frontend made with React JS for your MERN application
Note: Step 1 and Step 2 are the same as Step 2 and Step 3 as discussed above respectively.
Step 1: Deploying the front end of your MERN app: Go to the Vercel dashboard and click on the “Add New…” button and select the “Project” category.
Step 2: Import Your Git repository after linking your Github/Gitlab/BitBucket account with Vercel:
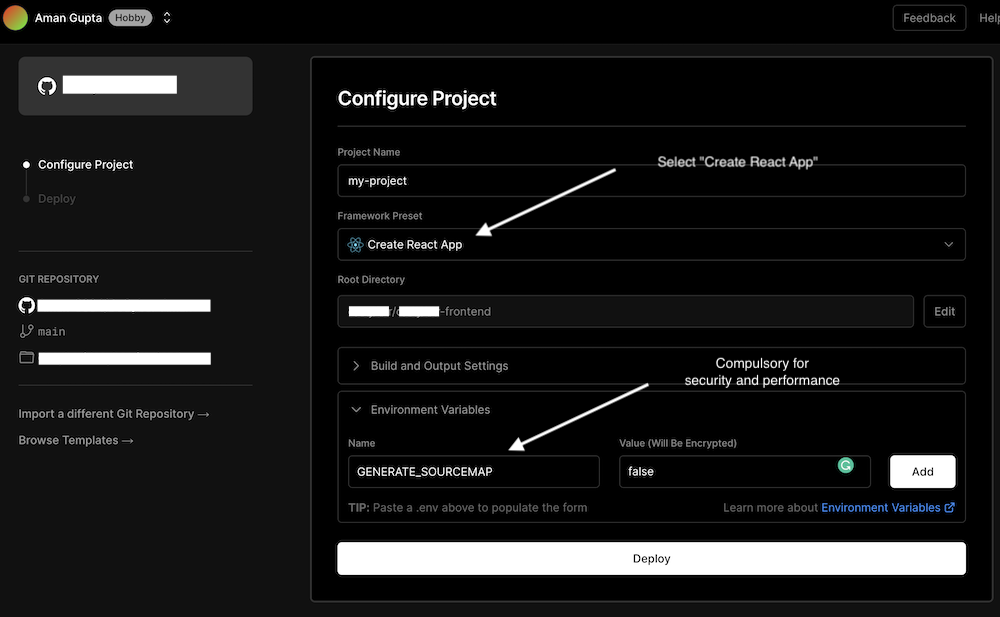
Step 3: Configure the Node.js backend of your MERN app:
- Write your project name. For eg. my-project
- Select “Create-React-App” in the framework option. This will ensure that the setup and customization process will be specific to React.js.
- Choose the backend directory of your project where the build command will be run by Vercel.
- Add your environmental variables. For eg. API_KEY: my-api-key
- Note: One mandatory environmental variable is GENERATE_SOURCEMAP: false for security and performance reasons.
- Click on the “Deploy” button.
Frontend Configuration
Congratulations! Your frontend will be up and running within a minute after deployment.
Enable Vercel Analytics: Vercel Analytics provides valuable insights to developers by allowing them to monitor the number of visitors, page views, location of visitors, and devices used to access their website. This information enables developers to track the traffic their site is generating and make informed decisions to enhance their website’s performance.
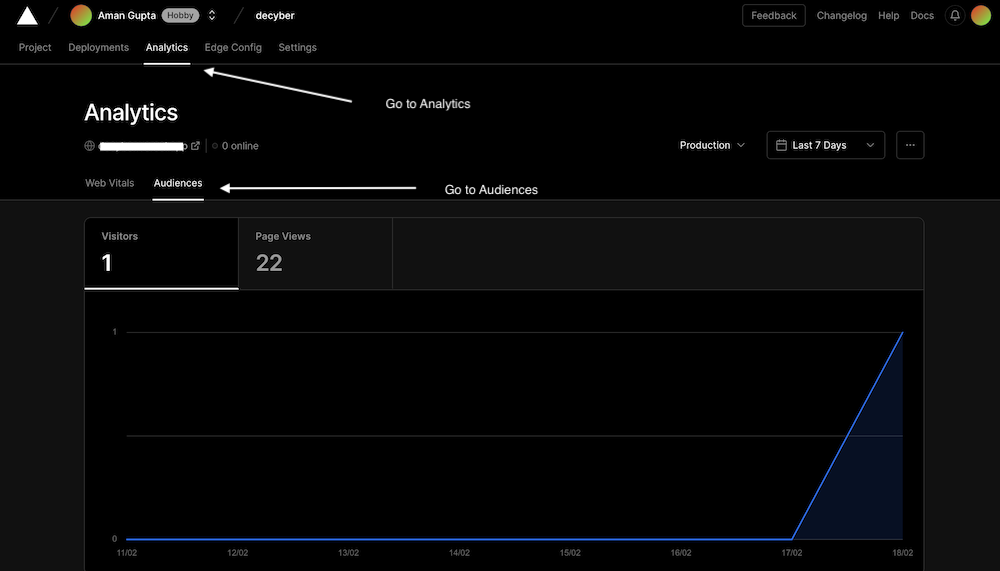
Vercel Analytics
Step 1: Enable Audiences in Vercel Analytics: On the Vercel dashboard, select your Project and then click the Analytics tab. From there, select the Audiences tab, and click Enable from the dialog.
Step 2: Add `@vercel/analytics` to your project: Using the package manager of your choice, add the @vercel/analytics package to your project:
- Using npm: npm i @vercel/analytics
- Using yarn: yarn add @vercel/analytics
Step 3: Call the `inject` function in your app: Add the following code to your main app file:
import { inject } from '@vercel/analytics';
inject();
Step 4: Push the changes to your git repository to see the updates.
Great job! You have successfully deployed your MERN application and activated analytics for your project.
Share your thoughts in the comments
Please Login to comment...