How to Host HTML, CSS & JavaScript Website on Vercel ?
Last Updated :
04 Oct, 2023
In this article, we will host HTML, CSS & JavaScript Websites on Vercel. Every web developer wants to not only create a website but also host it properly, ensuring that visitors and others have a problem-free experience while visiting your website and with Vercel you can seamlessly host your website with all functionality. Vercel not only hosts static websites like GitHub pages but also dynamic websites. So this is a very convenient tool for web developers to showcase their talents. So, let’s dive into the tutorial.
In this article, we will create a dynamic website and host that website on Vercel.
Example: In this example, we will start building a very basic website, which we will then post to GitHub.
- index.html file
- style.css file
HTML
<!DOCTYPE html>
<html lang="en">
<head>
<meta charset="UTF-8">
<meta name="viewport"
content="width=device-width, initial-scale=1.0">
<title>Simple Website</title>
<link rel="stylesheet" href="style.css">
</head>
<body>
<header>
<h1>Welcome to GFG Website</h1>
</header>
<nav>
<ul>
<li><a href="#home">Home</a></li>
<li><a href="#about">About</a></li>
<li><a href="#services">Services</a></li>
<li><a href="#contact">Contact</a></li>
</ul>
</nav>
<main>
<section id="home">
<h2>Home</h2>
<p>
Welcome to our website!
We are a passionate team dedicated to
providing top-notch web solutions for
businesses and individuals.</p>
</section>
<section id="about">
<h2>About</h2>
<p>
Our company was founded in 2010 with
the mission to make the web a better place.
We believe in delivering outstanding results by
combining creativity and cutting-edge technology.
</p>
</section>
<section id="services">
<h2>Services</h2>
<p>
This is the services section of the website.
</p>
</section>
<section id="contact">
<h2>Contact</h2>
<p>
Have a question or want to discuss
a project? We'd love to hear from you!
</p>
</section>
</main>
<footer>
<p>© 2023 Your Website Name. All rights reserved.</p>
</footer>
<script src="script.js"></script>
</body>
</html>
|
CSS
body {
font-family: Arial, sans-serif;
line-height: 1.6;
margin: 0;
padding: 0;
}
header {
background-color: green;
color: #fff;
text-align: center;
padding: 1rem;
}
nav {
background-color: #555;
text-align: center;
}
nav ul {
list-style: none;
margin: 0;
padding: 0;
}
nav li {
display: inline-block;
padding: 1rem;
}
nav a {
color: #fff;
text-decoration: none;
}
main {
padding: 2rem;
}
section {
margin-bottom: 2rem;
}
footer {
background-color: #333;
color: #fff;
text-align: center;
padding: 1rem;
}
|
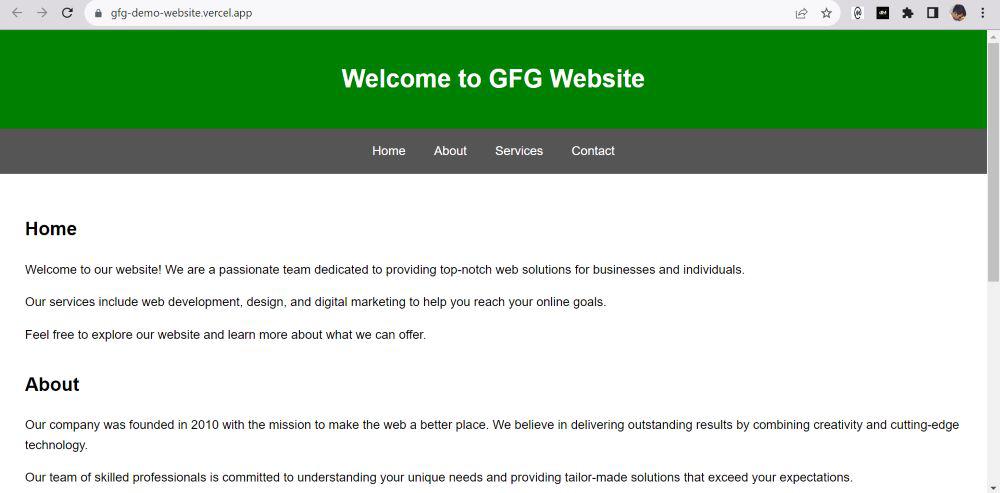
Output: Website view on localhost

Website View on localhost
Steps to host on Vercel:
Step 1: Now create a GitHub repository for this project. We now need to push the code for our website to this repository.

GitHub Repository
We have to push on the GitHub repository because we will connect our Vercel account with our GitHub account so that Vercel can fetch the website’s code without any problem. Through this, we can easily host our website on Vercel.
Step 2: Setup Vercel Account & Connect with GitHub:
Visit the Vercel website first, after which you will be prompted to sign up for Vercel. We advise you to sign up using GitHub. After successfully creating a Vercel account, log in there. After login, you will see an interface like this:
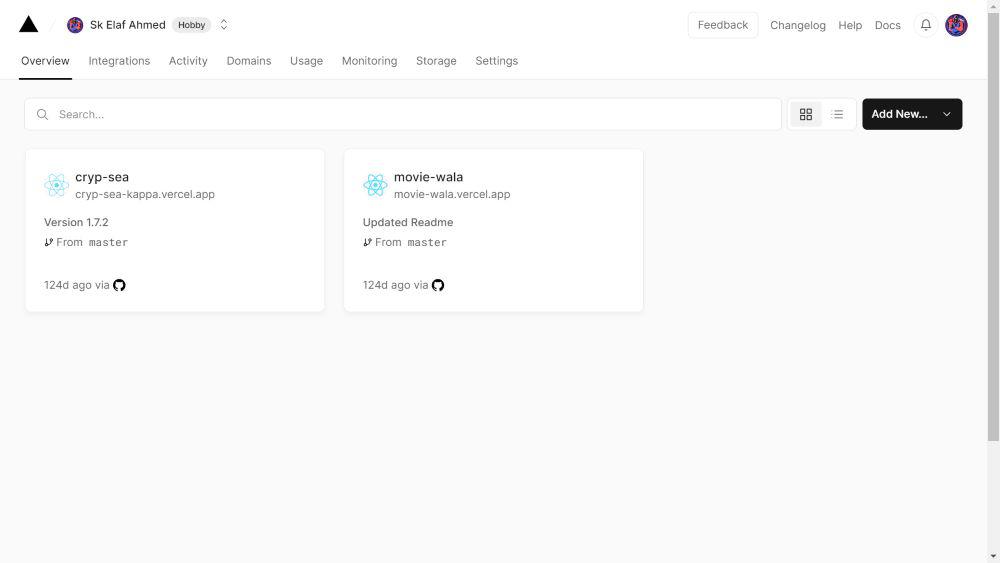
Vercel Dashboard
Step 3: So click on the options step by step “Add New” -> “Project“. It will open a new page where you will find your GitHub repositories, from where you can import your project’s code.
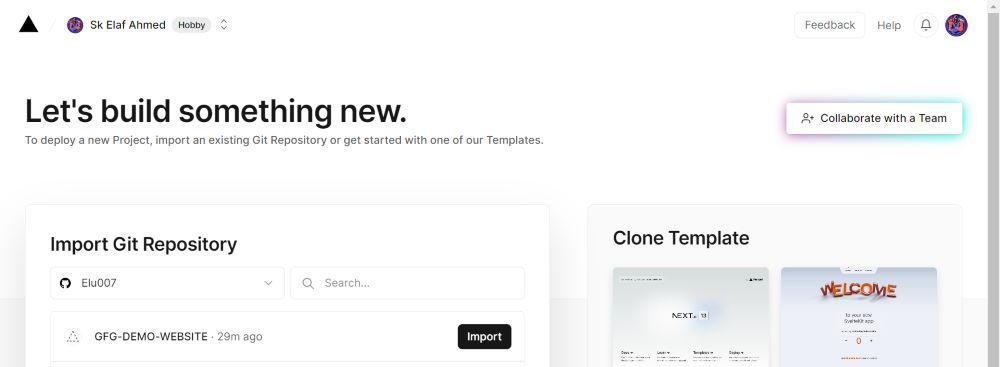
Import Project
Step 4: It will redirect you to the configure project page, where you can change the website’s name and change other settings as well. But in this case, we don’t need that so we simply click on the “Deploy” button to deploy our website.
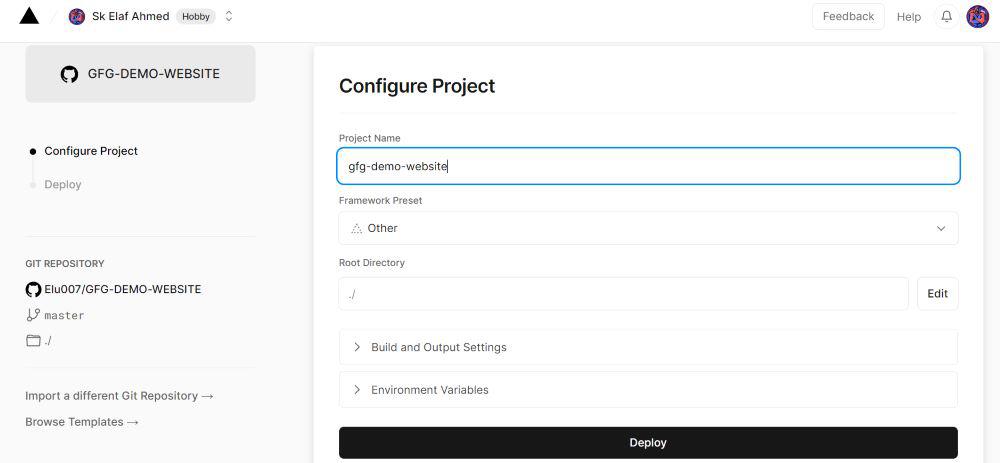
Deploy Project
You will be led to the website’s dashboard after a successful deployment, where you can find the link to the website. And you can share this URL. So that recruiters can quickly review your projects, you may just include this link in your resume.
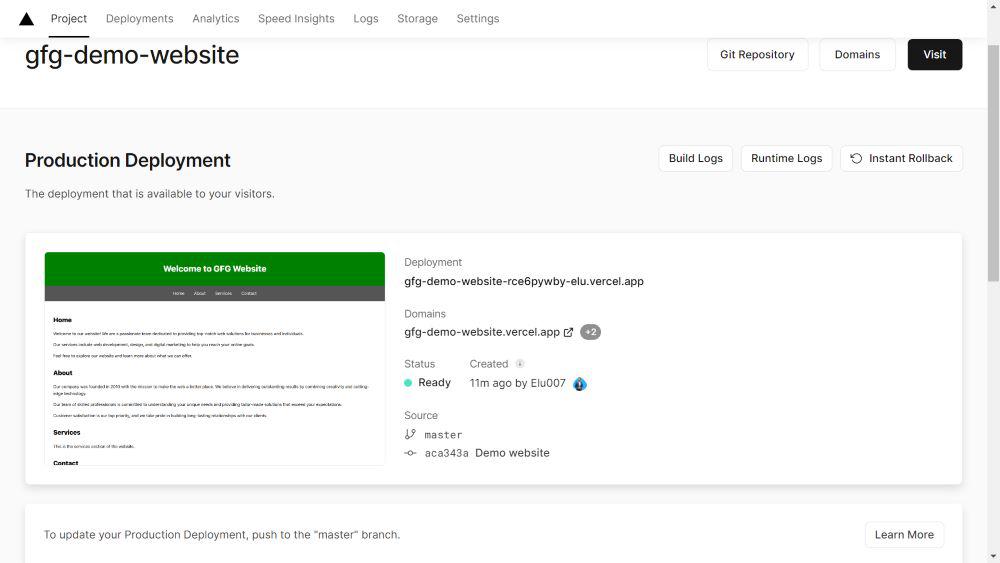
Dashboard after website hosted
Output: Here you can check the domain name, as it is hosted on Vercel.
Deployed Website
Share your thoughts in the comments
Please Login to comment...