How to create a Splash Screen using Tkinter?
Last Updated :
30 Nov, 2022
Python offers multiple options for developing a GUI (Graphical User Interface). Out of all the GUI methods, tkinter is the most commonly used method. It is a standard Python interface to the Tk GUI toolkit shipped with Python.
Prerequisite: Python GUI – tkinter
What is a Splash Screen?
A splash screen in tkinter is a tkinter window that disappears after a fixed period and then a particular operation takes place. To Create a splash screen we will use after() and destroy() method.
- The after() method assigns a time period (as an argument) after which a particular operation takes place, that operation is transformed into a function and is passed as an argument in after() method.
Syntax:
root.after(time in millisecond, function name)
- The destroy() method is used to close the current tkinter window.
Syntax:
root.destroy()
Below is a program that creates two normal Tkinter windows. The smaller window acts as a splash screen but it will not disappear.
Python3
from tkinter import *
splash_root = Tk()
splash_root.geometry("200x200")
splash_label = Label(splash_root, text="Splash Screen", font=18)
splash_label.pack()
def main():
root = Tk()
root.geometry("400x400")
main()
mainloop()
|
Output:

Main Window
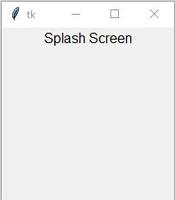
Splash Window
Code Explanation:
- The code starts by creating a splash_root object.
- The geometry attribute is set to 200×200, which means the splash screen will be 200 pixels wide and 200 pixels high.
- Next, a label is created and given the name splash_label.
- The font attribute is set to 18, which means the text will be 18 points bold.
- Finally, the pack() method is called on the label object to ensure that it is properly formatted and packed into memory for use by Tkinter.
- The main() function starts by creating a root object and setting its geometry attribute to 400×400.
- This size corresponds to the width of an ordinary window in most desktop environments (such as Windows or Mac OS).
- Next, the main function calls the mainloop() function, which begins executing automatically whenever Tkinter is started.
- When you run this code in your computer’s command line interface (CLI), you’ll see a simple black-and-white splash screen appear on your screen.
- To exit from this screen and return to your application’s normal windowing environment, press Control+C in Windows or Command+C in Mac OS X.
- The code creates a Splash Screen object and sets its geometry to be 200×200.
- Next, a Label object is created and given the name splash_label.
- The label is then packed into the Splash Screen object.
- Finally, the main() function is called which creates and displays the Splash Screen object on the screen.
Now we will use the below methods:
- destroy() Method
- after() Method
To create a splash screen in tkinter.
Below is a program that creates Splash screen in tkinter using after() and destroy() methods.
Python3
from tkinter import *
splash_root = Tk()
splash_root.geometry("200x200")
splash_label = Label(splash_root, text="Splash Screen", font=18)
splash_label.pack()
def main():
splash_root.destroy()
root = Tk()
root.geometry("400x400")
splash_root.after(3000, main)
mainloop()
|
Output:
Here a splash screen is created and it stays for a particular time period and then the next operation takes place i.e a new window is generated.
Code Explanation:
- The code starts by creating a splash_root object.
- The geometry of the splash_root object is set to be 200×200.
- Next, a label is created and given the name splash_label.
- The font for the label is set to 18 points.
- Finally, the pack() method is called on the label to make sure that it is properly formatted and ready to be displayed onscreen.
- The main() function starts by destroying the splash_root object.
- After that, tkinter is initialized and an interval of 3000 milliseconds (3 seconds) is set as the delay between each execution of the main() function.
- Finally, tkinter is executed again, this time with the after() method being used to execute it after 3 seconds have elapsed since the last execution of main().
- The code creates a splash screen in the form of a window.
- The window has a geometry of 200×200 pixels and is initially hidden.
- After 3000 milliseconds, the main() function is called, which destroys the splash screen and executes tkinter.
- Next, the size of the splash screen is adjusted to 400×400 pixels, and an interval timer is set to run every 3000 milliseconds.
- Finally, mainloop() is executed to keep everything running smoothly.
Share your thoughts in the comments
Please Login to comment...