How To Create a Delay Function in ReactJS ?
Last Updated :
04 Dec, 2023
Delay functions in programming allow for pausing code execution, giving developers precise control over timing. These functions are essential for tasks such as content display, animations, synchronization, and managing asynchronous operations. In this article, we will discuss how can we create a delay function in ReactJs.
Pre-requisites
Steps to Create a React Application
Step 1: Create a react application by using this command
npx create-react-app <<Project-Name>>
Step 2: After creating your project folder, use the following command to navigate to it:
cd <<Project-Name>>
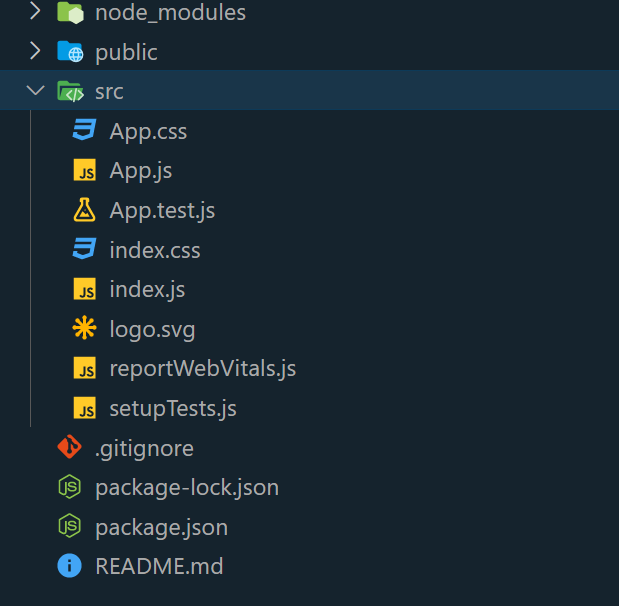
Project Structure:
Approach
- Using setTimeout method
- Using useEffect and async/await
Approach 1: Creating a Delay Function in ReactJs Using setTimeout Method
The setTimeout function can be employed to introduce a delay before executing a certain task. In this example, we’ll create a React component that initially displays a message. Upon clicking a button, another message will be revealed after waiting for one second.
Example: This example implements the above mentioned approach
Javascript
import React, { useState } from 'react';
import './style.css';
function App() {
const [showDelayedText, setShowDelayedText] =
useState(false);
const handleClick = () => {
setTimeout(() => {
setShowDelayedText(true);
}, 1000);
};
return (
<div className="container">
<h1 className="heading">
Geeksforgeeks
</h1>
<div className="content">
<p className="initialText">
This is the initial text.
</p>
<button className="button"
onClick={handleClick}>
Show Text
</button>
{showDelayedText && (
<p className="delayedText">
This text appears after a delay.
</p>
)}
</div>
</div>
);
}
export default App;
|
CSS
.container {
display: flex;
flex-direction: column;
align-items: center;
justify-content: center;
height: 100vh;
}
.heading {
font-size: 30px;
margin-bottom: 10px;
color: green;
}
.content {
margin-top: 10px;
display: flex;
flex-direction: column;
align-items: center;
gap: 20px;
}
.initialText {
font-size: 18px;
color: red;
}
.button {
padding: 15px;
font-size: 16px;
background-color: #007bff;
color: #fff;
border: none;
cursor: pointer;
border-radius: 8px;
}
.delayedText {
text-align: center;
font-size: 22px;
color: red;
}
|
Step to run the application: To open the application, use the Terminal and enter the command listed below.
npm start
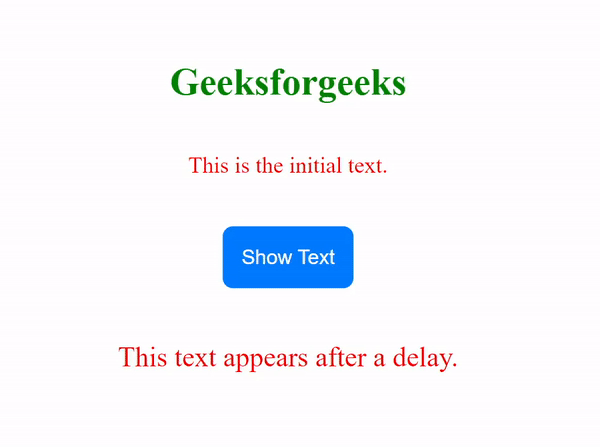
Output:
Approach 2: Creating a Delay Function in ReactJs Using useEffect and async/await
In this approach, a React component is created that initially displays a message. When a button is clicked, the component will pause for 2 seconds using the async/await syntax before revealing an additional message.
Example: This example implements the above mentioned approach
Javascript
import React, { useState } from 'react';
import './style.css';
function App() {
const [showDelayedText, setShowDelayedText] =
useState(false);
const delay = async (ms) => {
return new Promise((resolve) =>
setTimeout(resolve, ms));
};
const handleClick = async () => {
await delay(2000);
setShowDelayedText(true);
};
return (
<div className="container">
<h1 className="heading">
Geeksforgeeks
</h1>
<p className="initialText">
This is the initial text.
</p>
<button className="button"
onClick={handleClick}>
Show Delayed Text
</button>
{showDelayedText && (
<p className="delayedText">
This text appears after a
delay using async/await.
</p>
)}
</div>
);
}
export default App;
|
CSS
.container {
text-align: center;
margin-top: 100px;
}
.initialText {
font-size: 18px;
margin-bottom: 20px;
}
.heading {
font-size: 30px;
margin-bottom: 10px;
color: green;
}
.button {
padding: 10px 20px;
font-size: 16px;
background-color: #007bff;
color: #fff;
border: none;
cursor: pointer;
border-radius: 8px;
}
.delayedText {
font-size: 22px;
color: green;
margin-top: 20px;
}
|
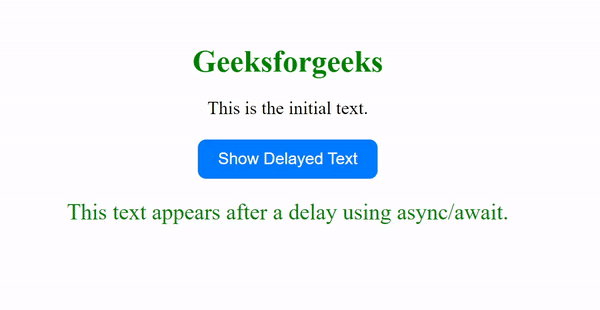
Output:
Share your thoughts in the comments
Please Login to comment...