Microsoft PowerPoint is a presentation of topics that allows us to create “presentation slides” that can be displayed on the computer screen or on a widescreen. A PowerPoint presentation is a good way to convey information to a large audience. It helps in creating a topic in a proper manner by providing various features like editing, graphical animations, and many more. A user does not have to carry around any slides or slide projector, and, if necessary, can make any last-minute changes to the presentation.
Features of MS PowerPoint
- Slide Design
- Animations
- Insert Icons and 3D models
- Video Recording
- Slide Layout
- Slide Transitions
- Slide Show
- Visual effects
- Inserting Shapes
- Inserting an Image, videos, pictures, audios, etc.
- Inserting Media
- Draw or write with digital ink
- Zoom
- Surface Pen Slide Navigation for PowerPoint
Why Convert PNG Images to JPG Images?
Microsoft PowerPoint has a special feature to convert PNG image files into JPG files or vice-versa. Basically, PNG images file are often larger in size than the JPG file. MS PowerPoint makes it easy to convert the image file format according to our requirements.
The main reason behind converting PNG images into the JPG format in PowerPoint is to reduce the file size of the presentation. You can also compress the PNG images inside of PowerPoint.
As you see in the figure that the image file is in PNG format.
Now we are going to convert it into JPG format.
How to check the Image file Format?
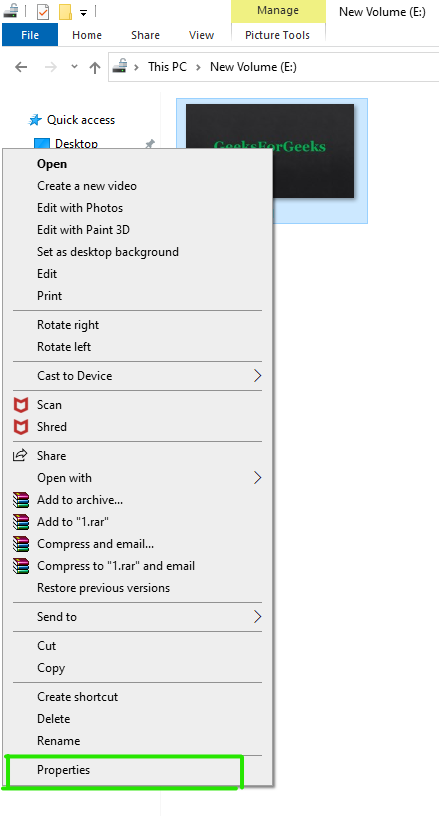
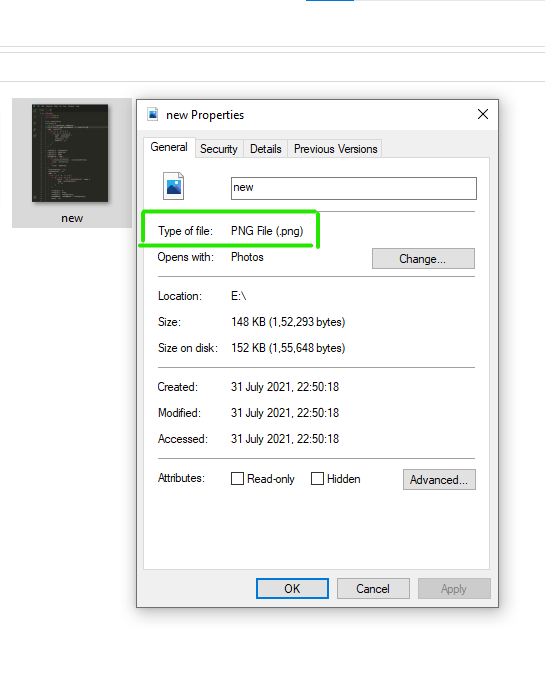
Step 1: Click on the image file and then right-click on it.
Step 2: Select the properties option from the menu as shown in the figure:
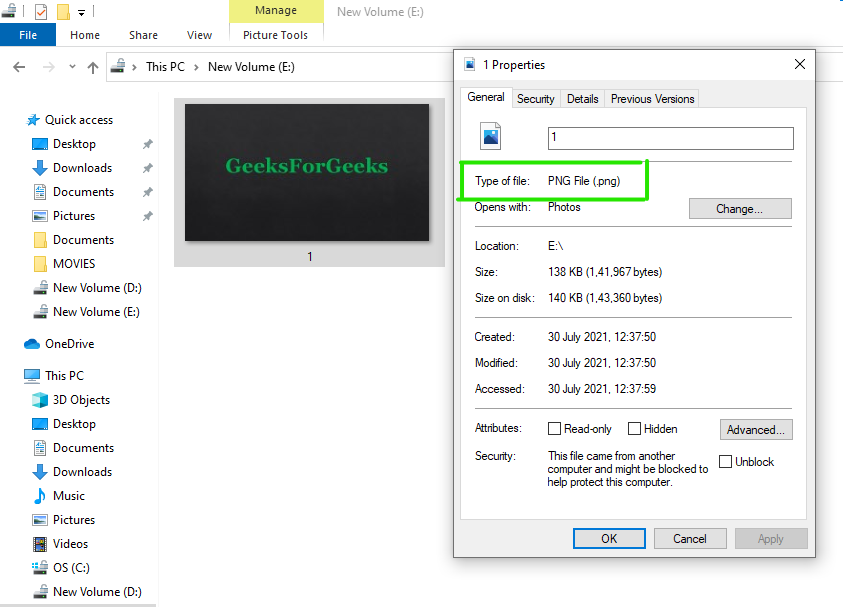
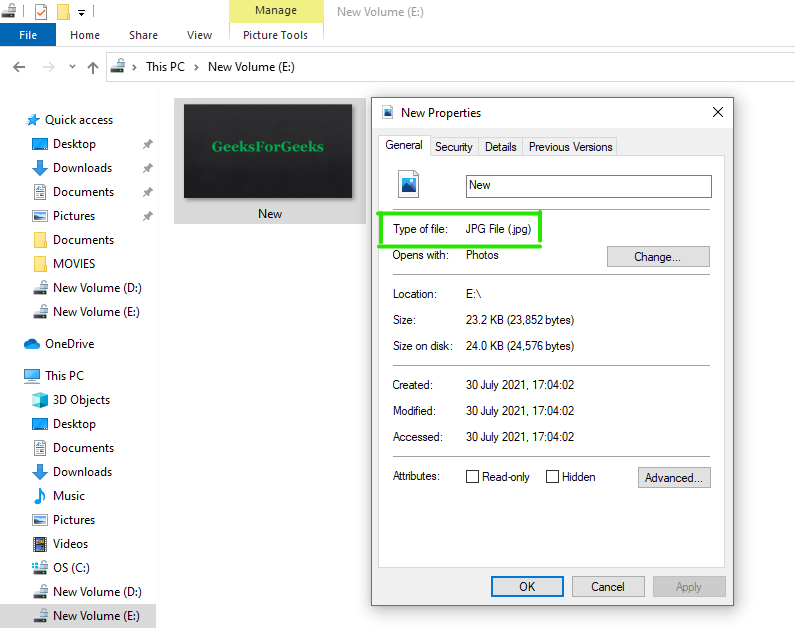
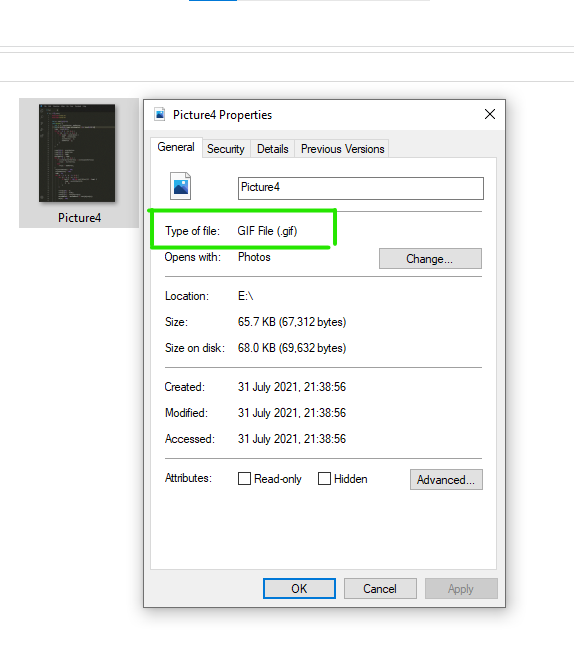
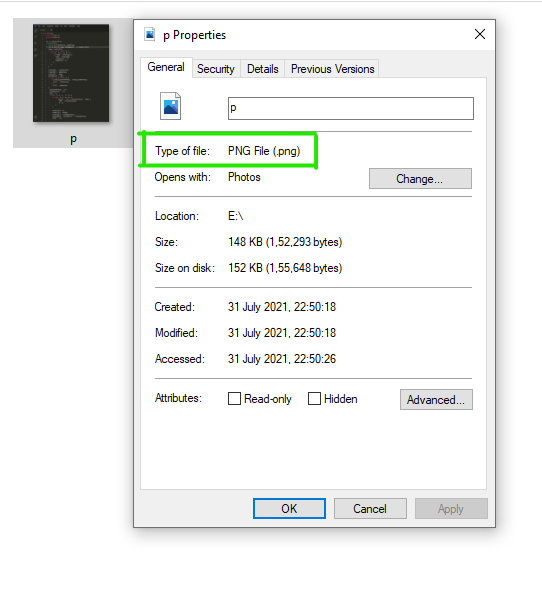
Step 3: A Properties menu dialog box will be open where you can check the format of the image file.
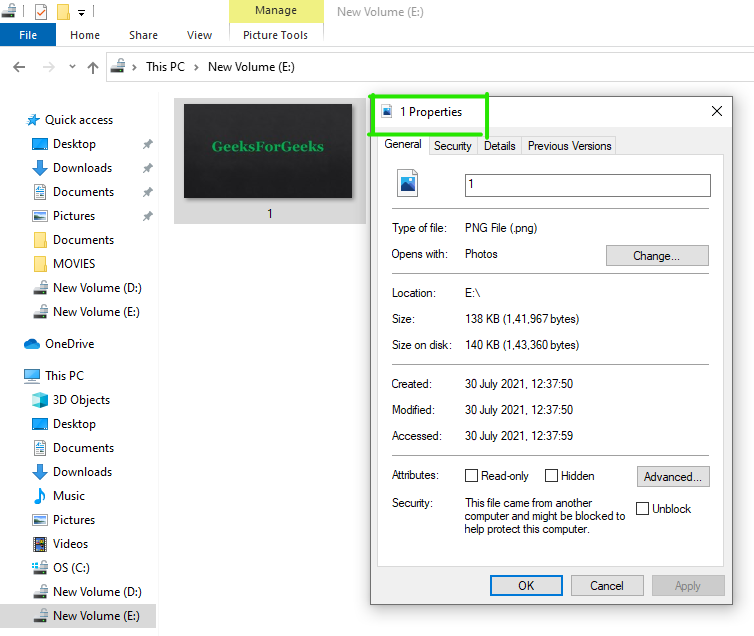
Step 4: Now check the file format of the image as shown in the figure:
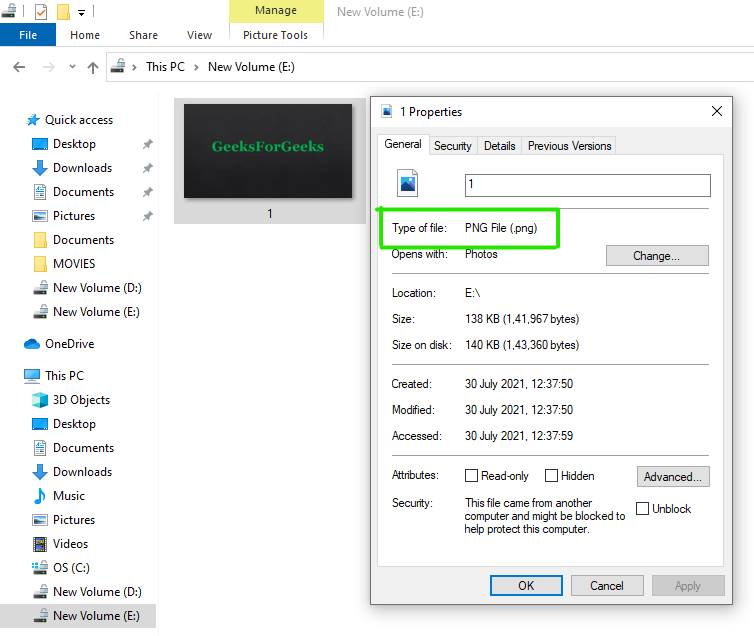
As you see in the figure that the image file is saved in PNG format.
Steps to Convert PNG Image to JPG Image
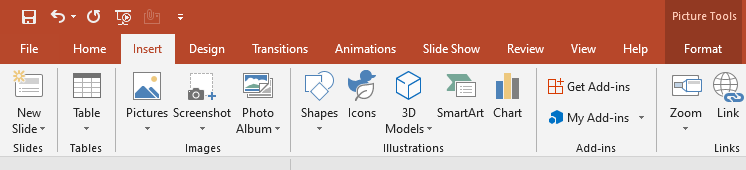
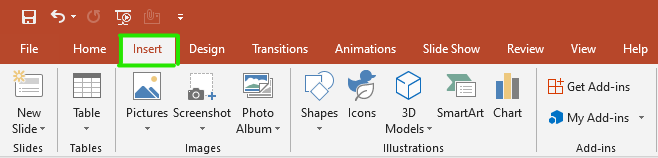
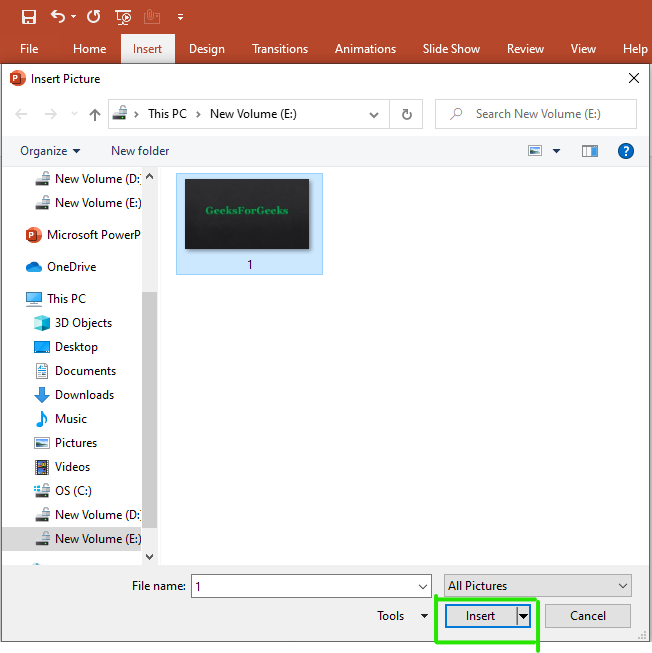
Step 1: On the navigation menu bar click on the Insert option.
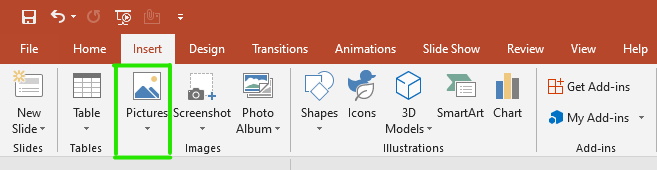
Step 2: Next click on the drop-down arrow button of the Picture option as shown in the figure:
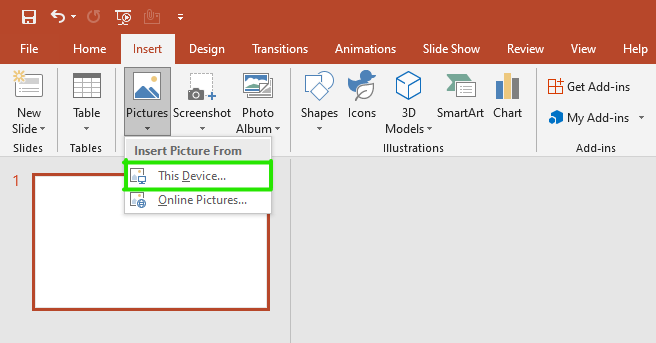
Step 3: Select This Device option from the menu.
Step 4: Select the drive from the left panel menu where you have saved your image file.

Step 5: Now select the image file of your choice which you want to convert in JPG format.
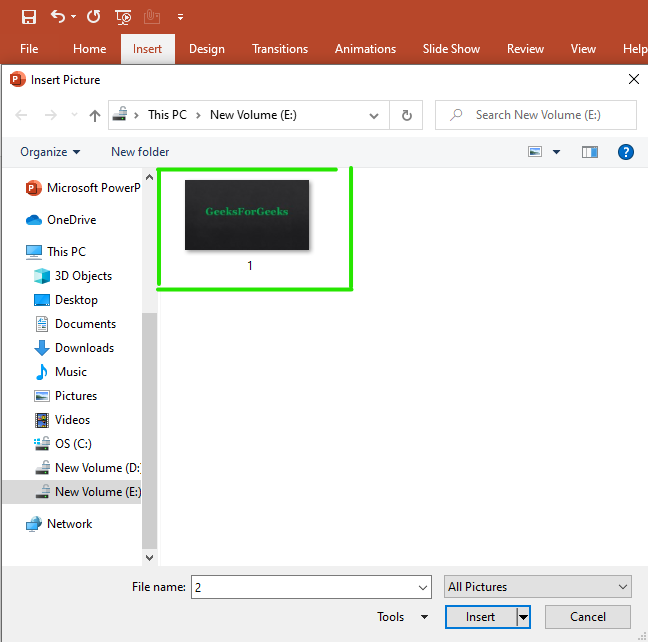
Step 6: Then click on the insert option as shown in the figure:
Finally, the image is inserted in the document as shown in the figure:

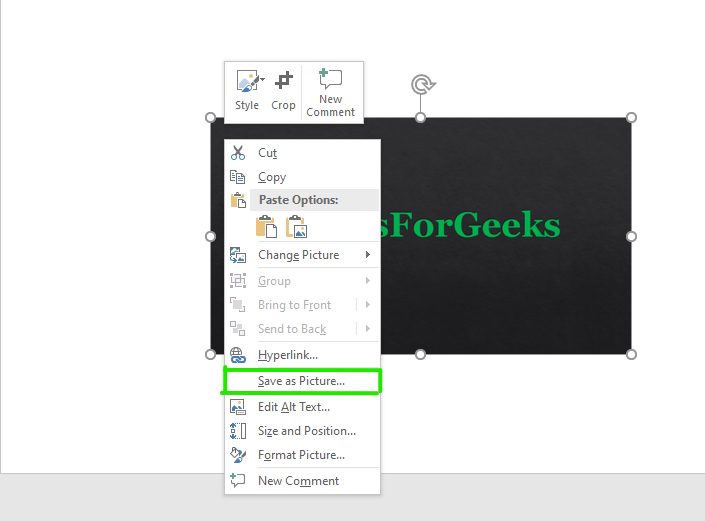
Step 7: Next Right-click on the image file and then a menu will pop up on the front of the screen.
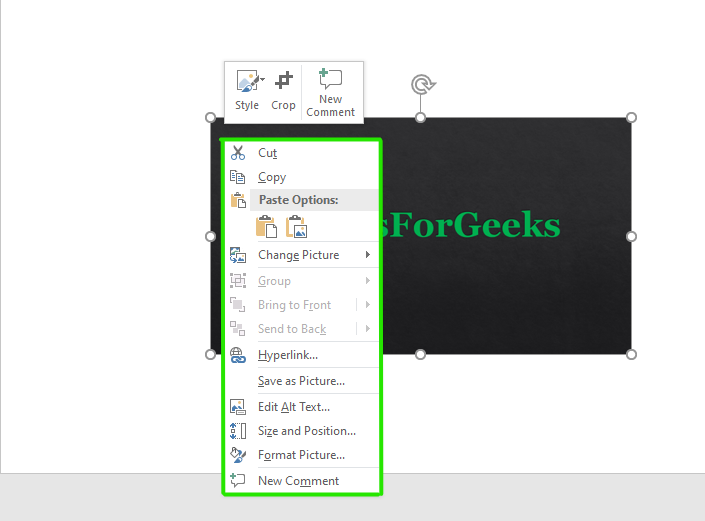
Step 8: Select the Save As Picture option from the menu as shown in the figure:
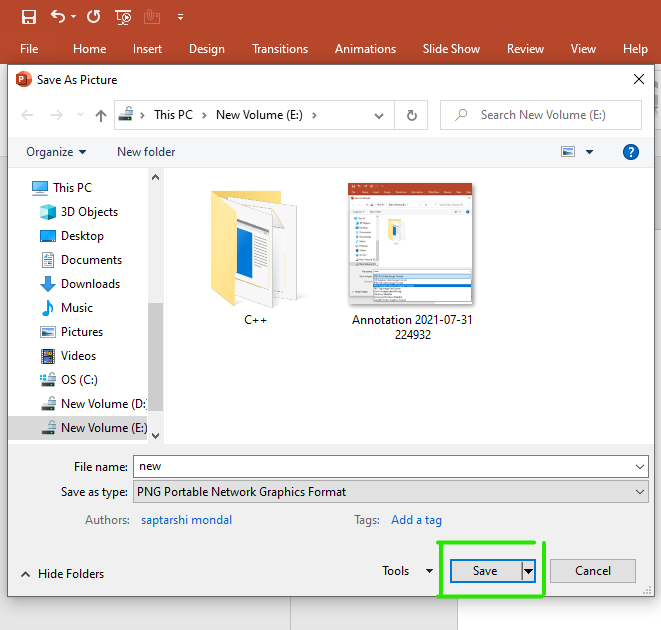
Step 9: Next select the drive from the left panel where you want to save the new image file.
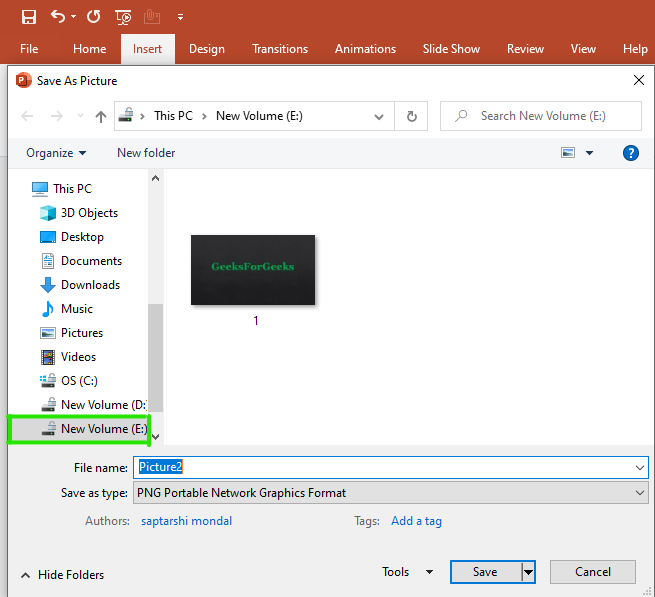
Step 10: Enter the File name in the box.

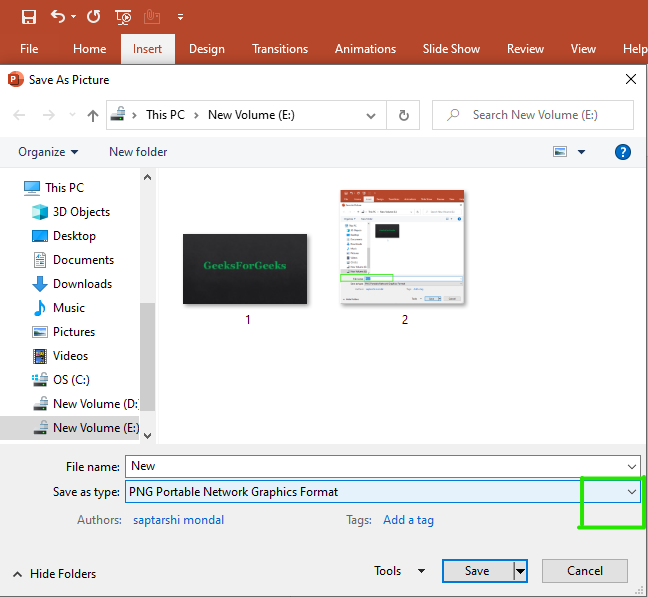
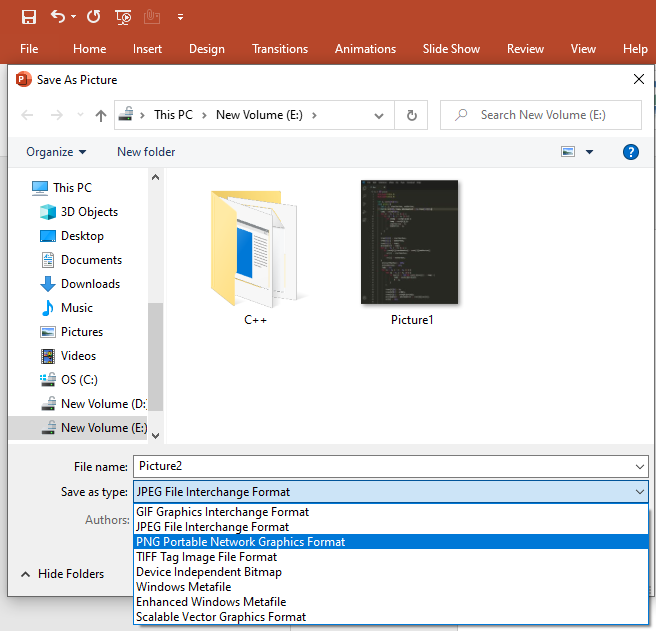
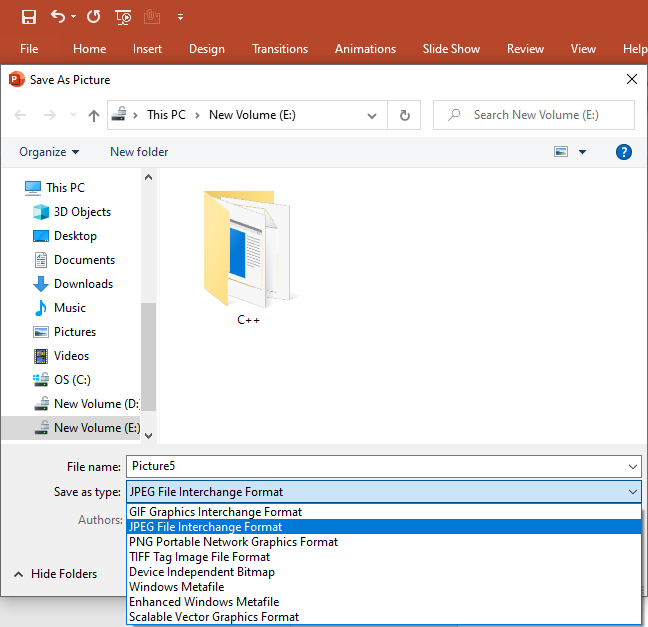
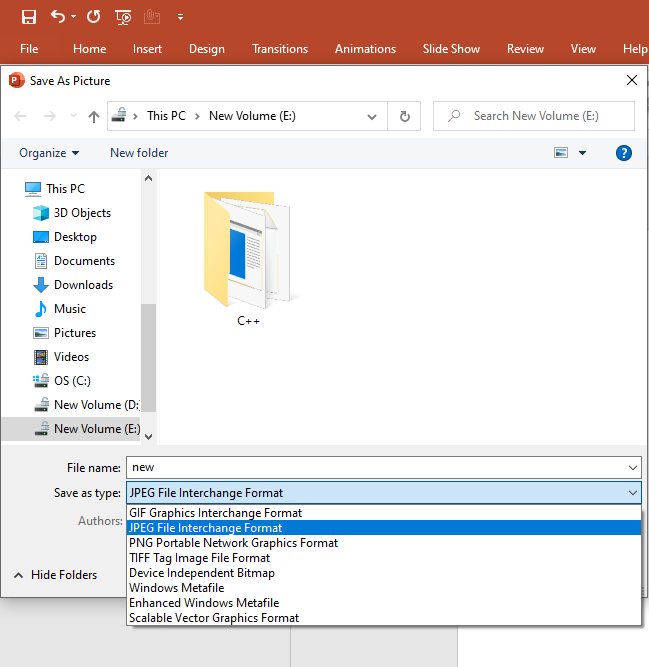
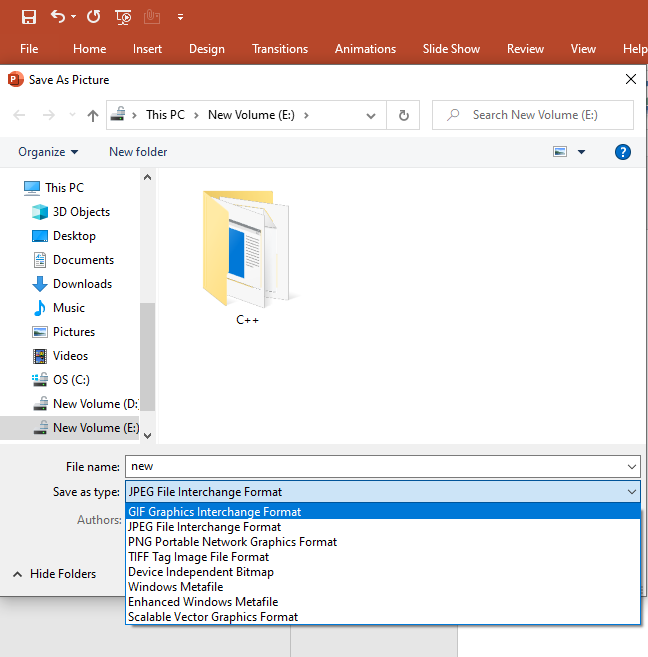
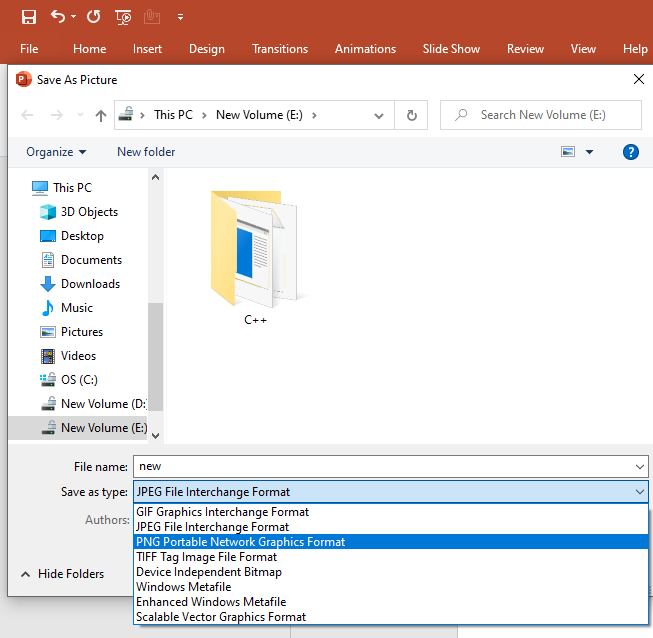
Step 11: Next click on the drop down arrow button to choose the image file format type as shown in the figure:
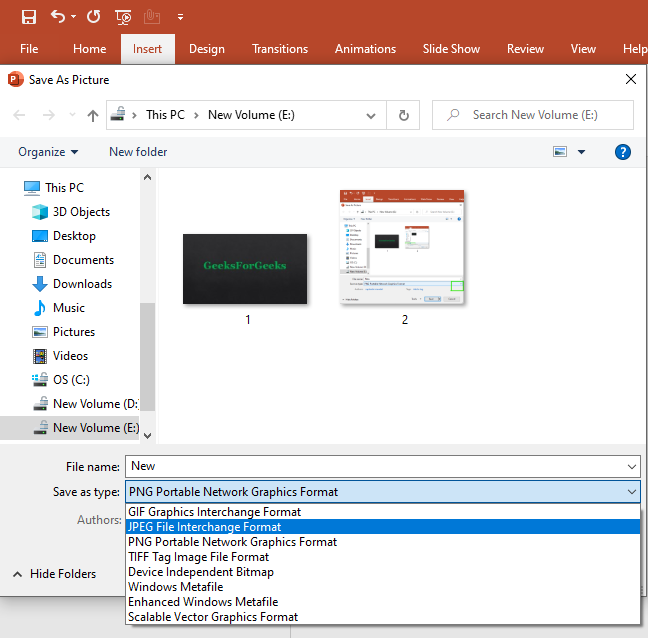
Step 12: Select the JPEF file format from the menu.
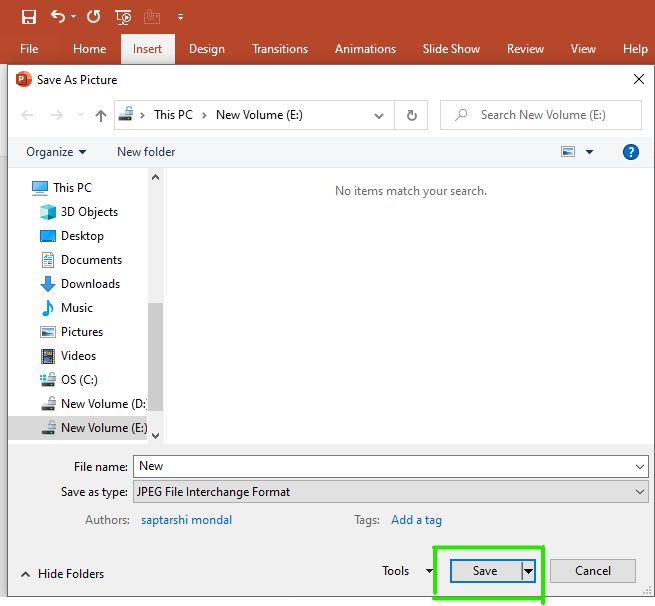
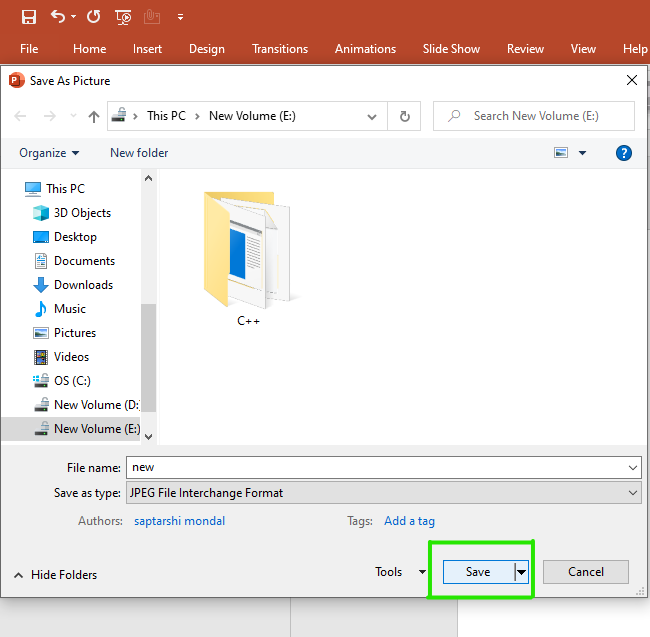
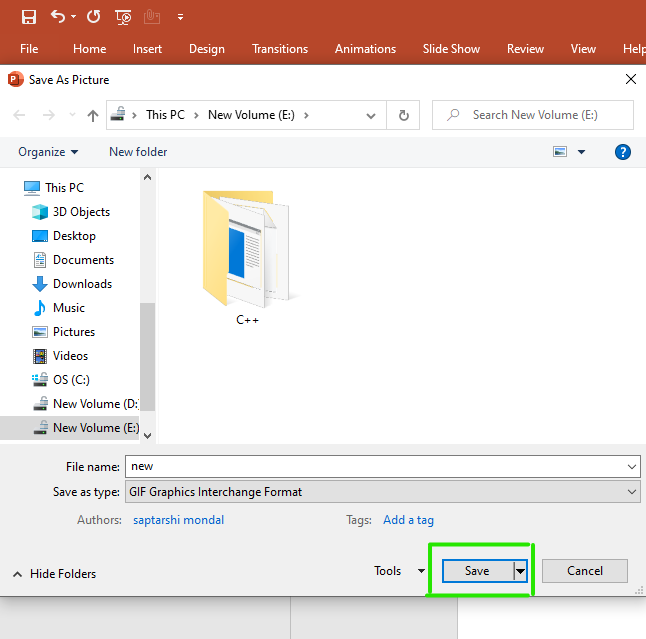
Step 13: Next click on the Save option.
Finally, your image is converted into a JPG file as shown in the figure:
With the help of the above-given steps, we can easily convert images of various different formats into other formats. Following are some of the similar conversions of the various image formats:
Steps to Convert JPG Image to PNG Image
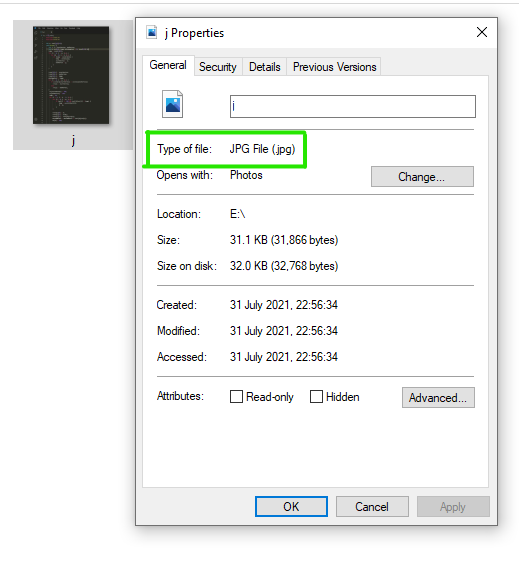
As you see in the figure that the image file is saved in JPG format.
Repeat the above-given steps from Step 1 to Step 11.
Step 12: Now select the PNG file format from the menu.
Step 13: Next click on the Save option.

Finally, your image is converted into a PNG file as shown in the figure:

Steps to Convert JPG Images to GIF
As you see in the figure that the image file is saved in JPG format.
Repeat the above-given steps from Step 1 to Step 11.
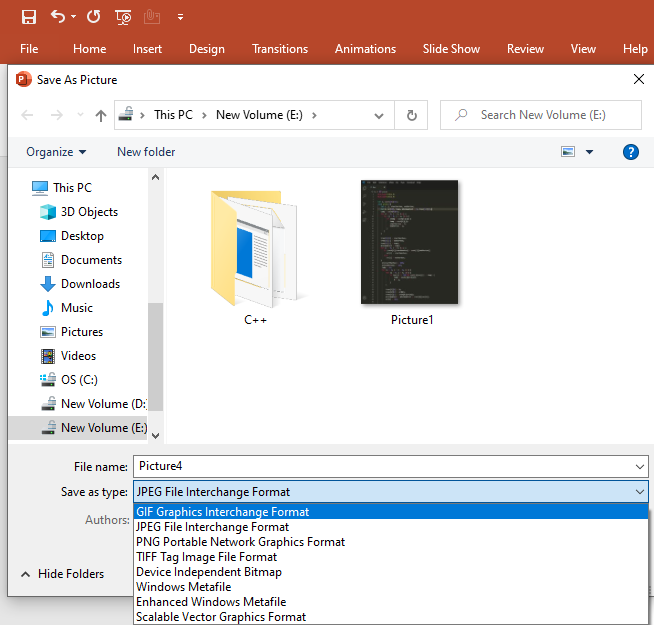
Step 12: Now select the GIF file format from the menu.
Step 13: Next click on the Save option.
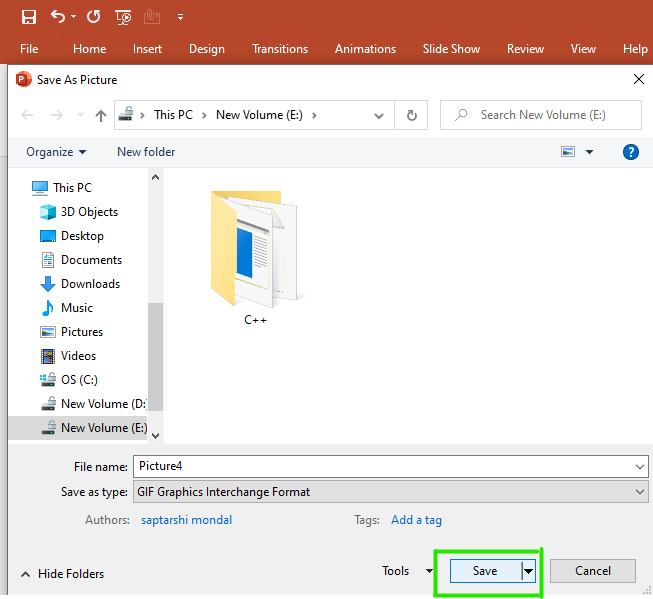
Finally, your image is converted into a GIF file as shown in the figure:
Steps to Convert GIF to JPG Images
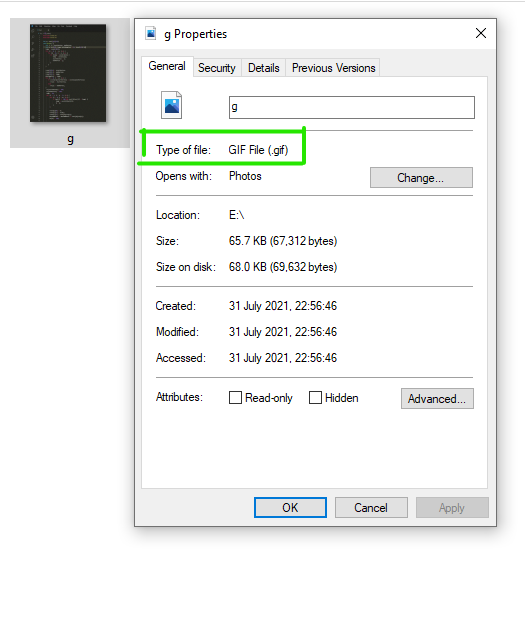
As you see in the figure that the image file is saved in GIF format.
Repeat the above-given steps from Step 1 to Step 11
Step 12: Now select the JPG file format from the menu.
Step 13: Next click on the Save option.

Finally, your image is converted into a JPG file as shown in the figure:
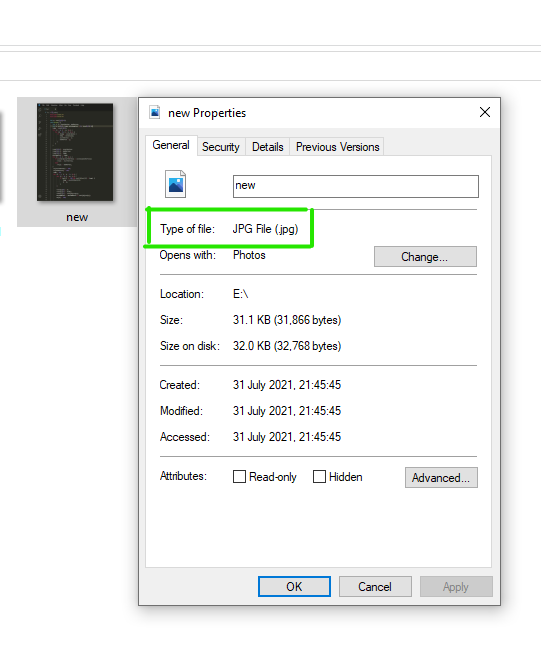
Steps to Convert JPG Images to TIF Images
As you see in the figure that the image file is saved in JPG format.
Repeat the above-given steps from Step 1 to Step 11
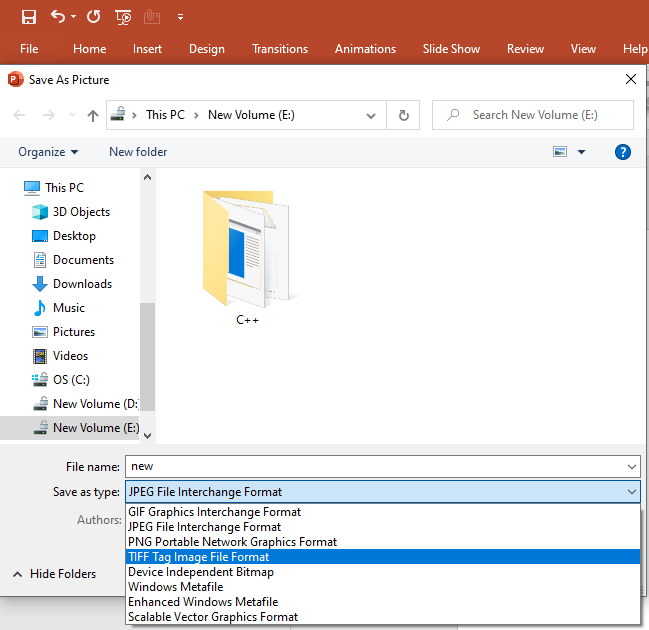
Step 12: Now select the TIF format from the menu.
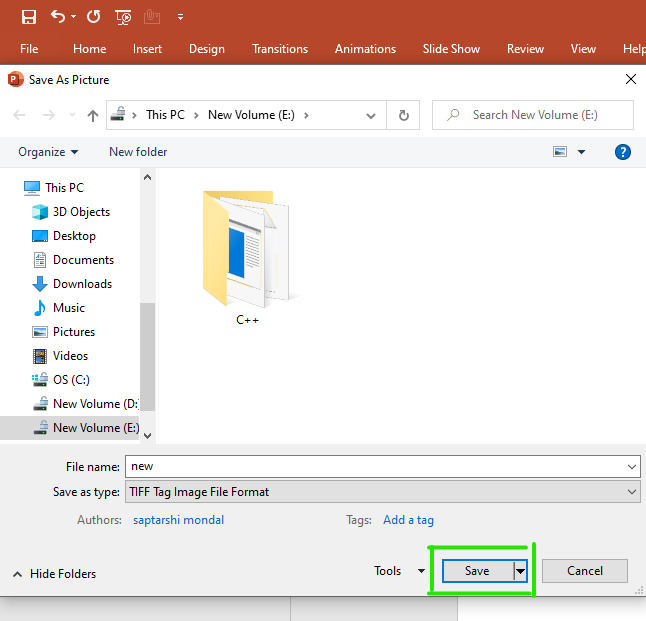
Step 13: Next click on the Save option.
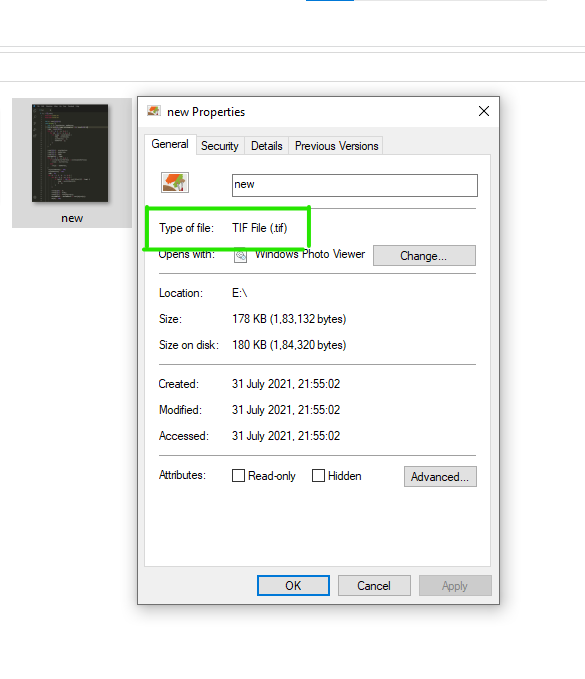
Finally, your image is converted into a TIF file as shown in the figure:
Steps to Convert TIF Image to JPG Image
As you see in the figure that the image file is saved in TIF format.
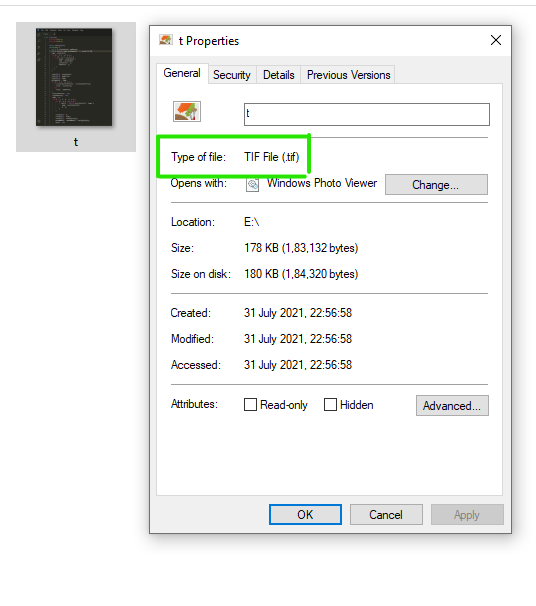
Repeat the above-given steps from Step 1 to Step 11
Step 12: Now select the JPG file format from the menu.
Step 13: Next click on the Save option.
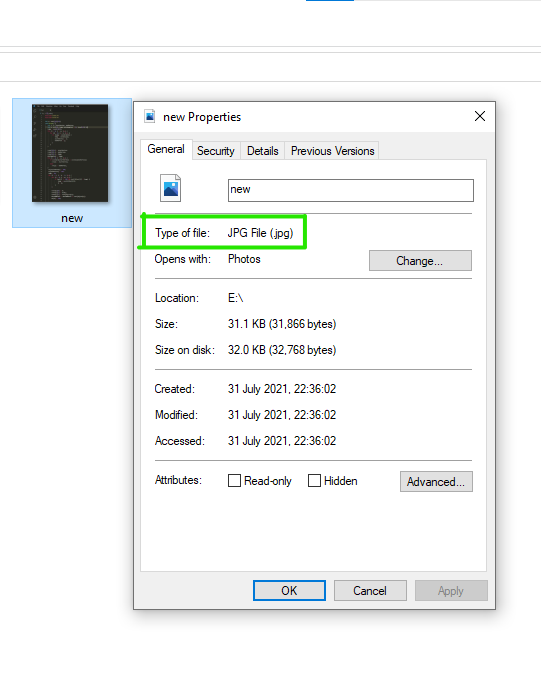
Finally, your image is converted into a JPG file as shown in the figure:
Steps to Convert PNG Image to GIF
As you see in the figure that the image file is saved in PNG format.
Repeat the above-given steps from Step 1 to Step 11
Step 12: Now select the GIF file format from the menu.
Step 13: Next click on the Save option.
Finally, your image is converted into a GIF file as shown in the figure:

Steps to Convert GIF to PNG Image
As you see in the figure that the image file is saved in GIF format.
Repeat the above-given steps from Step 1 to Step 11
Step 12: Now select the PNG file format from the menu.
Step 13: Next click on the Save option.
Finally, your image is converted into a PNG file as shown in the figure:
These are some of the conversions of Image formats using MS Powerpoint.
Share your thoughts in the comments
Please Login to comment...