How do you handle real-time updates in Redux applications?
Last Updated :
24 Apr, 2024
Handling real-time updates is essential for modern web applications to provide users with dynamic and interactive experiences. In Redux applications, managing real-time updates efficiently involves implementing strategies to synchronize the application state with changes occurring on the server in real time. In this article, we’ll explore various techniques and best practices for handling real-time updates in Redux applications.
Prerequisites:
Approach
- First set up a WebSocket server using Node.js and the
ws library to establish a bidirectional communication channel between the client and server. - Develop a React component to render the todo list, handle user interactions (add, toggle, delete todos), and subscribe to WebSocket events for real-time updates.
- Now define action types (
ADD_TODO, TOGGLE_TODO, DELETE_TODO) and action creators (addTodo, toggleTodo, deleteTodo) in separate files to handle various todo operations. - Create a Redux reducer (
todoReducer.js) to manage the application state, including the todos array. - Integrate WebSocket functionality into the React component using
useEffect hook to establish a connection when the component mounts, handle incoming messages, and dispatch corresponding actions to update the Redux store. - Configure the Redux store in
index.js by creating the store with the todo reducer and wrapping the root component with Provider from react-redux to provide access to the store throughout the component tree.
Steps to Setup the Backend
Step 1: Create a new directory for your project and navigate into it in your terminal.
mkdir server
cd server
Step 2: Run the following command to initialize a new Node.js project.
npm init -y
Step 3: Install the necessary packages/libraries in your project using the following commands.
npm install ws
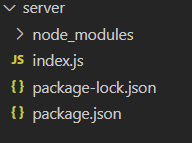
Project Structure:
The updated dependencies in package.json file will look like:
"dependencies": {
    "ws": "^8.16.0"
  }
Example: Implementation to setup the backend for the above application.
JavaScript
// index.js

const WebSocket = require('ws');

const wss = new WebSocket.Server({ port: 8080 });

wss.on('connection', (ws) => {
    console.log('Client connected');

    ws.on('message', (message) => {
        console.log('Received: %s', message);

        // Echo the message back to the client
        ws.send(message);
    });

    ws.on('close', () => {
        console.log('Client disconnected');
    });
});
Output: Run the server with the following command in the terminal
node index.js
Steps to Setup the Frontend
Step 1: Create a reactJS application by using this command
npx create-react-app client
Step 2: Navigate to project directory
cd client
Step 3: Install the necessary packages/libraries in your project using the following commands.
npm install react-redux redux redux-thunk
Project Structure:

The updated dependencies in package.json file will look like:
"dependencies": {
    "@testing-library/jest-dom": "^5.17.0",
    "@testing-library/react": "^13.4.0",
    "@testing-library/user-event": "^13.5.0",
    "react": "^18.2.0",
    "react-dom": "^18.2.0",
    "react-redux": "^9.1.0",
    "react-scripts": "5.0.1",
    "redux": "^5.0.1",
    "redux-thunk": "^3.1.0",
    "web-vitals": "^2.1.4"
  },
Example: Implementation to setup the frontend for the above application.
CSS
/* src/App.css */
.App {
    text-align: center;
    margin-top: 20px;
  }

  ul {
    list-style-type: none;
    padding: 0;
  }

  li {
    margin: 10px;
  }

  button {
    margin-left: 5px;
  }
// App.js

import React, { useEffect } from 'react';
import {
    useDispatch,
    useSelector
} from 'react-redux';
import {
    addTodo,
    toggleTodo,
    deleteTodo
} from '../actions/todoActions';
import './App.css';

const App = () => {
    const dispatch = useDispatch();
    const todos = useSelector(state => state.todos);

    useEffect(() => {
        const socket = new WebSocket('ws://localhost:8080');

        socket.onopen =
            () => console.log('WebSocket connection established.');

        socket.onmessage = (event) => {
            const data = JSON.parse(event.data);
            switch (data.type) {
                case 'ADD_TODO':
                    dispatch(addTodo(data.todo));
                    break;
                case 'TOGGLE_TODO':
                    dispatch(toggleTodo(data.id));
                    break;
                case 'DELETE_TODO':
                    dispatch(deleteTodo(data.id));
                    break;
                default:
                    console.log('Unknown WebSocket message type:', data.type);
            }
        };

        return () => {
            socket.close();
        };
    }, [dispatch]);

    const handleAddTodo = () => {
        const text = prompt('Enter new todo:');
        if (text) {
            dispatch(addTodo({
                id: Date.now(),
                text,
                completed: false
            }));
        }
    };

    const handleToggleTodo = (id) => {
        dispatch(toggleTodo(id));
    };

    const handleDeleteTodo = (id) => {
        dispatch(deleteTodo(id));
    };

    return (
        <div className="App">
            <h1>Todo List</h1>
            <button onClick={handleAddTodo}>
                Add Todo
            </button>
            <ul>
                {todos.map(todo => (
                    <li key={todo.id}>
                        <input
                            type="checkbox"
                            checked={todo.completed}
                            onChange={
                                () => handleToggleTodo(todo.id)} />
                        <span style=
                            {{
                                textDecoration: todo.completed ?
                                    'line-through' : 'none'
                            }}>
                            {todo.text}
                        </span>
                        <button onClick={
                            () => handleDeleteTodo(todo.id)}>
                            Delete
                        </button>
                    </li>
                ))}
            </ul>
        </div>
    );
};

export default App;
// src/actions/todoActions.js

export const ADD_TODO = 'ADD_TODO';
export const TOGGLE_TODO = 'TOGGLE_TODO';
export const DELETE_TODO = 'DELETE_TODO';

export const addTodo = (todo) => ({
    type: ADD_TODO,
    payload: todo,
});

export const toggleTodo = (id) => ({
    type: TOGGLE_TODO,
    payload: id,
});

export const deleteTodo = (id) => ({
    type: DELETE_TODO,
    payload: id,
});
// src/index.js

import React from 'react';
import ReactDOM from 'react-dom';
import { Provider } from 'react-redux';
import { createStore } from 'redux';
import todoReducer from './reducers/todoReducer';
import App from './components/App';

const store = createStore(todoReducer);

ReactDOM.render(
    <Provider store={store}>
        <App />
    </Provider>,
    document.getElementById('root')
);
// src/reducers/todoReducer.js

import {
    ADD_TODO,
    TOGGLE_TODO,
    DELETE_TODO
} from '../actions/todoActions';

const initialState = {
    todos: [],
};

const todoReducer = (state = initialState, action) => {
    switch (action.type) {
        case ADD_TODO:
            return {
                ...state,
                todos: [...state.todos, action.payload],
            };
        case TOGGLE_TODO:
            return {
                ...state,
                todos: state.todos.map(todo =>
                    todo.id === action.payload ?
                        { ...todo, completed: !todo.completed } : todo
                ),
            };
        case DELETE_TODO:
            return {
                ...state,
                todos: state.todos.filter(
                    todo => todo.id !== action.payload),
            };
        default:
            return state;
    }
};

export default todoReducer;
Step to Run Application: Run the application using the following command from the root directory of the project
npm start
Output: Your project will be shown in the URL http://localhost:3000/

Share your thoughts in the comments
Please Login to comment...