Export SQLite Database To a CSV File
Last Updated :
25 Jan, 2024
SQLite is an embedded database that doesn’t use a database like Oracle in the background to operate. It is written in C language and is used by developers who embed a lightweight database over the existing application, browser, or embedded systems. The main features of SQLite are that it is a tiny, quick, self-contained, reliable, full-featured SQL database engine.
Exporting a SQLite file into a Comma Separated Value (CSV) format can become very useful when it comes to data sharing and data storage. The CSV format is widely used, lightweight, and simple to understand and manipulate. Another benefit of using a CSV file is that it can store Tabular Data. CSV is also platform-independent and easily importable to other database systems or other data-related tools. Exporting an SQLite file into a CSV file can also be used in case of Data Backup, Data Migration, and Data Analysis.
In this article, we will explore the different ways to export an SQLite file into a CSV file format, using the SQLite Command-Line and the SQLiteStudio tool.
Export SQLite Database to a CSV File Using the SQLite3 Tool
Step 1: Open the Database and Set the Mode
Using the SQLite command line tool, we will export the output into a CSV file. For that, we need to follow some specific steps. For this tutorial, an already created and populated Table called Students will be used.
Firstly, we need to open the Database using the open dot-command. Then we need to set the mode into Column and CSV to structure our output better. Write and execute the below commands
Query:
.mode column
.mode csv
Step 2: Create CSV File
After that, we need to manually create a file in the destination/directory of our choice and create a CSV file there. Then we need to use the output dot command, followed by the entire path of the CSV file. Write and execute the below command.
Query:
.output student_details.csv
Here, only the name and the extension of the file has been provided because the Database and the file resides in same directory. This will not be the case everytime, if the file and the database doesn’t reside in the same directory, then the entire path of that file has to be passed.
After executing this command, every SQLite command we will run, the output will not be displayed on the Command Line, rather it will be stored in the mentioned CSV file.
Step 3: Run Statements and Output to CSV
Now we will run some simple statements using SELECT and WHERE statements and see their outputs getting stored in the mentioned CSV file. Write and Execute the below commands.
Query:
SELECT * FROM students;
SELECT * FROM students where class > 8;
Output

Explanation: As we can see in the output, nothing has been printed in the SQLite command Line. The outputs of both the commands has been stored in the CSV file mentioned earlier.
Contents of student_details.csv
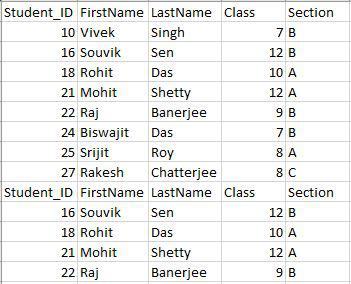
Explanation: As we can see here, the outputs of those SQlite commands have been successfully stored into the CSV file mentioned,
Step 4: Quit Operation
When we are done, means when we don’t want to store the outputs of the statements into the CSV file anymore. We need to execute another dot-command called .quit. This is to mark the end of the Exporting operation.
Query:
.quit
Export SQLite Database to a CSV File Using SQliteStudio
In this section we will see, how we can export an SQLite database into a CSV file using SQLite Studio. For that, the user need to download and install the SQLite Studio software in their device.
After installation Open the application and follow the below steps –
Step 1: Open and Connect Database
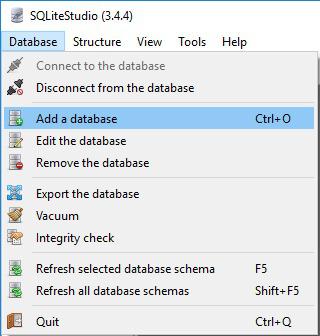
Firstly, open and connect the Database into SQLite Studio. Click on the Databases tab and select Add Database.
After clicking it, the following dialogue box opens.

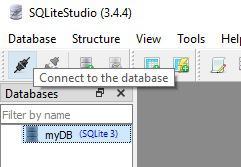
From here, select the SQLite Database File and click OK. Then select the Database which was added and click on the Connect button from the task bar.
After clicking connect, all the tables and peripherals like indexes and views will be displayed below the Database name at the left of the screen. Now we are ready to import it.
Step 2: Export Using SQLiteStudio
Click on Tools and select Export.

After clicking Export, the following dialogue box will appear:

Here we have to choose what we want to export. For example, we are clicking Database for this example. Select Database Radio Button and click Next. The below dialogue box appears.
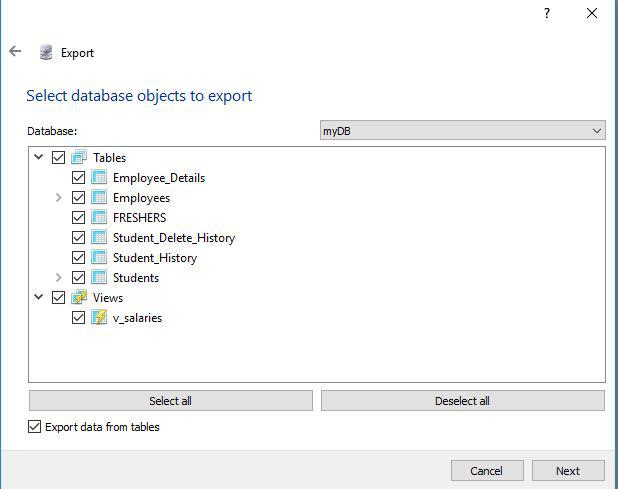
Here we have to choose what Database objects that we want to export, this objects include both tables and it’s peripherals like Index and Views. Select only those which the user want to export. For this example, we are only choosing the Employee_Details and Student_History tables.
Conclusion
Exporting a database or a part of database becomes very much useful when the database records are needed to be shared or stored as a backup. Comma Separated Values or CSV is a very well-known and lightweight format, which is understandable and supported by most of the databases and other programs available. SQLite itself can import and manipulate CSV files with ease, this is why it is very much useful for both the reason. In this article, we saw and discussed about the quickest and best approach to export an SQLite database into a CSV file and also saw how the CSV file gets updated with the execution of every single command.
Share your thoughts in the comments
Please Login to comment...