Python has become an essential tool for developers, data scientists, and system administrators due to its versatility and robust libraries. To manage Python packages, the ‘pip’ tool is widely used. However, if you’ve encountered the frustrating “pip command not found” error in your Linux system, it can be a roadblock to your workflow. Fortunately, this error can be fixed with a few straightforward steps.
Understanding the “pip command not found” Error

Error: command not found pip
When you receive the “pip command not found” error in Linux, it means that your system cannot locate the ‘pip’ command. This can happen for a variety of reasons, such as missing dependencies, incorrect installation, or issues with your system’s PATH variable. Resolving this issue is crucial for managing Python packages efficiently.
Let’s explore some common solutions to fix the “pip command not found” error in Linux.
1. Verify that pip is installed
To check if pip is installed on Linux, run the following command in a terminal:
Syntax:
python3 -m pip --version

If pip is installed, you will see a version number. If you do not see a version number, then pip is not installed.
Explanation:
- python3 is the command to start the Python 3 interpreter.
- -m tells Python to run the specified module as a script.
- pip is the name of the module that installs Python packages.
- –version tells pip to print its version number.
If pip is installed, you will see a version number. If you do not see a version number, then pip is not installed.
2. Try pip3 instead of pip
In some Linux distributions, Python 3 is the default Python version. If you’ll type python in your terminal it may give error as nowadays most distributions are shipped with python3 by default.

python3 is installed instead of ‘python’
If that’s the case, try using ‘pip3’ instead of ‘pip’ to manage Python packages.
pip3 install <package name>
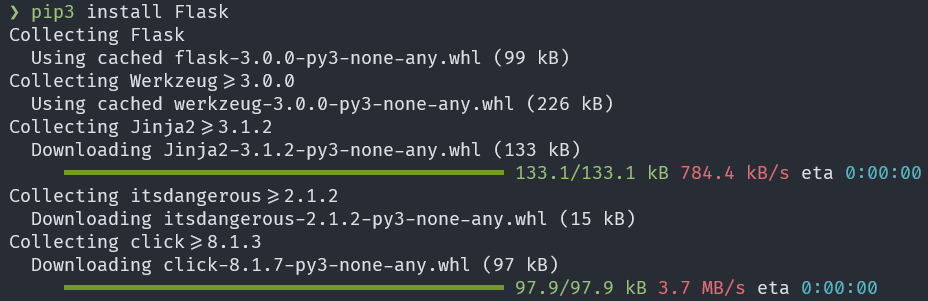
Output: pip3 install Flask
3. Install ‘python3-pip’ package
If you are getting an error message that pip is not found, it is possible that you do not have the pip package installed on your system.
To install pip on Linux, you will need to use your distribution’s package manager to install the python3-pip package.
Installing pip3
Fedora and other Red Hat-based distributions:
Open your terminal and run the following command:
sudo dnf install python3-pip
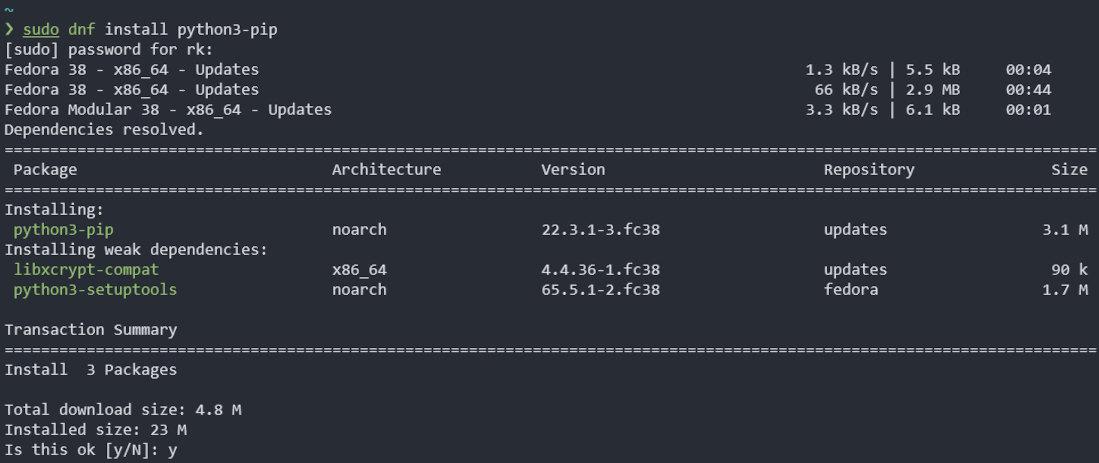
sudo dnf install python3-pip
Debian and Ubuntu:
Open your terminal and run the following command:
sudo apt install python3-pip

sudo apt install python3-pip
Once the Python 3 package manager (pip3) is installed, you should be able to run the pip3 command without any errors.
4. Use ‘ensurepip’ module
Python simplifies the process of installing pip within a Python environment by providing the “ensurepip” module. This module streamlines the installation of pip, enabling you to get it up and running effortlessly.
To utilize “ensurepip,” open your terminal and execute the following command:
python3 -m ensurepip --upgrade

Output: python3 -m ensurepip –upgrade
Explanation:
- python3: This is the command used to invoke Python 3 in your terminal.
- -m: The -m option stands for “module” and is used to run a Python module as a script.
- ensurepip: “ensurepip” is a Python module designed to ensure that the pip package manager is available in your Python environment.
- –upgrade: The –upgrade flag is used to ensure that you have the latest version of pip installed. It will upgrade pip if a newer version is available.
This command initiates the installation of pip, ensuring that you have the most up-to-date version. The “ensurepip” module essentially guarantees that pip is readily available for your Python environment, removing the need for manual installation or any complex procedures.
5. Installing pip using ‘get-pip.py’
The “get-pip.py” script serves as a versatile tool designed to facilitate the installation of essential Python components, including pip, setuptools, and wheel, in environments where they may be missing. To install pip using ‘get-pip.py’ follow these steps:
Step 1: Download ‘get-pip.py’ script
Download the get-pip.py script directly.
- To download the get-pip.py script directly, go to the following URL in your web browser: https://bootstrap.pypa.io/get-pip.py
- Press Ctrl+S or Right-click > Save as and save it as a python file with .py extension.
Download the get-pip.py script using curl.
To download the get-pip.py script using curl, open a terminal or command prompt and run the following command:
curl -sSL https://bootstrap.pypa.io/get-pip.py -o get-pip.py

Downloading ‘get-pip.py’ using curl
Explanation:
- curl is a command-line tool that can be used to transfer data over a network.
- -sSL tells curl to use the HTTPS protocol and to silence all output except for errors.
- https://bootstrap.pypa.io/get-pip.py is the URL of the get-pip.py script.
- -o get-pip.py tells curl to save the get-pip.py script to the current directory with the filename get-pip.py.
This will download the get-pip.py script to the current directory.
Step 2: Execute the script ‘get-pip.py’
After downloading “get-pip.py,” open your terminal and navigate to the directory where the script is located using the cd command, and initiate the installation process by running the following command:
python3 get-pip.py

This command triggers the installation process, ensuring that pip is properly set up on your system.
6. Installing pip as a Standalone Zip Application
In addition to integrating pip into your Python environment, pip is also available as a standalone zip application, offering a convenient and portable way to manage Python packages.
Step 1: Downloading ‘pip.pyz’
This standalone version can be downloaded from the following URL: https://bootstrap.pypa.io/pip/pip.pyz.
The zip application is versatile and can be executed using any supported version of Python.
To list the supported commands, go to the directory where pip.pyz is downloaded, type this command in your terminal:
python3 pip.pyz --help
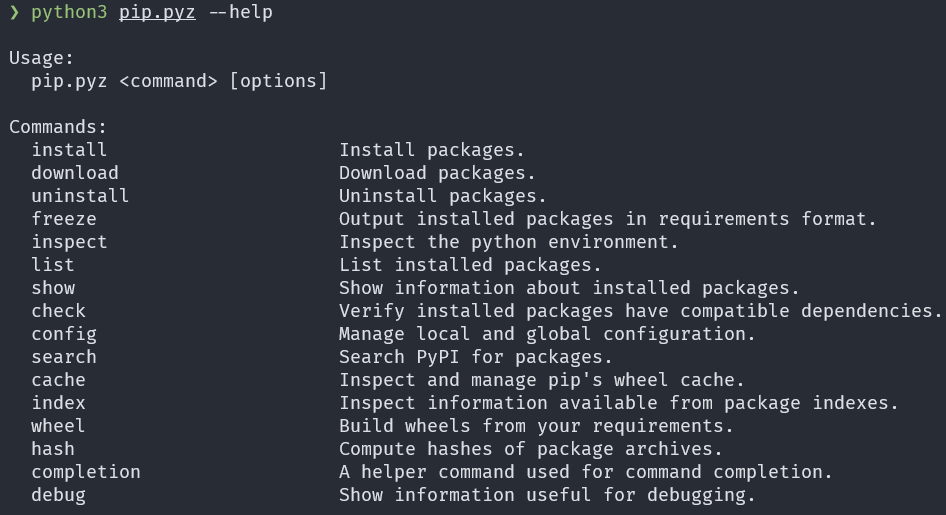
Output: python3 pip.pyz –help
Step 2: Installing package using pip.pyz
Navigate to the directory where the pip.pyz file is located, open a terminal and run the following command:
python3 pip.pyz install <package name>

Installing package using pip.pyz
This will install the numpy package to the Python installation that you are currently using.
7. Update your PATH variable
Sometimes, even after installing Python and pip, the “pip command not found” error may persist due to issues with your system’s PATH variable. To fix this, you should add the pip binary directory to your PATH.
Step 1: Checking Your PATH Variable
Before addressing the “pip command not found” error, it’s essential to check your PATH variable to understand its current configuration.
To do this, open your terminal and run the following command:
echo $PATH

The echo $PATH command prints the current value of the $PATH environment variable. The $PATH variable is a list of directories that the shell searches for executable files when you run a command.
This command will display the complete path configuration for your Linux system. Note the directories listed; you may have “/usr/local/bin” and “/usr/bin” in your PATH variable, but if they are missing, you will need to update it to include these directories.
Step 2: Updating Your PATH Variable
- Open the appropriate shell configuration file, depending on your shell.
If you’re using the Bash shell, open the ‘.bashrc’ file, while users of the Zsh shell should edit the ‘.zshrc’ file.
You can use text editors like ‘nano’ or ‘vim’ for this purpose. We are showing it for bash shell steps are same for zsh.
nano ~/.bashrc

Opening .bashrc using nano
For zsh shell replace ‘~/.bashrc’ with ‘~/.zshrc’ .i.e “nano ~/.zshrc”
This will open .bashrc file in nano text editor in your terminal, it may look like this:

.bashrc in nano text editor
- Go to the end of this file and add this line:
export PATH="/usr/local/bin:/usr/bin:$PATH"
This line appends the necessary directories to your PATH variable, ensuring that system commands and tools can be found.

- Press ‘Ctrl + s’ to save ‘.bashrc’ and ‘Ctrl + x’ to exit nano text editor.
Step 3: Applying Changes to Your Shell Environment
After updating your shell configuration file, you need to apply the changes to your current shell session. To do this, follow these steps:
source ~/.bashrc

This command reloads the shell configuration, applying the changes you made to the PATH variable.
Now, try running ‘pip3’ command to install the required package.
8. Use Python’s ‘-m pip’ option
If you’re still facing the “pip command not found” error, you can use Python’s ‘-m pip’ option to execute pip as a module. For example, to install a package using ‘pip’, you can use:
python3 -m pip install <package_name>
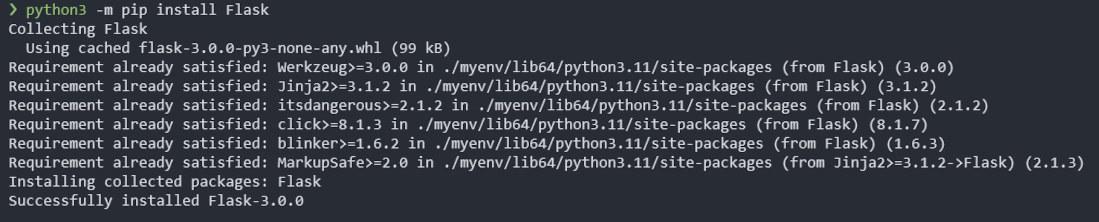
Output: python3 -m pip install Flask
This method avoids the need to have the ‘pip’ command in your PATH.
9. Use python virtual environment
Additionally, using Python virtual environments can provide a robust solution to this error, allowing for isolated Python environments and avoiding conflicts. Virtual environments allow you to create isolated Python environments, each with its own set of packages and dependencies, without interfering with the system-wide Python installation.
When used from within a virtual environment, common installation tools such as pip will install Python packages into a virtual environment without needing of doing it explicitly.
Recent versions of Python 3 include the venv module, which can create virtual environments.
Step 1: Creating a virtual environment
Create a new virtual environment using the ‘venv’ module (Python 3.3 and later):
python3 -m venv myenv
Replace ‘myenv’ with the desired name for your virtual environment.

In the virtual environment ‘myenv,’ as depicted in the above figure, you’ll notice that the ‘bin’ folder contains both ‘pip’ and ‘pip3’. These binaries are automatically generated when creating the virtual environment.
Step 2: Activate the virtual environment
To activate the virtual environment “myenv”, we’ll use source command.
source myenv/bin/activate
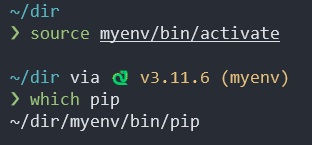
When you’ve activated the virtual environment called “myenv,” the ‘pip’ command you’ll be using is located within the ‘myenv/bin’ directory.
Step 3: Installing the package using pip
You can install packages with ‘pip’ without encountering the “pip command not found” error.
pip install <package name>

To deactivate the virtual environment and return to the system-wide Python, simply run:
deactivate

Deactivating python environment
10. Upgrade pip to the latest version
If pip is still not working, you can try upgrading it to the latest version. To do this, open a terminal and run the following command:
python3 -m pip install --upgrade pip

Upgrading pip to the latest version
Explanation:
- python3 is the command to start the Python 3 interpreter.
- -m tells Python to run the specified module as a script.
- pip is the name of the module that installs Python packages.
- install is the command to install a package.
- –upgrade tells pip to upgrade the specified package to the latest version.
In other words, this command will tell pip to download and install the latest version of itself.
Conclusion
Encountering the “pip command not found” error in Linux can be a frustrating experience, but it’s a common issue with straightforward solutions. By using the above solutions you can resolve this error and continue managing Python packages with ease. Remember to adapt the solutions to your specific Linux distribution and configuration, and you’ll be back to smoothly working with Python packages in no time.
To learn more about pip checkout Python PIP.
Share your thoughts in the comments
Please Login to comment...