Enum Mapping in Spring Boot
Last Updated :
23 Apr, 2024
Spring Boot framework is one of the famous frameworks for developing web applications. This framework provides a lot of features to optimize the software application code. Spring Auto-Configuration, Spring Annotations, Spring Integration Spring Security and other features are available in the Spring Boot framework.
Spring Boot is open open-source Java-based framework And also Spring Boot is also used for standalone and production-grade Spring-based applications with less effort. Now, we will explain Enum mapping in the Spring Boot framework. The Enum is used for declaring the constants with upper case letters. Below we provide a simple Spring Boot project for mapping Enum.
What is Enum?
- The enum is one of the special data types in Java programming and It is introduced in Java 5.
- The Enum is a data type that consists of a set of predefined named values separated by commas.
- These named values are known as elements, and the elements in an enum are constants.
- It’s important to represent them in UPPER CASE letters.
- Enums are created using the enum keyword in Java programming.
- Internally, enums are implemented by a class.
- They are primarily used to declare constants like roles, categories, types, and other entities.
Syntax:
public enum Role {
    ELEMENT_1, ELEMENT_2
}
Prerequisites:
- Spring Boot Framework
- APIs functionality
- Enum in Java programming
- HTTP Requests methods
- API Testing
- Spring stater project creation
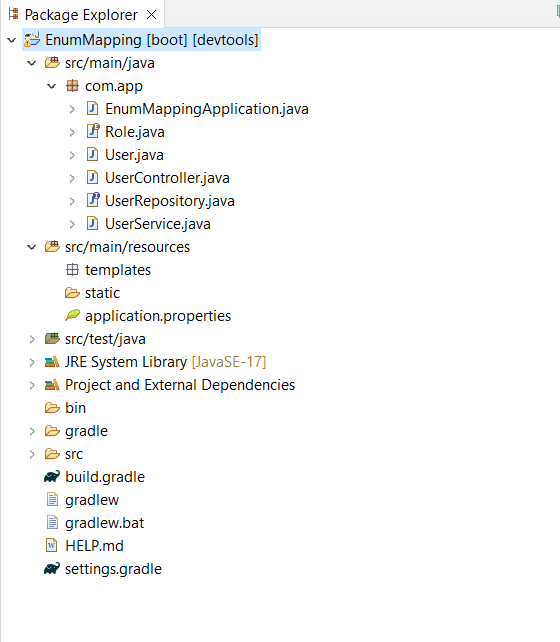
Project Structure:
Below we can see the structure of the project, after successfully creating the project.
Steps to Implement Enum Mapping in Spring Boot
Here, we will create a simple Spring Boot application for Enum Mapping in Spring Boot by utilizing RestController API endpoints. Upon accessing these APIs in a browser, we’ll be able to view the output.
Step 1:
Create a Spring Boot project by using Spring initializer with required project dependencies.
dependencies {
    implementation 'org.springframework.boot:spring-boot-starter-data-mongodb'
    implementation 'org.springframework.boot:spring-boot-starter-web'
    compileOnly 'org.projectlombok:lombok'
    developmentOnly 'org.springframework.boot:spring-boot-devtools'
    annotationProcessor 'org.projectlombok:lombok'
    testImplementation 'org.springframework.boot:spring-boot-starter-test'
}
Step 2:
Once project is successfully created, then configure the mongo db connection by using database name, port number and host name.
spring.data.mongodb.host=localhost
spring.data.mongodb.port=27017
spring.data.mongodb.database=work
Step 3:
- Now we have created the required classes in the main package of the project folder.
- Initially, we created one domain class named User.
- In this class, we declared some fields, namely id, username, age, and role.
- Here, the role is of enum type, as we will explain in the next step.
- Additionally, we utilized some Spring annotations such as @AllArgsConstructor, @NoArgsConstructor, @Data, and @Document(collection = “userdata”) to facilitate data handling.
Java
package com.app;

import org.springframework.data.annotation.Id;
import org.springframework.data.mongodb.core.mapping.Document;

import lombok.AllArgsConstructor;
import lombok.Data;
import lombok.NoArgsConstructor;

@AllArgsConstructor
@NoArgsConstructor
@Data
@Document(collection = "userdata")
public class User {
    @Id
    private String id;
    private String username;
    private String age;
    private Role role;
}
Step 4:
- Next, we created one enum class in that main package using the enum keyword, which is Role.
- Then, we declared some roles in that enum role class.
- The roles are ADMIN, USER, and GUEST.
- Below, we have provided that code for your reference.
package com.app;

public enum Role {
    ADMIN, USER, GUEST
}
Step 5:
- Now we have created another Java interface in the package, named UserRepository.
- This repository is used for handling database operations like saving, inserting, deleting, and other database operations.
- We created this repository using the @Repository and @EnableMongoRepositories annotations.
- This repository takes two arguments as input, those being the domain class name and its ID datatype.
- We extend this UserRepository to MongoRepository.
- We have also created some user-defined functions in this repository.
Java
package com.app;

import java.util.List;

import org.springframework.data.mongodb.repository.MongoRepository;
import org.springframework.data.mongodb.repository.config.EnableMongoRepositories;
import org.springframework.stereotype.Repository;

@Repository
@EnableMongoRepositories
public interface UserRepository extends MongoRepository<User, String> {

    List<User> findByRole(Role role);

}
Step 6:
- Now, we’ve created another Java class in the main package named UserService.
- We utilized the @Service Spring annotation to establish a service layer within the web application.
- Within this Java class, we implemented several methods for saving user data, retrieving all user data, and finding users based on their roles.
- The findByRole method is a user-defined function, which is why we created a corresponding method in the Repository interface.
- Below, you’ll find the code for your reference.
Java
package com.app;

import java.util.List;

import org.springframework.beans.factory.annotation.Autowired;
import org.springframework.stereotype.Service;

@Service
public class UserService {

    @Autowired
    private UserRepository userRepository;

    // save user data
    public User createUser(User user) {
        return userRepository.save(user);
    }

    // get all users data
    public List<User> findAllUsers() {
        return userRepository.findAll();
    }

    // find by role
    public List<User> findUsersByRole(Role role) {
        return userRepository.findByRole(role);
    }
}
Step 7:
- After this, we created another Java class in the main package called UserController.
- This class is responsible for creating API endpoints and managing HTTP requests.
- We access the service layer methods from this controller by autowiring the UserService class.
- Within UserController, we defined three distinct API endpoints ‘save’, which operates as a POST type endpoint, ‘getAll’, a GET mapping, and ‘byRole’, also a GET mapping.
- These APIs are utilized for saving user data, retrieving all user data, and finding users based on their roles.
Java
package com.app;

import java.util.List;

import org.springframework.beans.factory.annotation.Autowired;
import org.springframework.http.HttpStatus;
import org.springframework.http.ResponseEntity;
import org.springframework.web.bind.annotation.GetMapping;
import org.springframework.web.bind.annotation.PostMapping;
import org.springframework.web.bind.annotation.RequestBody;
import org.springframework.web.bind.annotation.RequestParam;
import org.springframework.web.bind.annotation.RestController;

@RestController
public class UserController {

    @Autowired
    private UserService userService;

    // Endpoint for creating a new user
    @PostMapping("/save")
    public ResponseEntity<User> createUser(@RequestBody User user) {
        User createdUser = userService.createUser(user);
        return new ResponseEntity<>(createdUser, HttpStatus.CREATED);
    }

    // Endpoint for retrieving all users
    @GetMapping("/getAll")
    public ResponseEntity<List<User>> getAllUsers() {
        List<User> users = userService.findAllUsers();
        return ResponseEntity.ok(users);
    }

    // Endpoint for finding users by role
    @GetMapping("/byRole")
    public ResponseEntity<List<User>> findUsersByRole(@RequestParam("role") Role role) {
        List<User> users = userService.findUsersByRole(role);
        return ResponseEntity.ok(users);
    }

}
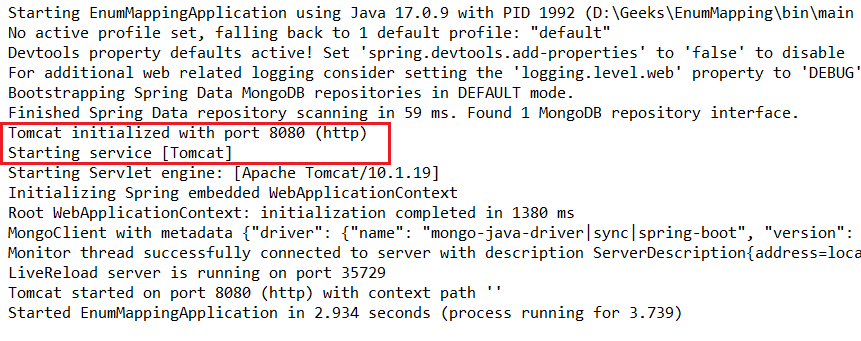
Step 8:
Once entire logic is developed, then run this project as Spring Boot App and this project run on server port number 8080 and this project uses Apache Tomcat server. Below is the output image for reference.
Step 9:
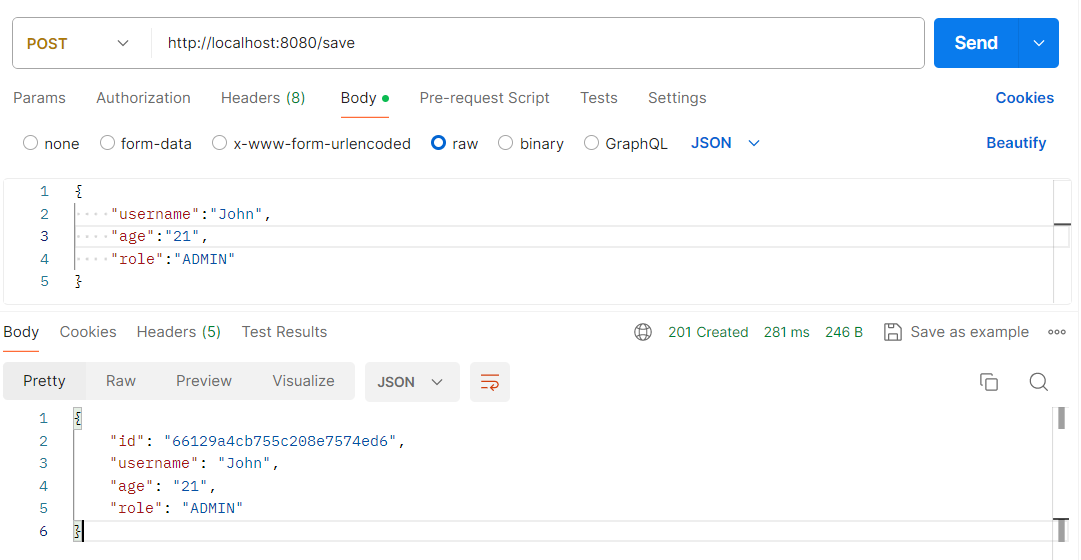
- After successfully running the project, now open the Postman tool to test the APIs.
- First, we test the save API. This API is used for save the user data into mongo db.
- This save API is POST mapping for save the user data by using domain object.
http://localhost:8080/save
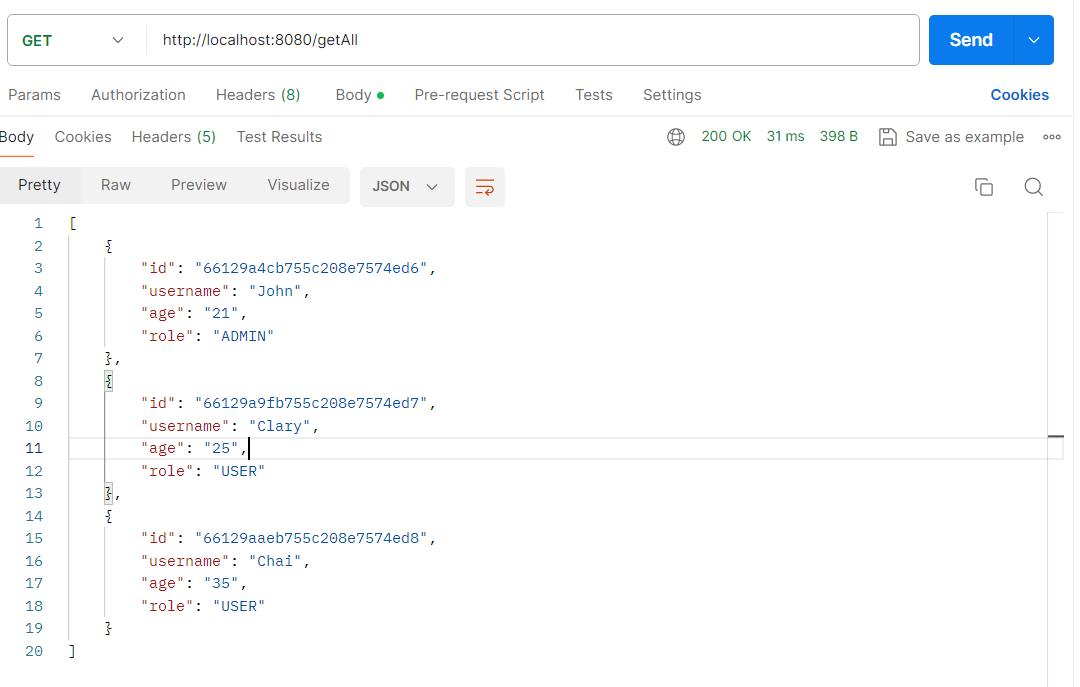
Step 10:
- Next, we test the getAll API, means this API can retrieve all available data from the database.
- Open the Postman tool and hit the below API URL.
- Then, we can observe the result.
http://localhost:8080/getAll
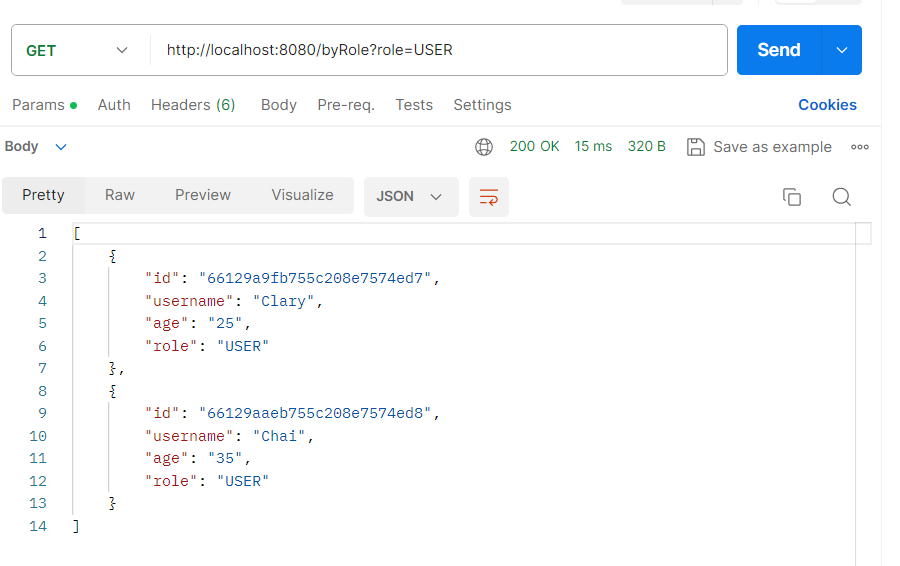
Step 11:
- Finally, we tested the third API.
- The API name is byRole API., means this API can find user data based on User role.
- We have three roles in this Spring Project those are ADMIN, USER and GUEST.
- Now, we will open the Postman tool and hit the below API URL to find User by their roles.
- After testing, we got expected result.
- Below, we have searched user data by using USER role.
If we follow the above steps, then we can demonstrate the enum mapping in spring boot application.
Share your thoughts in the comments
Please Login to comment...