Mapping the Root URL to a Page in Spring Boot
Last Updated :
23 Apr, 2024
In Spring Boot, mapping the URLs to specific pages or controllers is the fundamental aspect of web development. Mapping the root URL to the specific pages allows the defined landing pages of the Spring application. The process is important for giving users a smooth and easy browsing experience.
Key Terminologies:
- Controller: This class is marked with the @Controller annotation and handles incoming HTTP requests. It contains methods annotated with @GetMapping, @PostMapping to map requests to specific endpoints of the application.
- Handler method: These methods inside the controller class handle HTTP requests. They are annotated with @GetMapping, @PostMapping to specify the URL path and HTTP method they handle in the application.
- View: In Spring Boot, a view represents the output sent back to the client in response to an HTTP request. Typically, views are HTML files containing markup to display in the user’s web browser.
- View Resolver: This component resolves view names returned by controller methods to actual view objects. It determines which view template to render based on the view name returned by the controller.
- Template Engine: This component processes view templates and generates HTML content dynamically. Common template engines include Thymeleaf, FreeMarker, and Velocity.
- Model: It represents the data used by the view for rendering. It can be passed from the controller to the view using the Model object.
Root URL Mapping to a Page in Spring Boot
In Spring Boot, URL mapping is done by controllers, which are classes annotated with @Controller. These controllers handle incoming HTTP requests and define how the application behaves for specific URLs.
Mapping the Root URL:
To map the root URL in Spring Boot, annotate a method in the controller class with @GetMapping(“/”) to handle requests. This method should return the name of the view or HTML page for displaying when users access the root URL.
Configuring the View Resolution:
Spring Boot uses a view resolver to determine which template to render based on the name returned by the controller method. By default, it searches for view templates in the src/main/resources/templates directory, ensuring the HTML file is located there.
Creating the HTML page:
Once we have mapped the root URL to the controller method and configured the view resolution, we create the landing page HTML file. This file should contain the content and layout displayed to users when accessing the root URL, including CSS styles, JavaScript, and dynamic content as needed for the application.
Testing the Mapping
Finally, we can test the mapping by running the Spring Boot application and accessing the root URL (“/”) in the web browser.
Project Implementation to Map the Root URL to a Page in Spring Boot
We have developed a simple spring boot project to show the Mapping the Root URL to a Page of the project.
Step 1: We will create a project using Spring STS IDE and on creating the project adding the below dependencies into it.
Dependencies:
- Spring Web
- Thymeleaf
- Lombok
- Spring Dev Tools
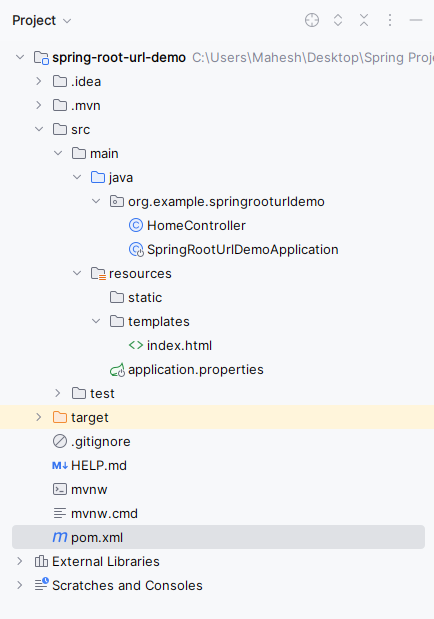
Once the process is done, the file structure will look like the image below.
Step 2: Open the application.properties file and put the below code for server port configuration of the project.
spring.application.name=spring-root-url-demo

server.port=8082
Step 3: Create a new Java class named as HomeController.
Go to src > main > java > springrooturldemo > HomeController and put the code below.
Java
package org.example.springrooturldemo;


import org.springframework.stereotype.Controller;
import org.springframework.web.bind.annotation.RequestMapping;
import org.springframework.web.bind.annotation.RestController;

@Controller
public class HomeController {

    @RequestMapping("/home")
    public String home() {
        return  "index.html";  // Assuming "index.html" is the name of your landing page
    }
}
Step 4: Open the main class file and paste the below code.
Note: No changes are required in the main class (Keep the default code generated by the project creation)
Java
package org.example.springrooturldemo;

import org.springframework.boot.SpringApplication;
import org.springframework.boot.autoconfigure.SpringBootApplication;

@SpringBootApplication
public class SpringRootUrlDemoApplication {

    public static void main(String[] args) {
        SpringApplication.run(SpringRootUrlDemoApplication.class, args);
    }

}
Step 5: Create a new HTML page and it named as index.html.
Go to src > main > resources > template > index.html and put the below code.
HTML
<!DOCTYPE html>
<html lang="en">
<head>
    <meta charset="UTF-8">
    <meta name="viewport" content="width=device-width, initial-scale=1.0">
    <title>Home Page</title>
    <style>
        body {
            font-family: Arial, sans-serif;
            margin: 0;
            padding: 0;
            background-color: #f0f0f0;
        }
        .container {
            width: 80%;
            margin: auto;
            text-align: center;
            padding-top: 50px;
        }
        h1 {
            color: #333;
        }
        p {
            color: #666;
        }
        .btn {
            display: inline-block;
            background-color: #007bff;
            color: #fff;
            padding: 10px 20px;
            text-decoration: none;
            border-radius: 5px;
            margin-top: 20px;
        }
        .btn:hover {
            background-color: #0056b3;
        }
    </style>
</head>
<body>
<div class="container">
    <h1>Welcome to My Spring Boot Application!</h1>
    <p>This is a simple and elegant home page created using Spring Boot.</p>
    <a href="/about" class="btn">About Us</a>
</div>
</body>
</html>
- This HTML code represents a basic homepage layout for a Spring Boot application.
- It includes styling for the body, a container, headings, paragraphs, and a button.
- The button is linked to the “/about” URL, creating a simple navigation feature.
pom.xml:
XML
<?xml version="1.0" encoding="UTF-8"?>
<project xmlns="http://maven.apache.org/POM/4.0.0" xmlns:xsi="http://www.w3.org/2001/XMLSchema-instance"
         xsi:schemaLocation="http://maven.apache.org/POM/4.0.0 https://maven.apache.org/xsd/maven-4.0.0.xsd">
    <modelVersion>4.0.0</modelVersion>
    <parent>
        <groupId>org.springframework.boot</groupId>
        <artifactId>spring-boot-starter-parent</artifactId>
        <version>3.2.4</version>
        <relativePath/> <!-- lookup parent from repository -->
    </parent>
    <groupId>org.example</groupId>
    <artifactId>spring-root-url-demo</artifactId>
    <version>0.0.1-SNAPSHOT</version>
    <name>spring-root-url-demo</name>
    <description>spring-root-url-demo</description>
    <properties>
        <java.version>17</java.version>
    </properties>
    <dependencies>
        <dependency>
            <groupId>org.springframework.boot</groupId>
            <artifactId>spring-boot-starter-web</artifactId>
        </dependency>

        <dependency>
            <groupId>org.springframework.boot</groupId>
            <artifactId>spring-boot-starter-thymeleaf</artifactId>
        </dependency>
        <dependency>
            <groupId>org.springframework.boot</groupId>
            <artifactId>spring-boot-devtools</artifactId>
            <scope>runtime</scope>
            <optional>true</optional>
        </dependency>
        <dependency>
            <groupId>org.projectlombok</groupId>
            <artifactId>lombok</artifactId>
            <optional>true</optional>
        </dependency>
        <dependency>
            <groupId>org.springframework.boot</groupId>
            <artifactId>spring-boot-starter-test</artifactId>
            <scope>test</scope>
        </dependency>
    </dependencies>

    <build>
        <plugins>
            <plugin>
                <groupId>org.springframework.boot</groupId>
                <artifactId>spring-boot-maven-plugin</artifactId>
                <configuration>
                    <excludes>
                        <exclude>
                            <groupId>org.projectlombok</groupId>
                            <artifactId>lombok</artifactId>
                        </exclude>
                    </excludes>
                </configuration>
            </plugin>
        </plugins>
    </build>

</project>
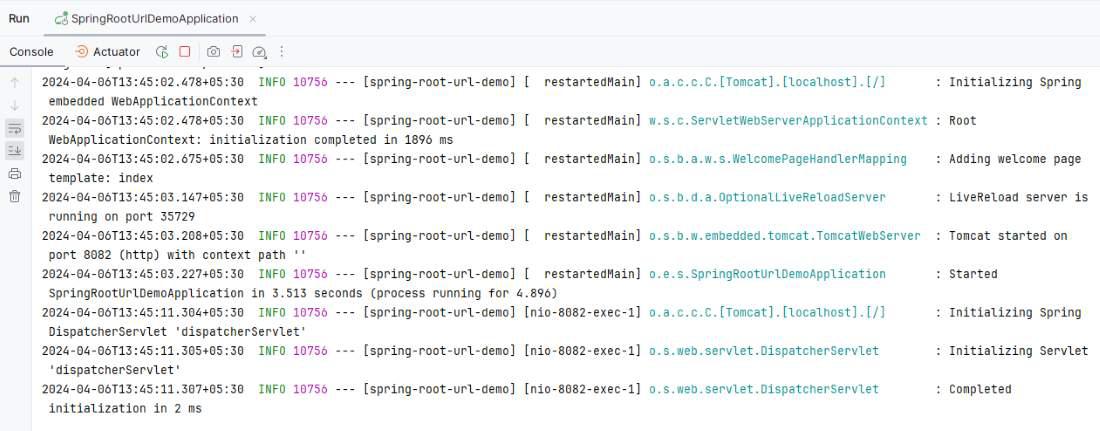
Step 6: Once the project completed, then run the application as a spring project then it run at port 8082.
Output:
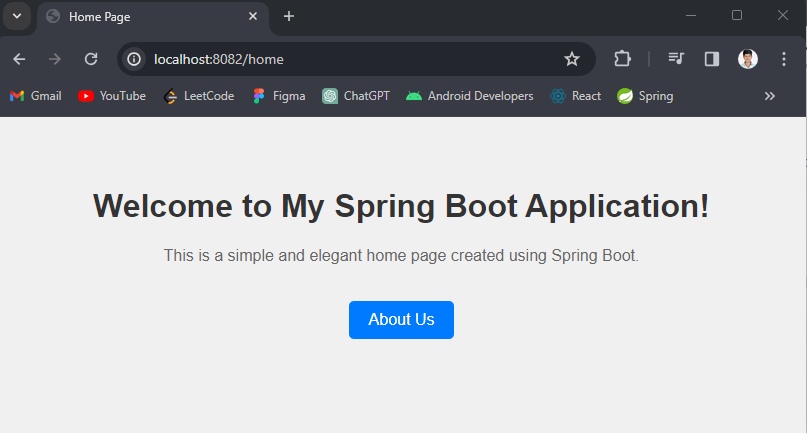
Open the web browser and enter the below URL , then it will show the below page as output.
http://localhost:8082/home
Home Page:
If we follow the above steps, then we can successfully demonstrate a simple spring application to Map the Root URL to a Page in Spring Boot.
Share your thoughts in the comments
Please Login to comment...