CSRF Protection in Spring Security
Last Updated :
07 Mar, 2024
In Spring Security, CSRF stands for Cross-Site Request Forgery. It is used to protect in the Spring Security mechanism. It is designed to prevent the attackers from executing unauthorized actions on behalf of the authenticated users.
Key Terminologies:
- CSRF Attack
- CSRF Token
- CSRF Token Repository
- CSRF Token Generation
- CSRF Token Validation
Example to Implement CSRF Protection in Spring Security
We can implement the CSRF Token generation from the server side and it can be embedded into the client-side form to validate the CSRF tokens can access the server. In Implementation, we can prevent the authenticated attackers from the unknown domains.
CSRF Token Generation:
Java
public SecurityFilterChain securityFilterChain(HttpSecurity http) throws Exception {
http.csrf()
.csrfTokenRepository(csrfTokenRepository())
.and()
.authorizeRequests()
.requestMatchers("/public/**", "/signup", "/login").permitAll()
.anyRequest().authenticated()
.and()
.formLogin()
.loginPage("/login").permitAll()
.successHandler(successHandler())
.and()
.logout()
.logoutRequestMatcher(new AntPathRequestMatcher("/logout")).permitAll()
.logoutSuccessHandler(new HttpStatusReturningLogoutSuccessHandler());
return http.build();
}
private CsrfTokenRepository csrfTokenRepository() {
HttpSessionCsrfTokenRepository repository = new HttpSessionCsrfTokenRepository();
repository.setSessionAttributeName("_csrf");
return repository;
}
|
Embedded with Client-side forms:
HTML
<form th:action="@{/login}" method="post">
<h2>Login</h2>
<input type="hidden" th:name="${_csrf.parameterName}" th:value="${_csrf.token}" />
<div>
<label for="username">Username:</label>
<input type="text" id="username" name="username" required autofocus/>
</div>
<div>
<label for="password">Password:</label>
<input type="password" id="password" name="password" required/>
</div>
<button type="submit">Login</button>
</form>
|
Now, we can implement the simple user login management system that can be added the CSRF protection into the application.
Step by Step Implementation of CSRF Protection in Spring Security
Below are the steps to implement a simple user login management system and we will add CSRF protection into the application.
Step 1: Create the spring project using Spring Initializer on creating the project add the below dependencies into the project.
Dependencies:
- Spring Web
- Spring Security
- Spring data for mongodb
- Thymeleaf
- Lombok
- Spring Dev Tools
Once created the project, then the file structure looks like the below image.
File Structure: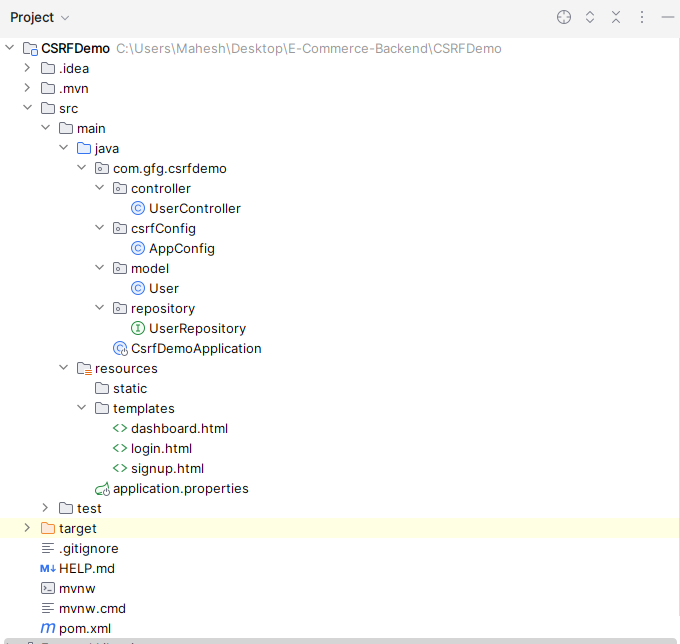
Step 2: Open the application.properties file, it will be located in resource folder then the put the below code for the mongodb database configuration and server assigning to the server.
server.port=8081
spring.data.mongodb.uri=mongodb://localhost:27017/user-data
Step 3: Create the new package and it named as model and create the new Java class in that package named as User.
Go to src > csrfdemo > model > User and put the below code.
Java
package com.gfg.csrfdemo.model;
import lombok.AllArgsConstructor;
import lombok.Data;
import lombok.NoArgsConstructor;
import org.springframework.data.mongodb.core.mapping.Document;
@Data
@AllArgsConstructor
@NoArgsConstructor
@Document
public class User {
private String id;
private String username;
private String password;
}
|
Step 4: Create the new package and it named as repository and create the new java interface in that package named as UserRepository.
Go to src > csrfdemo > repository > UserRepository and put the below code.
Java
package com.gfg.csrfdemo.repository;
import com.gfg.csrfdemo.model.User;
import org.springframework.data.mongodb.repository.MongoRepository;
import org.springframework.stereotype.Repository;
@Repository
public interface UserRepository extends MongoRepository<User, String> {
User findByUsername(String username);
}
|
Step 5: Create the new package named as csrfConfig and create the new Java class in that package named as AppConfig.
Go to src > csrfdemo > csrfConfig > AppConfig and put the below code.
Java
package com.gfg.csrfdemo.csrfConfig;
import org.springframework.context.annotation.Bean;
import org.springframework.context.annotation.Configuration;
import org.springframework.security.config.annotation.web.builders.HttpSecurity;
import org.springframework.security.crypto.bcrypt.BCryptPasswordEncoder;
import org.springframework.security.crypto.password.PasswordEncoder;
import org.springframework.security.web.SecurityFilterChain;
import org.springframework.security.web.authentication.AuthenticationSuccessHandler;
import org.springframework.security.web.authentication.SimpleUrlAuthenticationSuccessHandler;
import org.springframework.security.web.authentication.logout.HttpStatusReturningLogoutSuccessHandler;
import org.springframework.security.web.csrf.CsrfTokenRepository;
import org.springframework.security.web.csrf.HttpSessionCsrfTokenRepository;
import org.springframework.security.web.util.matcher.AntPathRequestMatcher;
/**
* Configuration class for Spring Security.
*/
@Configuration
public class AppConfig {
@Bean
public SecurityFilterChain securityFilterChain(HttpSecurity http) throws Exception {
http
.csrf()
.csrfTokenRepository(csrfTokenRepository())
.and()
.authorizeRequests()
.requestMatchers("/public/**", "/signup", "/login").permitAll()
.anyRequest().authenticated()
.and()
.formLogin()
.loginPage("/login")
.permitAll()
.successHandler(successHandler())
.and()
.logout()
.logoutRequestMatcher(new AntPathRequestMatcher("/logout"))
.logoutSuccessHandler(new HttpStatusReturningLogoutSuccessHandler())
.permitAll();
return http.build();
}
/**
* Creates a CsrfTokenRepository instance.
* @return CsrfTokenRepository instance
*/
private CsrfTokenRepository csrfTokenRepository() {
HttpSessionCsrfTokenRepository repository = new HttpSessionCsrfTokenRepository();
repository.setSessionAttributeName("_csrf");
return repository;
}
private AuthenticationSuccessHandler successHandler() {
SimpleUrlAuthenticationSuccessHandler handler = new SimpleUrlAuthenticationSuccessHandler();
handler.setDefaultTargetUrl("/dashboard");
return handler;
}
@Bean
public PasswordEncoder passwordEncoder() {
return new BCryptPasswordEncoder();
}
}
|
Step 6: Create the new package and it named as controller and create the new java class in that package named as UserController.
Go to src > csrfdemo > controller > UserController and put the below code.
Java
package com.example.demo.controller;
import com.gfg.csrfdemo.model.User;
import com.gfg.csrfdemo.repository.UserRepository;
import org.springframework.beans.factory.annotation.Autowired;
import org.springframework.security.crypto.password.PasswordEncoder;
import org.springframework.stereotype.Controller;
import org.springframework.web.bind.annotation.GetMapping;
import org.springframework.web.bind.annotation.ModelAttribute;
import org.springframework.web.bind.annotation.PostMapping;
@Controller
public class UserController {
@Autowired
private UserRepository userRepository;
@Autowired
private PasswordEncoder passwordEncoder;
/**
* Endpoint to display the signup form.
* @return The name of the signup view
*/
@GetMapping("/signup")
public String signupForm() {
return "signup";
}
@PostMapping("/signup")
public String signupSubmit(@ModelAttribute User user) {
user.setPassword(passwordEncoder.encode(user.getPassword()));
userRepository.save(user);
return "redirect:/login";
}
@GetMapping("/login")
public String login() {
return "login";
}
}
|
Step 7: Open the main class and put the below code.
Note: No need any changes into the main class.
Java
package com.gfg.csrfdemo;
import org.springframework.boot.SpringApplication;
import org.springframework.boot.autoconfigure.SpringBootApplication;
@SpringBootApplication
public class CsrfDemoApplication {
/**
* Main method to start the application.
* @param args Command line arguments
*/
public static void main(String[] args) {
SpringApplication.run(CsrfDemoApplication.class, args);
}
}
|
Step 8: Create the html file and named as login.html and it can be saved as the templates folder.
Go to src > resources > templates > login.html and put the below html code.
HTML
<!DOCTYPE html>
<head>
<meta charset="UTF-8">
<title>Login</title>
<style>
/* Center the form */
body {
display: flex;
justify-content: center;
align-items: center;
height: 100vh;
margin: 0;
background-color: #f2f2f2;
}
form {
width: 400px; /* Adjust the width as per need */
background-color: white;
padding: 40px; /* Adjust the padding to increase the size */
border-radius: 8px;
box-shadow: 0 2px 4px rgba(0, 0, 0, 0.1);
}
h2 {
text-align: center;
margin-bottom: 20px;
}
label {
display: block;
margin-bottom: 10px;
}
input[type="text"],
input[type="password"] {
width: 100%;
padding: 10px;
margin-bottom: 20px;
border: 1px solid #ccc;
border-radius: 4px;
}
button[type="submit"] {
width: 100%;
padding: 12px;
background-color: #007bff;
color: white;
border: none;
border-radius: 4px;
cursor: pointer;
}
button[type="submit"]:hover {
background-color: #0056b3;
}
</style>
</head>
<body>
<form th:action="@{/login}" method="post">
<h2>Login</h2>
<input type="hidden" th:name="${_csrf.parameterName}" th:value="${_csrf.token}" />
<div>
<label for="username">Username:</label>
<input type="text" id="username" name="username" required autofocus/>
</div>
<div>
<label for="password">Password:</label>
<input type="password" id="password" name="password" required/>
</div>
<button type="submit">Login</button>
</form>
</body>
</html>
|
Step 9: Create the html file and named as signup.html and it can be saved as the templates folder.
Go to src > resources > templates > signup.html and put the below html code.
Java
<!DOCTYPE html>
<head>
<meta charset="UTF-8">
<title>Sign Up</title>
<style>
body {
display: flex;
justify-content: center;
align-items: center;
height: 100vh;
margin: 0;
background-color: #f2f2f2;
}
form {
background-color: white;
padding: 40px;
border-radius: 8px;
box-shadow: 0 2px 4px rgba(0, 0, 0, 0.1);
width: 400px;
}
h2 {
text-align: center;
margin-bottom: 20px;
}
label {
display: block;
margin-bottom: 5px;
}
input[type="text"],
input[type="password"] {
width: 100%;
padding: 8px;
margin-bottom: 10px;
border: 1px solid #ccc;
border-radius: 4px;
}
button[type="submit"] {
width: 100%;
padding: 10px;
background-color: #007bff;
color: white;
border: none;
border-radius: 4px;
cursor: pointer;
}
button[type="submit"]:hover {
background-color: #0056b3;
}
</style>
</head>
<body>
<form th:action="@{/signup}" th:object="${user}" method="post">
<h2>Sign Up</h2>
<input type="hidden" th:name="${_csrf.parameterName}" th:value="${_csrf.token}" />
<div>
<label for="username">Username:</label>
<input type="text" id="username" th:field="*{username}" required autofocus/>
</div>
<div>
<label for="password">Password:</label>
<input type="password" id="password" th:field="*{password}" required/>
</div>
<button type="submit">Sign Up</button>
</form>
</body>
</html>
|
Step 10: Create the html file and named as dashboard.html and it can be saved as the templates folder.
Go to src > resources > templates > dashboard.html and put the below html code.
Java
<!DOCTYPE html>
<head>
<meta charset="UTF-8">
<title>Dashboard</title>
<style>
body {
display: flex;
justify-content: center;
align-items: center;
height: 100vh;
margin: 0;
background-color: #f2f2f2;
}
.dashboard-container {
background-color: white;
padding: 20px;
border-radius: 8px;
box-shadow: 0 2px 4px rgba(0, 0, 0, 0.1);
text-align: center;
}
h2 {
margin-bottom: 20px;
}
.logout-link {
display: inline-block;
padding: 10px 20px;
background-color: #007bff;
color: white;
text-decoration: none;
border-radius: 4px;
transition: background-color 0.3s ease;
}
.logout-link:hover {
background-color: #0056b3;
}
</style>
</head>
<body>
<div class="dashboard-container">
<h2>Welcome to the Dashboard</h2>
<a href="/logout" class="logout-link">Logout</a>
</div>
</body>
</html>
|
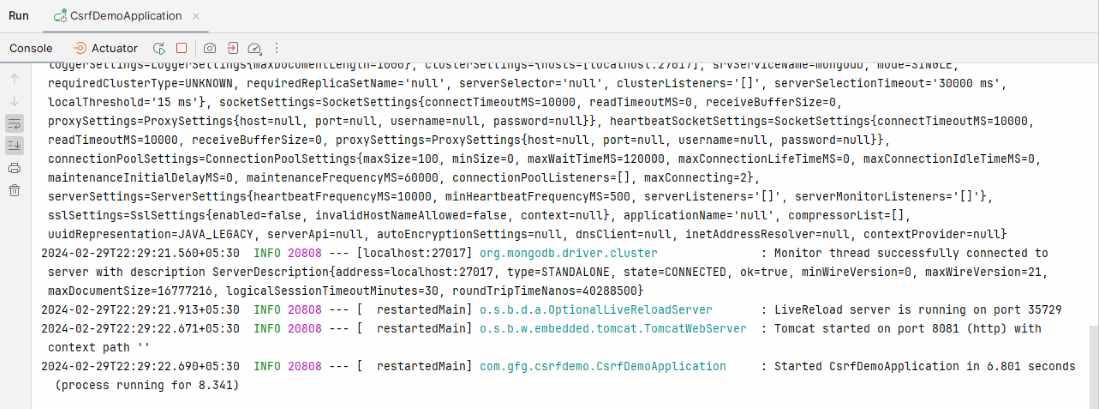
Step 11: Once the completed the spring project, and it runs as the spring project then it will run on the port 8081.
SignUp Page:

Login Page:

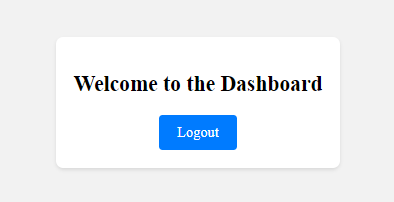
Dashboard:
The above Project is the example of the CSRF protection in Spring Security that it can generates the CSRF token into the configuration and it can be embedded within the forms for the CSRF verification when the client sent request to the server then server can be verifying the CSRF token then give the access to user other server can block the access of the unknown domain request.
We can follow the above steps then we can successfully build the application that can integrates the CSRF protection into the spring project.
Share your thoughts in the comments
Please Login to comment...