Create a basic Navbar using React Router v6
Last Updated :
29 Feb, 2024
React Router recently released version 6, and earlier version 5 of React Router was used. A lot of changes have been made in v6. In this article, we will understand how to create a basic navbar using React Router v6.
Approach to Create a Basic Navbar using React Router v6:
- <Link></Link>: The Link tag works the same way as the anchor tag, just like the <a> tag has “herf” and the Link tag has “to”. If we use <a> tag, our page will be reloaded and when we use <Link> tag page doesn’t reload.
- <RouterProvider router={router}></RouterProvider>: For all components we need routing, we have to wrap it in RouterProvider. For a router that we created using createBrowserRouter, we have to pass the router in the router prop.
- But in this navbar, one thing is missing, we are not able to find out which navbar item is active, meaning we are on the Home or About, or Projects page. The solution to this problem has also been given by React Router. Instead of using <Link>, we can use <NavLink>.
- NavLink automatically adds active class name to the active nav item. So using CSS we can handle the “.active” class to customer active nav item.
Steps to Create a React App and Installing React Router v6:
Step 1: Create a react project folder, open the terminal, and write the following command.
# Run this to use npm
npx create-react-app foldername
# Or run this to use yarn
yarn create react-app foldername
Step 2: Navigate to the root directory of your project using the following command.
cd foldername
Step 3: Now, install the React Router library
npm install react-router-dom
or
yarn add react-router-dom
Project Structure:
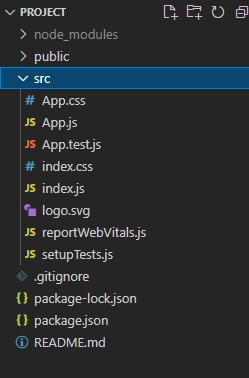
Project Structure
The updated dependencies in package.json file will look like:
"dependencies": {
    "react": "^18.2.0",
    "react-dom": "^18.2.0",
    "react-scripts": "5.0.1",
    "web-vitals": "^2.1.4",
    "react-router-dom": "^6.22.0"
}
Syntax to setup Browser Router:
import { createBrowserRouter } from "react-router-dom";
const router = createBrowserRouter([
  {
    path: "/"
    element: <App />
  }
]);
Example: Below is an example of creating a basic Navbar using React Router v6.
CSS
* {
padding: 0;
margin: 0;
}
body {
font-family: system-ui;
}
nav {
padding: 10px;
margin-bottom: 10px;
background: green;
}
ul {
list-style-type: none;
}
li {
display: inline;
margin-right: 20px;
}
a {
text-decoration: none;
color: white;
}
a:hover {
color: #eee;
}
|
Javascript
import { Link } from 'react-router-dom';
const Navbar = () => {
return (
<nav>
<ul>
<li><Link to="/">Home</Link></li>
<li><Link to="/about">About</Link></li>
<li><Link to="/projects">Projects</Link></li>
<li><Link to="/contact">Contact</Link></li>
</ul>
</nav>
);
}
export default Navbar;
|
Javascript
import React from 'react'
import ReactDOM from 'react-dom/client'
import {
RouterProvider,
createBrowserRouter
} from 'react-router-dom'
import App from './App'
import Home from './Home'
import About from './About'
import Projects from './Projects'
import Contact from './Contact'
const router = createBrowserRouter([
{
path: '/',
element: <App />,
children: [
{
path: '/',
element: <Home />,
},
{
path: '/about',
element: <About />,
},
{
path: '/projects',
element: <Projects />,
},
{
path: '/contact',
element: <Contact />,
},
]
}
]);
ReactDOM.createRoot(document.getElementById('root')).render(
<RouterProvider router={router}>
<App />
</RouterProvider>
)
|
Javascript
import { Outlet } from "react-router-dom";
import "./App.css";
import Navbar from "./NavBar";
const App = () => {
return (
<>
<Navbar />
<Outlet />
</>
);
};
export default App;
|
Javascript
const Home = () => {
return <div>Home</div>;
}
export default Home;
|
Javascript
const About = () => {
return <div>About</div>;
}
export default About;
|
Javascript
const Projects = () => {
return <div>Projects</div>;
}
export default Projects;
|
Javascript
const Contact = () => {
return <div>Contact</div>;
}
export default Contact;
|
Start your application using the following command.
npm start
Output:
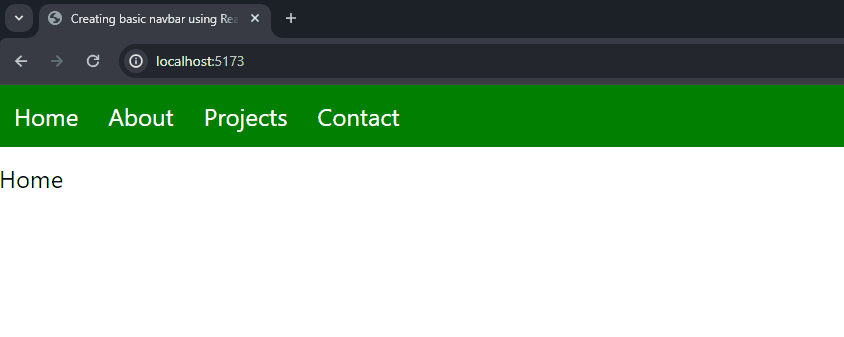
Basic NavBar
Example 2: Below is an example of creating a Navabr using React Router v6 and NavLink.
CSS
* {
padding: 0;
margin: 0;
}
body {
font-family: system-ui;
}
nav {
padding: 10px;
margin-bottom: 10px;
background: green;
}
ul {
list-style-type: none;
}
li {
display: inline;
margin-right: 20px;
}
a {
text-decoration: none;
color: white;
}
a:hover {
color: #eee;
}
a.active {
text-decoration: underline;
}
|
Javascript
import { NavLink } from 'react-router-dom';
const Navbar = () => {
return (
<nav>
<ul>
<li><NavLink to="/">Home</NavLink></li>
<li><NavLink to="/about">About</NavLink></li>
<li><NavLink to="/projects">Projects</NavLink></li>
<li><NavLink to="/contact">Contact</NavLink></li>
</ul>
</nav>
);
}
export default Navbar;
|
Javascript
const Home = () => {
return <div>Home</div>;
}
export default Home;
|
Javascript
const About = () => {
return <div>About</div>;
}
export default About;
|
Javascript
const Projects = () => {
return <div>Projects</div>;
}
export default Projects;
|
Javascript
const Contact = () => {
return <div>Contact</div>;
}
export default Contact;
|
Output:
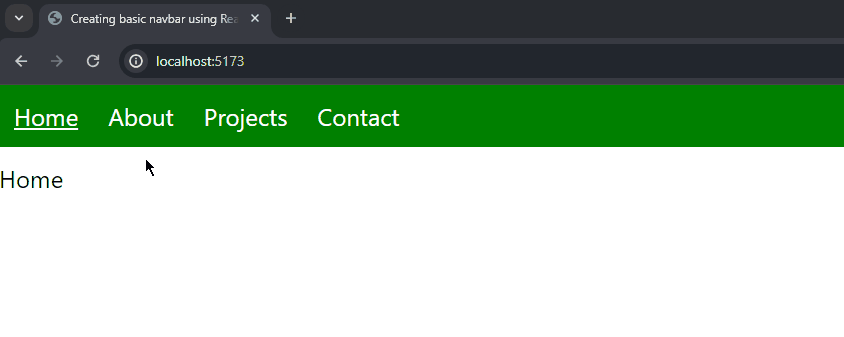
Using Navlink
createRoutesFromElements:
If you do not like the syntax to create routes from these objects then we can also use <Route> element instead of objects. To do this, we will call another function in createBrowserRouter which is createRoutesFromElements and in this function, we will set up the routes.
Example: Below is an sample example of creaRoutesElements.
Javascript
import React from "react";
import ReactDOM from "react-dom/client";
import App from "./App";
import Home from "./Home";
import About from "./About";
import Projects from "./Projects";
import Contact from "./Contact";
import {
RouterProvider,
createBrowserRouter,
createRoutesFromElements,
Route,
} from "react-router-dom";
const router = createBrowserRouter(
createRoutesFromElements(
<Route path="/" element={<App />}>
<Route path="/" element={<Home />} />
<Route path="/about" element={<About />} />
<Route path="/projects" element={<Projects />} />
<Route path="/contact" element={<Contact />} />
</Route>
)
);
ReactDOM.createRoot(document.getElementById("root")).render(
<RouterProvider router={router}>
<App />
</RouterProvider>
);
|
Output:
Output
Share your thoughts in the comments
Please Login to comment...