Build a Todo List App using VueJS
Last Updated :
02 May, 2024
This article provides an in-depth exploration of creating a Todo List application using Vue.js. It covers various aspects of building the application, whether you’re new to Vue.js or looking to expand your skills, this comprehensive guide offers valuable insights and practical instructions to help you create a fully functional Todo List application.
Steps to setup the ToDo list App Project
Step 1: Initialize Vue Project
npm install -g @vue/cli
vue create todo-list-vue
cd todo-list-vue
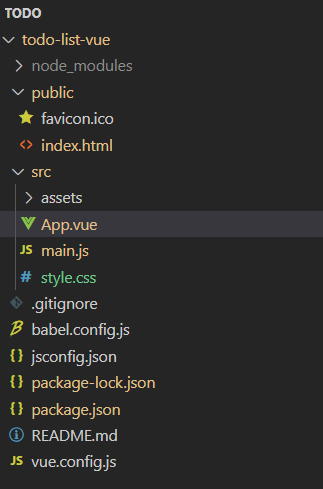
Project Structure:
Package.json file:
"dependencies": {
        "core-js": "^3.8.3",
        "vue": "^3.4.24"
      },
Approach
- Event Handling: Integrated Vue.js event handling for tasks such as adding, editing, and deleting.
- Dynamic Rendering: Used Vue.js directives like v-for for dynamic rendering of tasks and v-bind for conditional styling.
- State Management: Managed application state using Vue.js data properties for efficient data handling.
- Table Layout: Implemented a table-like layout using CSS Grid for the task list.
Example: This example shows the creation of todo app in vuejs.
CSS
/* style.css */
header {
  background-color: rgb(48, 47, 47);
  color: white;
  padding: 10px 0;
}

.navbar {
  display: flex;
  justify-content: center;
}

.logo img {
  height: 40px;
  width: auto;
}

/* Todo list styles */
#app {
  font-family: Arial, sans-serif;
}

.container {
  margin: 20px auto;
  max-width: 600px;
}

.title {
  text-align: center;
  font-size: 36px;
  font-weight: bold;
}

hr {
  border: 1px solid #ccc;
}

.input-group {
  display: flex;
  justify-content: space-between;
  align-items: center;
  margin-bottom: 20px;
}

.form-control {
  flex: 1;
  padding: 10px;
  border-radius: 5px;
  border: 1px solid #ccc;
  margin-right: 10px;
}

.btn-success {
  border-radius: 5px;
  padding: 10px 20px;
  background-color: #28a745;
  color: white;
  border: none;
  cursor: pointer;
}

.todo-table {
  border: 1px solid #ccc;
  border-radius: 5px;
  overflow: hidden;
}

.table-header {
  display: flex;
  background-color: #f0f0f0;
  padding: 10px;
}

.table-cell {
  flex: 1;
  padding: 10px;
  font-size: 18px;
}

.table-body {
  display: grid;
}

.table-row {
  display: flex;
  border-top: 1px solid #ccc;
}

.even-row {
  background-color: #f9f9f9;
}

.completed {
  text-decoration: line-through;
}

.completed-cell {
  color: #888;
}

.btn {
  padding: 10px 20px;
  border-radius: 5px;
  cursor: pointer;
}

.btn-primary {
  background-color: #007bff;
  color: white;
  border: none;
}

.btn-info {
  background-color: #17a2b8;
  color: white;
  border: none;
}

.btn-danger {
  background-color: #dc3545;
  color: white;
  border: none;
}
button{
margin-left:3px;
}
//App.vue

<template>
  <div id="app">
    <header>
      <nav class="navbar">
        <div class="logo">
          <img src=
"https://media.geeksforgeeks.org/gfg-gg-logo.svg"
alt="GeeksforGeeks logo">
        </div>
      </nav>
    </header>
    <div class="container">
      <h1 class="title">TODO LIST</h1>
      <hr>
      <div class="input-group">
        <input type="text"
        class="form-control"
        placeholder="Add item..."
        v-model="userInput" @keyup.enter="addItem">
        <button class="btn btn-success"
        @click="addItem">ADD</button>
      </div>
      <div class="todo-table">
        <div class="table-header">
          <div class="table-cell">Task</div>
          <div class="table-cell">Actions</div>
        </div>
        <div class="table-body">
          <div class="table-row" v-for="(item, index) in filteredList"
          :key="index" :class="{ 'even-row':
          index % 2 === 0, 'completed': item.completed }">
            <div class="table-cell" :class="{ 'completed-cell':
            item.completed }">{{ item.value }}</div>
            <div class="table-cell">
              <button class="btn btn-primary"
              @click="toggleCompleted(index)">
                {{ item.completed ? 'Undo' : 'Complete' }}
              </button>
              <button class="btn btn-info"
              @click="editItem(index)">Edit</button>
              <button class="btn btn-danger"
              @click="deleteItem(index)">Delete</button>
            </div>
          </div>
        </div>
      </div>
    </div>
  </div>
</template>

<script>
export default {
  name: 'App',
  data() {
    return {
      userInput: '',
      searchInput: '',
      list: []
    };
  },
  computed: {
    filteredList() {
      return this.list.filter(item => item.value.toLowerCase()
      .includes(this.searchInput.toLowerCase()));
    }
  },
  methods: {
    addItem() {
      if (this.userInput.trim() !== '') {
        const newItem = {
          id: Math.random(),
          value: this.userInput.trim(),
          completed: false
        };
        this.list.push(newItem);
        this.userInput = '';
      }
    },
    deleteItem(index) {
      this.list.splice(index, 1);
    },
    editItem(index) {
      const editedTodo = prompt('Edit the todo:');
      if (editedTodo !== null && editedTodo.trim() !== '') {
        this.list[index].value = editedTodo.trim();
      }
    },
    toggleCompleted(index) {
      this.list[index].completed = !this.list[index].completed;
    }
  }
};
</script>
<style src="./style.css">
</style>
import Vue from "vue";
import App from "./App.vue";
import "./styler.css";
Vue.config.productionTip = false;

new Vue({
  render: (h) => h(App),
}).$mount("#app");
Run the Development Server: Start the development server. This will compile your Vue.js code and launch a local server.
npm run serve
Once the server is running, open your web browser and go to http://localhost:8080 (or whatever port is specified in the terminal). You should see your Vue.js Todo List application running.
Output:
Share your thoughts in the comments
Please Login to comment...