Build a To-Do application Using Django, React and Tailwind
Last Updated :
06 Mar, 2024
This article will guide you in creating a To-Do application using React and Tailwind with the Django Framework. We’ll explore the integration of Django, React, and Tailwind, and go through the step-by-step process of implementing the To-Do application.
What is a To-Do application?
A To-Do application, also known as a task management or productivity app, is a software tool designed to help users organize, prioritize, and manage their tasks or activities. These applications are commonly used for personal and professional task management to enhance productivity and efficiency.
To-Do application Using Django, React and Tailwind
Here, is the step-by-step implementation of the To-Do application using React, Tailwind, and Django Framework in Python. Here, we will cover the article in 2 parts, frontend and then backend.
Backend Using Django
To start the project and app use this command
django-admin startproject book_backend
cd todo_backend
python manage.py startapp todos
Now add this app to the ‘settings.py’
INSTALLED_APPS = [
    'django.contrib.admin',
    'django.contrib.auth',
    'django.contrib.contenttypes',
    'django.contrib.sessions',
    'django.contrib.messages',
    'django.contrib.staticfiles',
    'todos',
    'rest_framework',
]
For install the rest_framework run the below command
pip install django-cors-headers
File Strutrue:
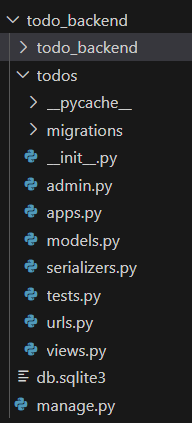
File Strcutrue :
Setting Necessary Files
models.py : below code defines a Django model named `Task` with two fields: a character field `task` with a maximum length of 100 characters, and a boolean field `completed` with a default value of `False`.
Python3
from django.db import models
class Task (models.Model):
task = models.CharField(max_length=100)
completed = models.BooleanField(default=False)
|
views.py : Below code defines several Django views using the Django Rest Framework. The `home` view retrieves all tasks from the `Task` model, serializes them using `TaskSerializer`, and returns the serialized data as a response. The `markCompleted` view marks a specific task as completed, the `postTask` view creates a new task, and the `deleteTask` view deletes a task based on the provided primary key.
Python3
from django.shortcuts import render
from rest_framework.decorators import api_view
from rest_framework.response import Response
from rest_framework import status
from .models import *
from .serializers import *
@api_view(['GET'])
def home(request):
taskobj = Task.objects.all()
print(taskobj)
serializer = TaskSerializer(taskobj, many=True)
return Response({'status': 200, 'payload': serializer.data})
@api_view(['POST'])
def markCompleted(request, pk):
try:
instance = Task.objects.get(pk=pk)
except Task.DoesNotExist:
return Response(status=status.HTTP_204_NO_CONTENT)
instance.completed = True
instance.save()
return Response(status=status.HTTP_204_NO_CONTENT)
@api_view(['POST'])
def postTask(request):
serializer = TaskSerializer(data=request.data)
if serializer.is_valid():
serializer.save()
return Response(serializer.data, status=status.HTTP_201_CREATED)
@api_view(['DELETE'])
def deleteTask(request, pk):
try:
instance = Task.objects.get(pk=pk)
except Task.DoesNotExist:
return Response(status=status.HTTP_404_NOT_FOUND)
instance.delete()
return Response(status=status.HTTP_204_NO_CONTENT)
|
serializers.py: below code defines a Django Rest Framework serializer named `TaskSerializer`, which inherits from `serializers.ModelSerializer`. It specifies the model as `Task` and includes all fields from the model in the serialization.
Python3
from rest_framework import serializers
from .models import *
class TaskSerializer(serializers.ModelSerializer):
class Meta:
model = Task
fields = '__all__'
|
todo_backend/urls.py : Below code configures Django urlpatterns, directing the root URL to include the URLs defined in the ‘todos.urls’ module and providing access to the Django admin interface at the ‘/admin/’ path.
Python3
from django.contrib import admin
from django.urls import path,include
urlpatterns = [
path('', include('todos.urls')),
path('admin/', admin.site.urls),
]
|
todos/urls.py : Below code configures Django urlpatterns for the ‘todos’ app, linking specific paths to respective views such as ‘home’, ‘postTask’, ‘deleteTask’, and ‘markCompleted’.
Python3
from .views import *
from django.urls import path
urlpatterns = [
path('', home),
path('task', postTask),
path('task/delete/<int:pk>/', deleteTask),
path('task/mark/<int:pk>/', markCompleted)
]
|
admin.py : Here we register our model.
Python3
from django.contrib import admin
from .models import *
admin.site.register(Task)
|
Frontend Using React + Tailwind
To start the project in react use this command
npx create-react-app todo_frontend
cd todo_frontend
Install the necessary library tailwindcss using the below command
npm install tailwindcss
File Structure :
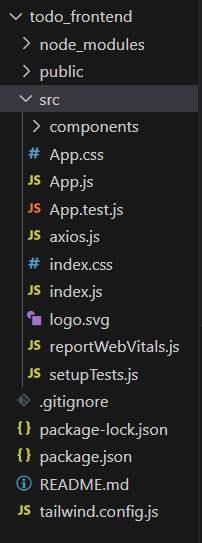
File Strcutrue :
Creating User InterFace
App.css : below code of CSS styling for a React application. It defines styles for various elements within the app, such as centering text, setting the height and animation for the app logo, styling the header with a background color, and applying animation to spin the logo. The styles are designed for a visually appealing and responsive user interface.
CSS
.App {
text-align: center;
}
.App-logo {
height: 40vmin;
pointer-events: none;
}
@media (prefers-reduced-motion: no-preference) {
.App-logo {
animation: App-logo-spin infinite 20s linear;
}
}
.App-header {
background-color: #282c34;
min-height: 100vh;
display: flex;
flex-direction: column;
align-items: center;
justify-content: center;
font-size: calc(10px + 2vmin);
color: white;
}
.App-link {
color: #61dafb;
}
@keyframes App-logo-spin {
from {
transform: rotate(0deg);
}
to {
transform: rotate(360deg);
}
}
|
App.js : `App` component in this React code manages a to-do list application. It fetches tasks on mount, allows adding tasks, and provides functionality for deleting and marking tasks as completed. The UI includes components for inputting tasks (`AddTask`) and displaying/managing tasks (`TaskView`).
Javascript
import './App.css';
import { useState, useEffect } from 'react';
import axios from '../src/axios'
import AddTask from './components/AddTask';
import TaskView from './components/TaskView';
function App() {
const [allTasks, setAllTasks] = useState([]);
const [query, setQuery] = useState("");
useEffect(() => {
axios.get("").then((res) => setAllTasks(res.data.payload));
}, []);
const handleDelete = (id) => {
axios
.delete(`/task/delete/${id}/`)
.then(() => {
setAllTasks((prevTasks) => prevTasks.filter((task) => task.id !== id));
})
.catch((error) => {
console.error("Error deleting task:", error);
});
};
const markCompleted = (id) => {
axios
.post(`/task/mark/${id}/`)
.then(() => {
setAllTasks((prevTasks) =>
prevTasks.map((task) =>
task.id === id ? { ...task, completed: true } : task
)
);
})
.catch((error) => {
console.error("Error marking task as completed:", error);
});
};
const postTask = () => {
axios
.post("/task", { task: query })
.then((res) => {
setQuery("");
setAllTasks((prevTasks) => [...prevTasks, res.data]);
})
.catch((error) => {
console.error("Error adding task:", error);
});
};
return (
<div>
<AddTask query={query} onInputChange={setQuery} onPostTask={postTask} />
<TaskView tasks={allTasks} onDelete={handleDelete} onMarkCompleted={markCompleted} />
</div>
);
};
export default App;
|
App.test.js: This React testing script uses `@testing-library/react` to render the `App` component and asserts that an element with the text “learn react” is present in the rendered output.
Python3
import { render, screen } from '@testing-library/react';
import App from './App'
test('renders learn react link', ()= > {
render( < App / >)
const linkElement=screen.getByText(/learn react/i)
expect(linkElement).toBeInTheDocument()
})
|
index.css : These `@import` statements bring in the base, components, and utilities stylesheets of Tailwind CSS, enabling the use of its comprehensive utility classes in a project’s styling.
CSS
@import 'tailwindcss/base';
@import 'tailwindcss/components';
@import 'tailwindcss/utilities';
|
index.js : below code initializes a React root using `ReactDOM.createRoot` and renders the `App` component within a `React.StrictMode` wrapper. Additionally, it includes a call to `reportWebVitals` for performance measurement.
Javascript
import React from 'react';
import ReactDOM from 'react-dom/client';
import './index.css';
import App from './App';
import reportWebVitals from './reportWebVitals';
const root = ReactDOM.createRoot(document.getElementById('root'));
root.render(
<React.StrictMode>
<App />
</React.StrictMode>
);
reportWebVitals();
|
Deployement of the Project
Run the server with the help of following command:
python3 manage.py runserver
npm start
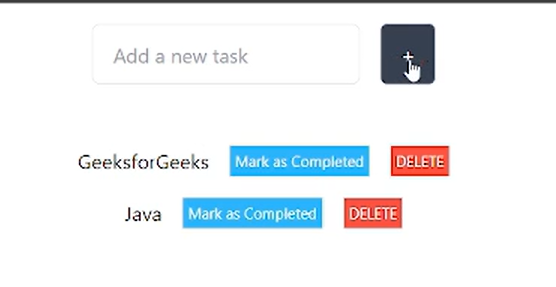
Output:
Video Demonstration
Share your thoughts in the comments
Please Login to comment...