Create a Counter App Using React, Tailwind and Django Framework
Last Updated :
07 Mar, 2024
This article will guide you in creating a Counter using React and Tailwind with the Django Framework. We’ll explore the integration of Django, React, and Tailwind, and go through the step-by-step process of implementing the Counter in Python using the Django Framework.
What is Counter App?
The Counter app is a straightforward tool designed for easy numeric tracking. Its minimalist interface prominently features a displayed number, accompanied by two intuitive buttons. Users can effortlessly increase the count by pressing the increment button or decrease it with the decrement button, providing a seamless and user-friendly experience for managing numerical values on the go.
Counter using React and Tailwind using Django Framework
Here, is the step-by-step implementation of Counter using React, Tailwind, and Django Framework. Here, we will cover the article in 2 parts, frontend and then backend.
Backend Using Django
To start the project and app use this command
django-admin startproject calculator_backend
cd calculator_backend
python manage.py startapp counter
Now add this app to the ‘settings.py’
INSTALLED_APPS = [
    'django.contrib.admin',
    'django.contrib.auth',
    'django.contrib.contenttypes',
    'django.contrib.sessions',
    'django.contrib.messages',
    'django.contrib.staticfiles',
    'rest_framework',
    'corsheaders',
    'counter'
]
To install the corsheaders run the below command in your terminal:
pip install django-cors-headers
File Structure
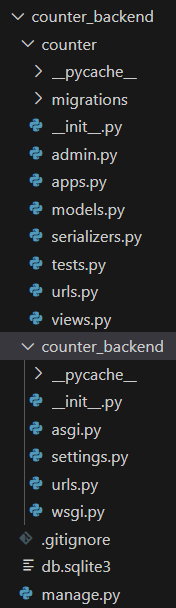
File Strcuture
Setting Necessary Files
models.py : below code defines a Django model named “Counter” with a single field “value” of type IntegerField, set with a default value of 50. This model can be used to represent a counter with an initial value 50.
Python3
from django.db import models
class Counter(models.Model):
value = models.IntegerField(default=50)
|
views.py :In below code Django REST Framework views define API endpoints for retrieving, incrementing, decrementing, and resetting a counter. The counter is represented by the “Counter” model, and the operations are performed based on HTTP POST requests, with corresponding responses containing messages and the updated counter value.
Python3
from rest_framework.decorators import api_view
from rest_framework.response import Response
from rest_framework import status
from django.shortcuts import get_object_or_404
from .models import Counter
from .serializers import CounterSerializer
@api_view(['GET'])
def get_counter(request):
counter_instance = Counter.objects.first()
if counter_instance is None:
counter_instance = Counter.objects.create(value=50)
serializer = CounterSerializer(counter_instance)
return Response(serializer.data, status=status.HTTP_200_OK)
@api_view(['POST'])
def increment_counter(request):
counter = get_object_or_404(Counter, pk=1)
counter.value += 1
counter.save()
serializer = CounterSerializer(counter)
return Response({'message': 'Counter incremented successfully', 'value': serializer.data['value']})
@api_view(['POST'])
def decrement_counter(request):
counter = get_object_or_404(Counter, pk=1)
counter.value -= 1
counter.save()
serializer = CounterSerializer(counter)
return Response({'message': 'Counter decremented successfully', 'value': serializer.data['value']})
@api_view(['POST'])
def reset_counter(request):
counter = get_object_or_404(Counter, pk=1)
counter.value = 0
counter.save()
serializer = CounterSerializer(counter)
return Response({'message': 'Counter reset successfully', 'value': serializer.data['value']})
|
serializers.py : In below code Django REST Framework serializer, “CounterSerializer,” is configured to serialize the “Counter” model, including only the ‘value’ field. It enables conversion between the Counter model instances and their JSON representations for use in the API views.
Python3
from rest_framework import serializers
from .models import Counter
class CounterSerializer(serializers.ModelSerializer):
class Meta:
model = Counter
fields = ['value']
|
counter_backend/urls.py : In below code Django URL configuration includes the default admin URLs and routes any URL starting with ‘api/’ to the URLs defined in the ‘counter.urls’ module, allowing the integration of the counter app’s API endpoints.
Python3
from django.contrib import admin
from django.urls import path, include
urlpatterns = [
path('admin/', admin.site.urls),
path('api/', include('counter.urls')),
]
|
counter/urls.py : In below code Django URL configuration for the ‘counter’ app maps specific paths to corresponding views: ‘get-counter/’ for retrieving the counter, ‘increment-counter/’ for incrementing it, ‘decrement-counter/’ for decrementing it, and ‘reset-counter/’ for resetting it
Python3
from django.urls import path
from .views import get_counter, increment_counter, decrement_counter,reset_counter
urlpatterns = [
path('get-counter/', get_counter, name='get_counter'),
path('increment-counter/', increment_counter, name='increment_counter'),
path('decrement-counter/', decrement_counter, name='decrement_counter'),
path('reset-counter/', reset_counter, name='reset_counter'),
]
|
Frontend Using React + Tailwind
To start the project in react use this command
npx create-react-app counter_frontend
cd counter_frontend
Install the necessary library tailwindcss using the below command
npm install tailwindcss
File Structure
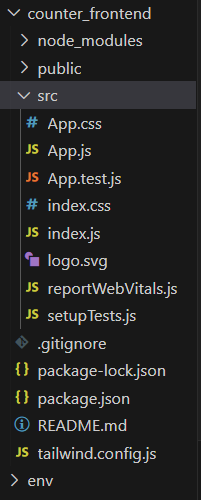
File Structure
Creating User InterFace
App.css: In below code this is a set of CSS styles for a React application or website. It includes styles for centering the content, setting the height and animation for a logo, defining the appearance of the header, and specifying colors and fonts. The keyframes section defines a spin animation for the logo, which rotates continuously from 0 to 360 degrees.
CSS
.App {
text-align: center;
}
.App-logo {
height: 40vmin;
pointer-events: none;
}
@media (prefers-reduced-motion: no-preference) {
.App-logo {
animation: App-logo-spin infinite 20s linear;
}
}
.App-header {
background-color: #282c34;
min-height: 100vh;
display: flex;
flex-direction: column;
align-items: center;
justify-content: center;
font-size: calc(10px + 2vmin);
color: white;
}
.App-link {
color: #61dafb;
}
@keyframes App-logo-spin {
from {
transform: rotate(0deg);
}
to {
transform: rotate(360deg);
}
}
|
App.js: In below code React component, ‘Counter.js’, uses the state hook to manage a counter value, fetches the initial value from a Django API endpoint using Axios in the ‘useEffect’ hook, and provides buttons to increment, decrement, and reset the counter through corresponding API calls. The component’s UI is styled with Tailwind CSS.
Javascript
import React, { useState, useEffect } from 'react';
import axios from 'axios'
const App = () => {
const [counterValue, setCounterValue] = useState(50);
useEffect(() => {
},[])
const handleIncrement = () => {
}
const handleDecrement = () => {
}
const handleReset = () => {
}
return (
<div className='p-40 max-w-3xl mx-auto flex space-x-4'>
<button className='bg-blue-500 text-white p-4 rounded-lg' onClick={handleIncrement}>Increment</button>
<p className='border shadow-md max-w-fit p-6 rounded-lg text-2xl'>Counter Value: {counterValue}</p>
<button className='bg-red-500 text-white p-4 rounded-lg' onClick={handleDecrement}>Decrement</button>
<button className='bg-green-400 p-4 px-10 rounded-lg' onClick={handleReset}>Reset</button>
</div>
);
};
export default App;
|
index.css: below code lines import Tailwind CSS base, components, and utilities styles, facilitating the use of predefined utility classes in your project’s stylesheets.
CSS
@import 'tailwindcss/base';
@import 'tailwindcss/components';
@import 'tailwindcss/utilities';
|
index.js: This code sets up a React root using ReactDOM’s `createRoot` function, renders the `<App />` component inside a `<React.StrictMode>`, and includes a call to `reportWebVitals` for performance measurement. The application’s main entry point is ‘index.js’.
Javascript
import React from 'react';
import ReactDOM from 'react-dom/client';
import './index.css';
import App from './App';
import reportWebVitals from './reportWebVitals';
const root = ReactDOM.createRoot(document.getElementById('root'));
root.render(
<React.StrictMode>
<App />
</React.StrictMode>
);
reportWebVitals();
|
Deployement of the Project
Run the server with the help of following command:
python3 manage.py runserver
npm start
Output
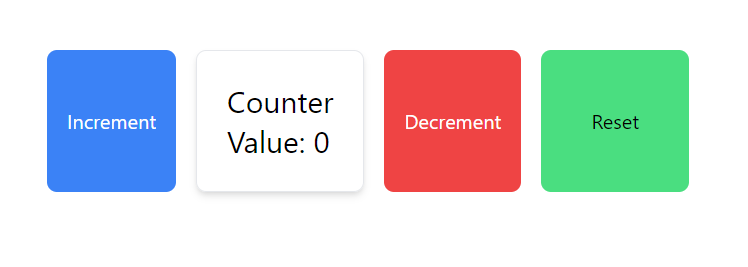
Create a Counter using React and Tailwind using Django Framework
Share your thoughts in the comments
Please Login to comment...