Authorization Types supported by Postman
Last Updated :
25 Dec, 2023
Postman is an API(application programming interface) development tool that helps to build, test and modify APIs. Authorization in Postman means authenticating and validating the identity of a user or the application that is making an API request. In this tutorial, we will see different types of Authorization supported by Postman.
Need for Authorization?
APIs use authorization to ensure that client requests access data securely. This can involve authenticating the sender of a request and attesting that they’ve authorization to enter or exploit the applicable data. However, you can cherry-pick from a variety of auth models, If you are constructing an API. However, the demanded authorization will be specified by the API provider, If you are incorporating a third-party API. You can pass auth details along with any request you shoot in Postman. Auth data can be contained in the header, body, or as parameters to a request. However, Postman will automatically colonize the applicable parts of the request for your chosen auth type, if you enter your auth details in the Authorization tab.
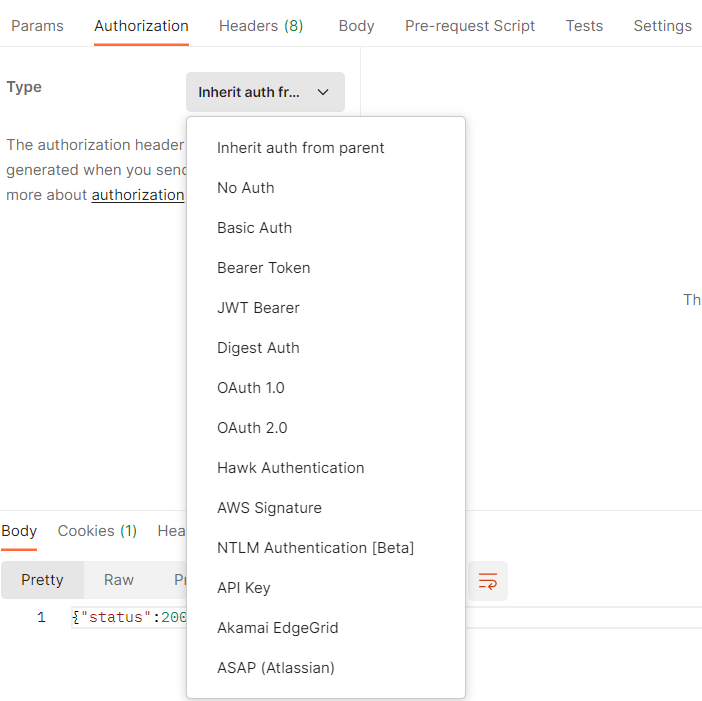
The following authorization types shown in the image are supported by postman are shown below, we will discuss about most widely used authorization type in this article:
1. No auth:
No Auth is the simplest type of authorization where No authentication is applied to the request. This is useful for APIs that are public or do not require authentication. Select No Auth from the Authorization tab Type dropdown list.
2. API auth:
With API key auth, you ship a key-value pair to the API both inside the request headers or question parameters. In the request Authorization tab, select API Key from the Type listing. Enter your key name and price, and pick out either Header or Query Params from the Add to dropdown listing. You can keep your values in variables for extra security. Postman will append the applicable facts in your request Headers or the URL query string.
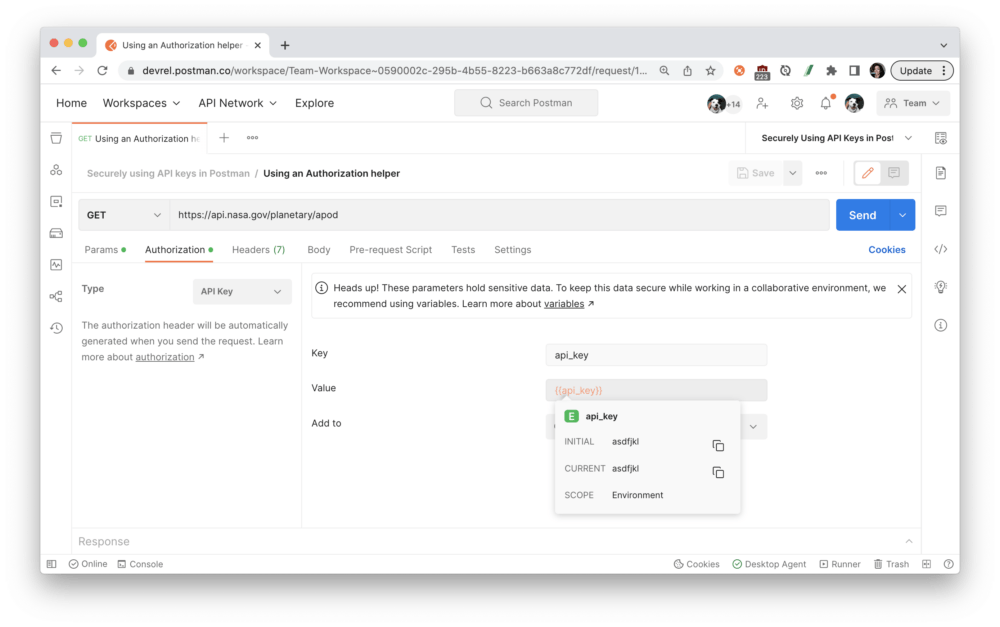
api-key Auth.
3. Basic Auth
Basic Auth is the most basic type of authentication. Basic Authentication is a simple authentication mechanism where the client includes a username and password in the request header.
Step-by-Step guide for setting up Basic Authentication
- Open Postman – Create a new request or open an existing one.
- Select Authorization Tab – In the request builder, go to the “Authorization” tab.
- Choose “Basic Auth” as the Type – Select “Basic Auth.” Type Authentication
- Enter Username and Password – Enter your API username and password in the Username and Password fields. For extra security, store these in variables.

4. Digest Auth
Digest Authentication is a more secure form of HTTP authentication when making API requests. Digest Authentication provides a more secure way of transmitting credentials compared to Basic Authentication because it involves hashing the password and other information. As with any authentication method, use HTTPS to encrypt the communication between the client and the server for enhanced security.
Step-by-Step guide for setting up Digest Authentication:
- Open Postman – Create a new request or open an existing one.
- Select Authorization Tab – In the request builder, go to the “Authorization” tab
- Choose “Digest Auth” as the Type – Select “Digest Auth.” Type Authentication.
- Enter Username and Password – Entering the username and password. Postman will handle the calculation of the hash value and include it in the “Authorization” header in subsequent requests.
5. Bearer Token
Bearer Token authentication is commonly used for securing API endpoints. In this method, a token (commonly a JSON Web Token or JWT) is included in the request to represent the authorization to access a specific resource . Bearer Tokens should be treated as sensitive information. Keep them secure, and avoid exposing them in public spaces. Ensure that the Bearer Token is valid and has the necessary scopes to access the desired resources on the API.
Step-by-Step guide for setting up Bearer Authentication:
- Open Postman – Create a new request or open an existing one.
- Select Authorization Tab – In the request builder, go to the “Authorization” tab
- Choose “Bearer Token Auth” as the Type – Select “Bearer Token Auth.” Type Authentication.
- Enter the Token – Provide the Bearer Token in the designated field. This token is typically obtained through an authentication process (e.g., OAuth 2.0) provided by the API service.

6. OAuth
OAuth is a widely used authorization standard that provides a secure way to access APIs. It allows users to grant third-party applications limited access to their resources without sharing their credentials directly. OAuth is commonly used for mobile and Web Applications. During the Process, requests is ecxhanged between client, user and service Provider.
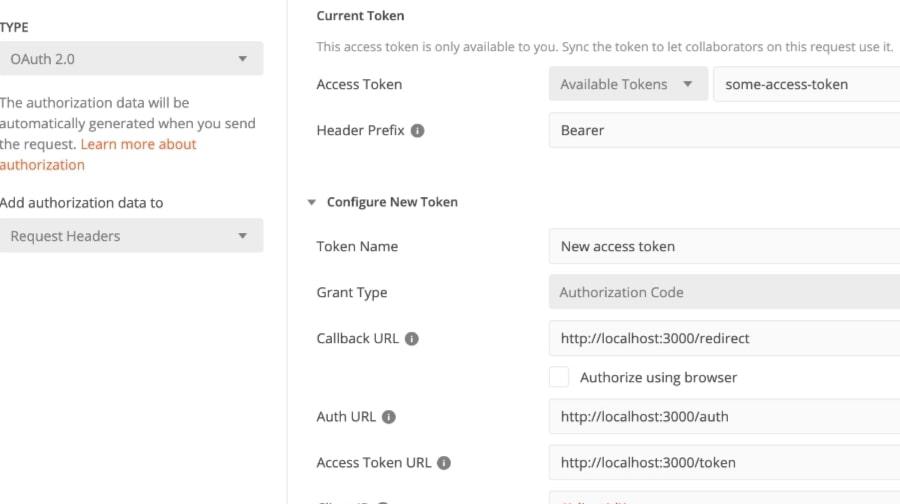
OAuth 2.0
Share your thoughts in the comments
Please Login to comment...