Angular Basics: Using the HostListener Decorator to Detect Changes for a Specific DOM Element
Last Updated :
15 Apr, 2024
In Angular, the HostListener decorator is a powerful tool used to listen for events on the host element of a component. This enables you to interact with the DOM and respond to user actions or changes effectively. In this tutorial, we’ll learn how to use the HostListener decorator to detect changes for a specific DOM element within an Angular component.
What is HostListener Decorator?
The `HostListener` decorator in Angular is used to listen for events on the host element of a directive or component. This declares a DOM event to listen for and provides a handler method to run when that event occurs. It allows us to detect changes, any user interactions or any other events on that element. Angular invokes the supplied handler method when the host element emits the specified event and updates the bound element with the result.
Syntax:
@HostListener(eventName, [options])
- eventName: This is a string representing the DOM event you want to listen for.
- [options]: This is an optional array that allows you to configure the behavior of the listener. You can specify things like the event capture phase or arguments passed to the handler method.
Approach 1: Using the Basic Approach
This is the most common use case for HostListener. You can listen to any standard DOM event supported by the browser on the component’s host element (the root element of the template). This includes events like ‘click’, ‘mouseover’, ‘keyup’, ‘focus’, ‘blur’, etc. This is suitable for handling clicks or other general events on the host element:
Syntax:
@HostListener('eventName')
onEvent() {
  // Handle event logic
}
@HostListener(eventName): This part of the decorator syntax specifies the DOM event you want to listen for on the host element. Common events include ‘click’, ‘mouseover’, ‘mouseout’, ‘keydown’, and many more.
Approach 2 : By Passing Arguments
This approach helps you access details about the event. Using this approach to listen for an event and pass a specific value from the event target. This calls the specified method with the value as an argument , allowing for more targeted event handling.
Syntax:
@HostListener('eventName', ['$event'])
onEvent(event: EventType) {
  // Access specific event properties like `event.target` or `event.clientX` (Custom logic)
}
@HostListener(eventName, [argumentList]):
- eventName: This defines the event to listen for.
- argumentList: This optional array specifies the arguments you want to receive in the event handler method. You can access data from the event object or target element as needed.
Steps to create the application
Step 1: Install the Angular CLI using the following command.
npm install -g @angular/cli
Step 2: Create a new Angular Project.
ng new new-project
cd new-project
Step 3: To start the application run the following command.
ng serve
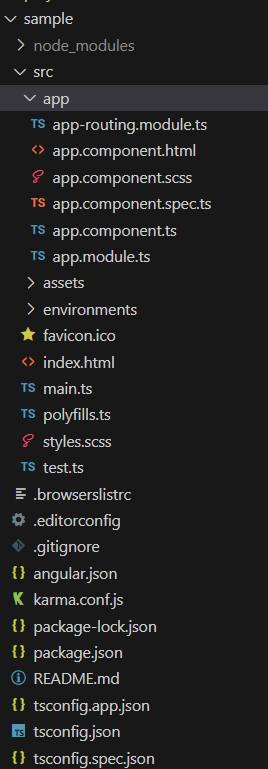
Folder Structure
Dependencies:
"dependencies": {
    "@angular/animations": "^17.3.0",
    "@angular/common": "^17.3.0",
    "@angular/compiler": "^17.3.0",
    "@angular/core": "^17.3.0",
    "@angular/forms": "^17.3.0",
    "@angular/platform-browser": "^17.3.0",
    "@angular/platform-browser-dynamic": "^17.3.0",
    "@angular/platform-server": "^17.3.0",
    "@angular/router": "^17.3.0",
    "@angular/ssr": "^17.3.0",
    "rxjs": "~7.8.0",
    "tslib": "^2.3.0",
    "zone.js": "~0.14.3"
},
"devDependencies": {
    "@angular-devkit/build-angular": "^17.3.0",
    "@angular/cli": "^17.3.0",
    "@angular/compiler-cli": "^17.3.0",
    "@types/express": "^4.17.17",
    "@types/jasmine": "~5.1.0",
    "@types/node": "^18.18.0",
    "jasmine-core": "~5.1.0",
    "karma": "~6.4.0",
    "karma-chrome-launcher": "~3.2.0",
    "karma-coverage": "~2.2.0",
    "karma-jasmine": "~5.1.0",
    "karma-jasmine-html-reporter": "~2.1.0",
    "typescript": "~5.4.2"
}
Step 4: To generate a new directive, we can use the following command.
ng generate directive sampleColorChange
Step 5 : Implementing the logic in our directive file
HTML
<!-- app.component.html -->

<p appSampleColorChange>Hightlight me and try to click me !</p>
//sample-color-change.directive.ts

import { Directive, ElementRef, HostListener } from '@angular/core';

@Directive({
    selector: '[appSampleColorChange]',
})
export class SampleColorChangeDirective {
    constructor(private el: ElementRef) { }
    clickedElement: string = '';
    @HostListener('mouseenter') onMouseEnter() {
        this.el.nativeElement.style.backgroundColor = 'green';
    }
    @HostListener('mouseleave') onMouseLeave() {
        this.el.nativeElement.style.backgroundColor = 'red';
    }
    @HostListener('click', ['$event']) onClick(event: MouseEvent) {
        console.log('Client X Position : ', event.clientX);
    }
}
Output:

Here in the above example, we have listened to mouse-enter and mouse-leave events using HostListener Directive and changed background colour of the element accordingly. On mouse enter, we have changed to green color, and on mouse leaving the element, we have changed the background colour to red. And we have also used click event, and printed ClientX (The clientX property returns the horizontal client coordinate of the mouse pointer when a mouse event occurs) position in the console as shown in the output.
Share your thoughts in the comments
Please Login to comment...