Taking screenshots is the most common method utilized to collect data when we are browsing the internet. The term “screenshot” may raise questions, so let me address them. A screenshot, also known as a screencap or screengrab, is an image that displays the content of your computer screen. These captures allow you to capture exactly what is on your screen, and they are frequently shared with others or used as a point of reference in the future. Using the shortcut “Windows key + Shift key + S” makes taking screenshots on Windows fairly easy, however, it’s not that easy on Linux.
In this article, we will learn 5 ways to take screenshots on Arch Linux, one of the commonly used Linux distributions.
5 Ways to Take Screenshots on Arch Linux
1. Keyboard Shortcuts
Using the built-in keyboard shortcuts is the most straightforward method for taking screenshots on Arch Linux. Given below are the keyboard shortcuts to take screenshots :
- PrtSc: You can take a full-screen screenshot or only a portion of the screen using this keyboard shortcut, and the screenshot is stored in the user’s home Pictures directory.
- Shift + PrtSc or Alt + PrtSc: This keyboard shortcut captures the window that is now active.
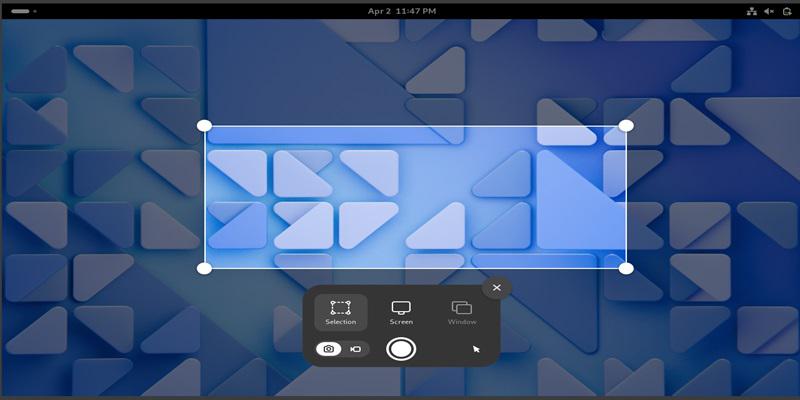
Using PrtSc keyboard shortcut
Note: Go to Pictures>Screenshots and use the following command to open the screenshot that was taken: xdg-open file_name
2. Spectacle
The second method involves utilizing the Spectacle tool, which on Arch Linux may record the full screen, a certain region, a single window, or a portion of an application window. With the spectacle screenshot tool, you may print, copy, or store your screenshots. Its parameters can also be changed to suit your needs.
Snap must first be installed in order to install Spectacle on Arch Linux. Utilize the following commands:
sudo pacman -S git
git clone https://aur.archlinux.org/snapd.git
cd snapd
makepkg -si
sudo systemctl enable --now snapd.socket
sudo ln -s /var/lib/snapd/snap /snap
Please be patient as this will take some time to complete. After snap has been installed, we can use snap to install Spectacle:
sudo snap install spectacle
reboot
For the installation to take effect, restart your computer. Next, open Spectacle by either typing the following command into a terminal or looking for it on the desktop menu:
snap run spectacle
or
spectacle
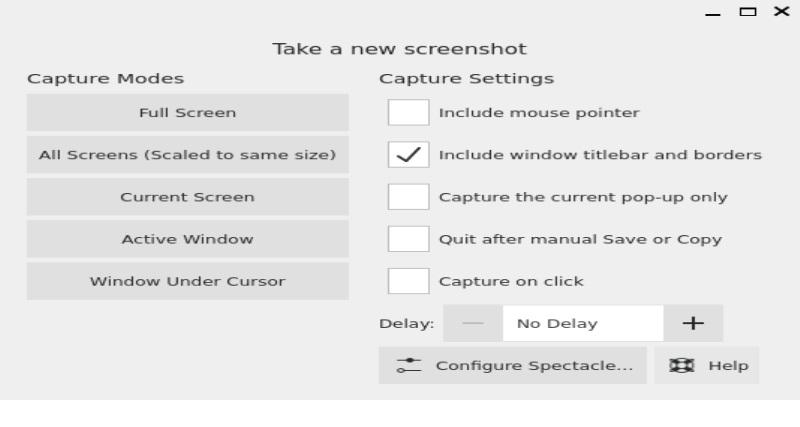
Spectacle
Use the following command to remove Spectacle from your system:
sudo snap remove spectacle
3. Flameshot
Using Flameshot, a different tool similar to Spectacle, is the third method. Use the following commands to install Flameshot on Arch Linux:
sudo pacman -S flameshot
Open Flameshot by either typing the following command into a terminal or looking for it on the desktop menu:
flameshot gui
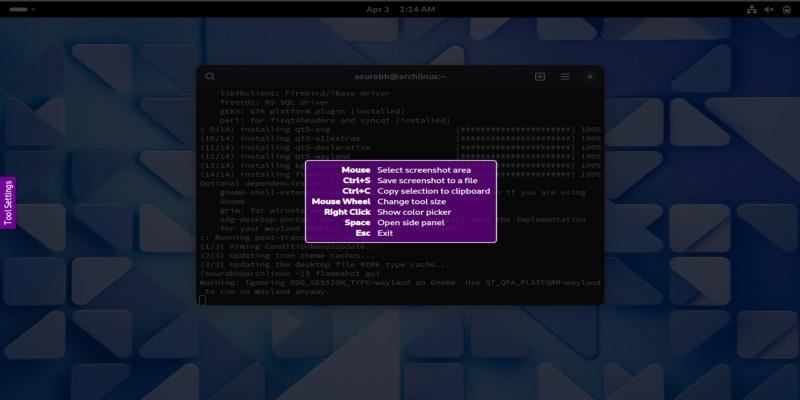
Flameshot
Use the following command to remove Flameshot from your system:
sudo pacman -Rcns flameshot
4. Ksnip Tool
Using Ksnip, a free cross-platform screenshot application, is the fourth option. You can take and modify screenshots with it. Snap needs to be installed on your machine in order to install Ksnip. On Linux, you can install apps from a central repository by using Snap. These procedures were covered in the section on the “Spectacle” tool ,follow the commands mentioned there to install snap. After snap has been installed,execute the following command to install Ksnip:
sudo snap install ksnip
Open Ksnip by either typing the following command into a terminal or looking for it on the desktop menu:
ksnip
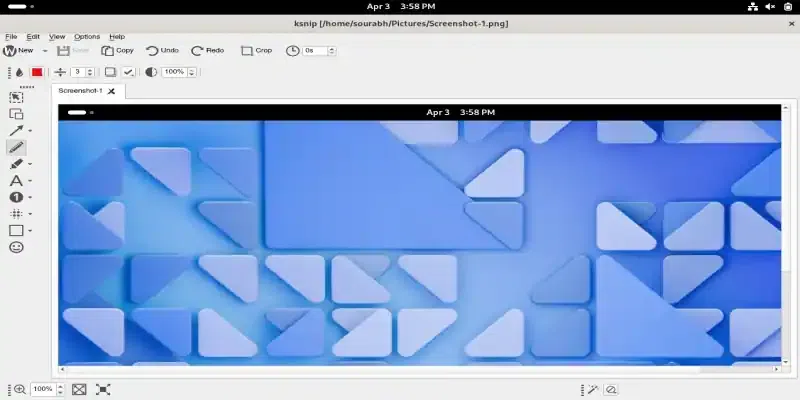
Ksnip
Use the following command to remove Ksnip from your system:
sudo snap remove ksnip
5. Using Command Line Interface
Using the Command Line Interface, or CLI, is the 5th method. With the CLI, you can snap screenshots by simply using commands like scrot and gnome.
Take Screenshot Using gnome
We can quickly take screenshots with the help of GNOME, a CLI tool.It has a graphical user interface in addition to the CLI. Use the following commands to install gnome-screenshot on Arch Linux:
sudo pacman -S gnome-screenshot
Use the following command to capture a screenshot of the entire screen:
gnome-screenshot
The aforementioned command will capture a screenshot and store it within the Pictures directory. Use the command below to snap a screenshot with a five-second delay:
gnome-screenshot -w -d 5
To personalize your screenshot, you can utilize the following parameters, which you can adjust to your preference:
- -w to record the window that is active
gnome-screenshot -w
- -a to record a section of the screen
gnome-screenshot -a
gnome-screenshot -p
gnome-screenshot -d 5
- -i to set settings interactively
gnome-screenshot -i
gnome-screenshot -f file_name
- -b to take a screenshot that includes the window border
gnome-screenshot -b
- -B to take a screenshot that does not include the window border
gnome-screenshot -B
Take Screenshot Using scrot
With the help of the CLI utility Scrot, we can quickly take screenshots. Use the following commands to install scrot on Arch Linux:
sudo pacman -S scrot
Use the following command to capture a screenshot of the entire screen:
scrot file_name
With the above command, the snapshot will be saved in the current working directory as the file name for example if the command is scrot test.png , file name is test.png iwth a PNG extension.
To personalize your screenshot, you can utilize the following parameters, which you can adjust to your preference:
- -s to seize a particular section
scrot -s test.png
- -d to establish a pause and extend the duration for capturing the picture
- -u to capture the window that is presently in use.
scrot -u -d 5 test2.png
Conclusion
In conclusion, Arch Linux several convenient methods for taking screenshots, caterings to the diverse needs and preferences of users. Regardless of the chosen method, capturing screenshots on Arch Linux is intuitive and adaptable, enhancing the overall user experience on this versatile operating system .
Share your thoughts in the comments
Please Login to comment...