Neofetch In Linux – Snap cool screenshots of your Linux
Last Updated :
10 Jun, 2023
Neofetch is a fancy, highly customizable, and aesthetic command-line system information screenshot utility tool. Written in the Bash scripting language, it works inside a terminal window, on triggering up the command it by default displays the operating system, software, and hardware of your system on the right side of the column alongside an ASCII image of the logo of your operating system on the left side of the column.
Neofetch is not a system diagnostics tool, instead, it’s a tool to show off your system configurations and specifications to other people who want to see that.
Neofetch currently supports more than 150 operating systems including Windows, Mac OS, Linux, Unix-like, and other DOS systems. Neofetch allows a wide range of customizations too, you can edit the ASCII image shown and the system information that is displayed. So, in order to experience this amazing Neofetch let’s install it hands-on.
Installation and Pre-requisites:
Neofetch requires Git and Terminal. Git is installed by default in Mac OS and Linux. Windows users can visit this link and download the appropriate file according to their system configurations. All the operating systems have terminals by default, possibly with different names but they have it.
Unix-like and Linux systems:
Note that using sudo commands requires password authentication for storage permissions.
- Ubuntu-based systems: Open a terminal window and enter the following apt command.
sudo apt install neofetch
- Debian-based systems: Open a terminal window and enter the following apt-get command.
sudo apt-get install neofetch
- Arch-based systems: Open a terminal window and enter the following pacman command.
sudo pacman -S neofetch
- Fedora-based systems: Open a terminal window and enter the following dnf command.
sudo dnf install neofetch
- Mac systems: Open a terminal window and enter the following brew command, to check if the brew is installed on your system or not type the “brew -v” command in your terminal, it should display the version number of the installed brew package in your system.
brew install neofetch
Now, type neofetch in your terminal to run Neofetch.

Neofetch inside a Ubuntu-based distro.
Windows systems:
- For Windows 10: Open PowerShell by searching in the start menu.
- For Windows 11: We have a terminal here which by default opens PowerShell instance or if it’s not there pressed that down arrow icon and select PowerShell.
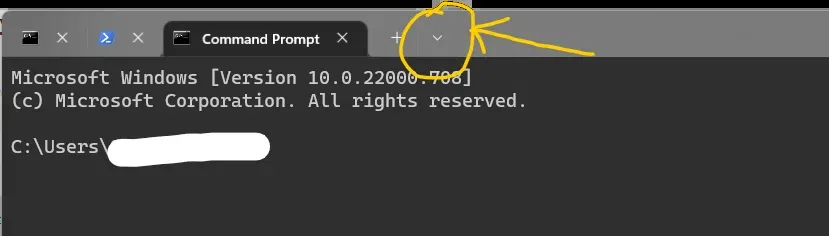
Click on that arrow and select PowerShell instance.
- Once in PowerShell, type the following command and press ENTER, in order to install scoop:
iwr -useb get.scoop.sh | iex
you might get an error stating as follows:
Just type Set-ExecutionPolicy RemoteSigned -Scope CurrentUser and press ENTER.
- Now Open the command prompt and type the following command and press ENTER:
scoop install neofetch
Now, type neofetch in the terminal to run Neofetch:

Neofetch inside windows
For customizations and tweaks:
You can change what’s displayed by using command-line flags, to know about all the accepted flags type use the following command:
neofetch --help | more.
Flags are cool but you don’t want to type those long lines, also you would like to fire up neofetch every time you open a terminal, follow the below steps:
- Open the .bashrc file inside your home directory. Dotfiles are generally hidden, go to preference and select show hidden files or alternatively press ctrl + h in your home directory to display the hidden files.
- Inside the .bashrc file to the very end and type neofetch and save the changes.
- .bashrc file runs as a program and it will trigger the neofetch command every time it loads as a new instance inside a terminal
If you have any other shell go to your shell’s rc file and type neofetch there.
Now, configure the .config file of Neofetch to set it up for what you want to see.
Windows:
Here we don’t have a config file, the file location should be like the below:
C:\Users\{user name}\scoop\apps\neofetch\7.1.0 ..(version number may vary)
open the neofetch file in any code editor of your choice and edit the contents inside the print info function, we comment out the properties that we don’t want to display using the # symbol in bash.
Unix-like and Linux:
- Inside your home directory go to the .config folder. If Dot files aren’t visible to you see above how we were able to see those.
- Open the neofetch folder.
- Open config.conf file inside the code editor of your choice and edit the contents inside the print info function, we comment out the properties that we don’t want to display using the # symbol in bash.

My custom neofetch profile
Conclusion
In this article we have discussed about the neofetch which is a powerful utility for Linux users to display the system information and create visually looking good screenshots. One can easily install it in their system by going throught this article. Overall, we can say that neofetch provides a fun and engaging experience for Linux enthusiast and system administrators alike.
Share your thoughts in the comments
Please Login to comment...