Upgrade Opencv Using Python PIP
Last Updated :
20 Feb, 2024
In this article, we will guide you through the step-by-step process of upgrading OpenCV to a specific version using Python PIP.
What is Python OpenCV?
OpenCV, or Open Source Computer Vision Library, is an open-source software developed by Intel for computer vision, image processing, and machine learning. With versatile tools and functions, it supports various programming languages like C++, Python, Java, and MATLAB, making it widely used in computer vision, robotics, and AI applications.
How To Upgrade OpenCV To Specific Version Using PIP
Step 1: Create a Virtual Environment
First, create the virtual environment using the below commands
python -m venv env
.\env\Scripts\activate.ps1
Step 2: Check Current Version
Check the current version of the OpenCV version in your system by typing the commands in the command line/terminal in your operating system.
pip show opencv-python  #Windows
pip3 show opencv-python #Mac/Linux
You can see the current version of the OpenCV library from the output, similar to the image below, after you type the above commands in the command line/terminal.
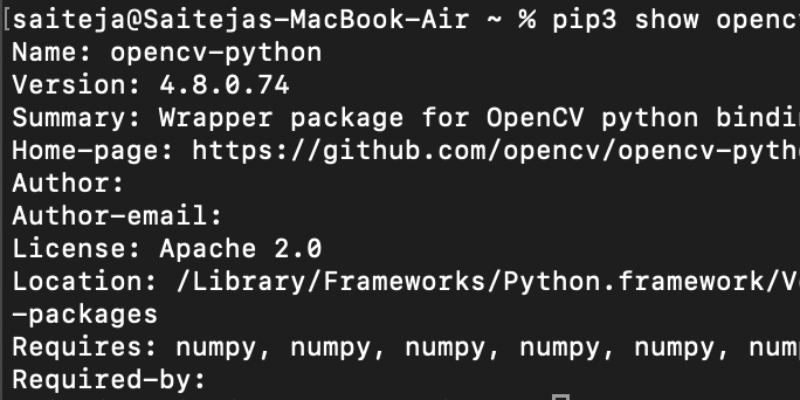
If the version you see is the version you desire, you don’t neet to upgrade it. If it’s not, follow the steps in this article to understand how to upgrade the OpenCV to specific version using pip , In this case the version you can see from the above image is Version: 4.8.0.74, Let’s say, your desired version of OpenCV that you want to use in your project is 4.9.0.80. Let’s see how to upgrade the OpenCV version from your current version to the specific version you desire.
Step 3: Upgrade Specific Version
For upgrading the OpenCV to the desired specific version, type the below commands of pip in the command line/terminal in your operating system.
pip install --upgrade opencv-python==4.9.0.80 #Windows
pip3 install --upgrade opencv-python==4.9.0.80 # Mac/Linux
You can see that after typing the above commands and clicking enter, the desired specific version of OpenCV is upgraded and installed in your operating system. Hence the desired Specific version of OpenCV library is upgraded using pip.

Code Examples of OpenCV
In this example, below Python code utilizes the OpenCV library to read an image named ‘image.jpg‘ using the imread() function. It checks if the image is loaded successfully; if not, it prints an error message. If loaded successfully, it extracts and prints the dimensions (height and width) of the image.
Python3
import cv2
image = cv2.imread('image.jpg')
if image is None:
print("Error: Failed to load image.")
else:
height, width = image.shape[:2]
print("Image Height:", height)
print("Image Width:", width)
|
Output
Error: Failed to load image.
Conclusion
In conclusion , Upgrading OpenCV to a specific version using pip is a straightforward process, ensuring compatibility with desired features and functionality. Following the steps outlined in this article will enable you to seamlessly incorporate the desired version of OpenCV into your Deep Learning projects.
Share your thoughts in the comments
Please Login to comment...