Storybook-tailwind. How should I add tailwind to storybook
Last Updated :
22 Nov, 2023
In this article, we will guide you through the process of adding Tailwind CSS to Storybook to enhance your UI development. Storybook is an open-source UI that helps developers create reusable, organized UI components with proper documentation independently. Tailwind CSS is basically a utility-first CSS framework for building rapid custom UI.
Prerequisites
Steps to add Tailwind in Storybook
Step 1: Start with creating a react application with the given command.
npx create-react-app story
Step 2: Move inside the directory(react-app) that you just created
cd story
Step 3: Install tailwindCSS via follwoing command
npm install -D tailwindcss postcss autoprefixer
Step 4: Create a file inside your src directory of project with the following name
postcss.config.js
Step 5: Update the content of “postcss.config.js” with following code.
Javascript
module.exports = {
plugins: {
tailwindcss: {},
autoprefixer: {},
}
}
|
Step 6: Generate a configuration file via following command. This command will create a file named “tailwind.config.js”.
npx tailwindcss init
Step 7: Update the code of “tailwind.conifg.js” with the following code.
Javascript
module.exports = {
content: ["./src/**/*.{html,js}"],
theme: {
extend: {},
},
plugins: [],
};
|
Step 8: All tailwind directories into the “index.css”. It is located in /src/index.css
CSS
@tailwind base;
@tailwind components;
@tailwind utilities;
|
Step 9 :Now Install Storybook inside your computer via following command.
npx storybook@latest init
Step 10: Run the project via following command
npm run storybook
Project Structure

Step 11: To create a React app component, create a file in the ‘src’ folder called ‘Customtext.js’ and add the following code.
Javascript
function Customtext() {
return (
<div className="text-green-500
text-4xl
font-bold
tracking-wider
text-center">
GeeksforGeeks
</div>
);
}
export default Customtext;
|
Step 12: Then make a storybook story and write the following code.
Javascript
import Customtext from "../Customtext";
import "../index.css";
export default {
title: "Example/Customtext",
component: Customtext,};
const Templateone = () => (
<Customtext />);
const Templatetwo = () => (
<Customtext />);
export const Primary = Templateone.bind(
{});
export const Secondary =
Templatetwo.bind({});
|
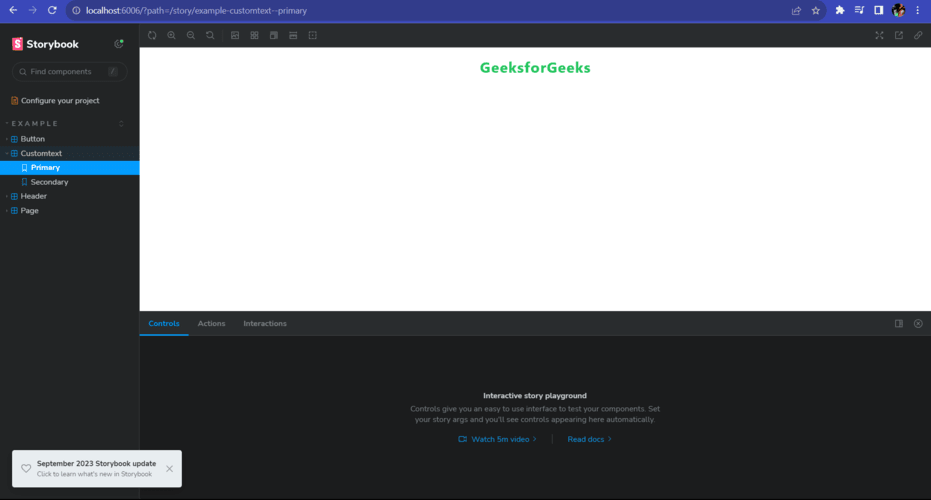
Output:
Share your thoughts in the comments
Please Login to comment...