Scaling Azure VMs: Vertical And Horizontal Strategies
Last Updated :
11 Mar, 2024
As someone who has been working with Azure for a few years now, I can attest to the importance of having a cloud infrastructure that can adapt to changing workloads and demands. One of the key features that has really impressed me about Azure is its ability to scale virtual machines (VMs) using two main strategies: vertical scaling and horizontal scaling. Let me start by sharing my experience with vertical scaling, which involves adjusting the resources of a single VM instance. I’ve found this approach particularly useful when dealing with temporary spikes in workload or gradual growth in resource needs. The simplicity of vertical scaling is what really appealed to me initially. By scaling up or down a single VM, I could quickly respond to changing demands without having to manage multiple instances. This strategy worked like a charm for applications or workloads that couldn’t be easily distributed across multiple VMs or when the workload wasn’t suitable for horizontal scaling.
What is Azure Virtual Machine?
Imagine you have a powerful computer at home that can run multiple applications and programs simultaneously. Now, a picture can create multiple “virtual” versions of that computer, all running independently and isolated from each other, but still hosted on the same physical machine. That’s essentially what an Azure virtual machine (VM) is. Azure is Microsoft’s cloud computing platform, and one of its core services is the ability to create these virtual machines. Instead of buying and maintaining physical hardware, you can simply create a VM in the Azure cloud, essentially a virtualized computer or server.
Think of it like having a bunch of different computers or servers but without the hassle of actually buying and setting up the physical machines. These VMs are created using software and exist virtually in the Azure cloud. One of the great things about Azure VMs is that you can customize them to suit your specific needs. You can choose how much computing power (CPU), memory (RAM), and storage you want for each VM, just like you would when buying a physical computer. This flexibility allows you to create VMs that are tailored to the requirements of your applications or workloads.
Another advantage of using Azure VMs is that you don’t have to worry about maintaining the underlying hardware or infrastructure. Microsoft takes care of all that for you, ensuring that the physical servers hosting your VMs are up-to-date, secure, and running smoothly. Azure VMs also offer great scalability options, which is what we discussed earlier in terms of vertical and horizontal scaling. Vertical scaling is like upgrading the components of a single physical computer (adding more RAM, a faster processor, etc.), while horizontal scaling is like adding more physical computers to handle increased workloads.
What is Vertical and Horizontal Scaling in Azure Virtual Machine?
Vertical Scaling
Vertical scaling, in the context of Azure virtual machines (VMs), refers to the process of increasing or decreasing the resources (CPU, RAM, storage) of an existing VM instance. In simpler terms, it’s like upgrading or downgrading the components of a physical computer.
Here are the key points about vertical scaling in Azure VMs:
- It involves modifying the specifications of a single VM instance, such as increasing or decreasing the number of CPU cores, amount of memory (RAM), or storage capacity.
- Vertical scaling is useful when you need to temporarily handle spikes in workload or accommodate gradual growth in resource requirements for a specific application or workload.
- The advantage of vertical scaling is its simplicity. You can quickly adjust the resources of a single VM instance without the added complexity of managing multiple instances.
- However, there is a limit to how much you can vertically scale a VM, as there is an upper bound to the resources that can be allocated to a single instance based on Azure’s VM size limitations and the underlying hardware.
- Vertical scaling typically requires some downtime or a brief period of unavailability during the resizing process, as the VM needs to be stopped, resized, and then restarted.
- It is often the go-to solution for workloads that cannot be easily distributed across multiple VMs or for scenarios where the workload is not suitable for horizontal scaling.
- Azure provides various VM sizes with different combinations of CPU, RAM, and storage to choose from when vertically scaling your VM instance.
- The process of vertical scaling in Azure involves stopping the VM, resizing it to the desired VM size, and then restarting the VM with the new resource configuration.
In summary, vertical scaling in Azure VMs allows you to quickly adjust the resources of a single VM instance to meet changing workload demands, but it has limitations in terms of the maximum resources that can be allocated and typically requires some downtime during the resizing process.
Horizontal Scaling
Horizontal scaling, in the context of Azure virtual machines (VMs), refers to the process of adding or removing multiple VM instances to accommodate fluctuating workloads. It involves scaling out (adding more VMs) or scaling in (removing VMs) to match the demands on your application or service.
Here are the key points about horizontal scaling in Azure VMs:
- It is particularly useful for applications or workloads that can be distributed across multiple instances, such as web servers, databases, or other stateless or loosely coupled services.
- The primary advantage of horizontal scaling is its ability to handle massive spikes in demand or workload by adding more VM instances, linearly increasing your computing capacity.
- It offers improved fault tolerance and high availability. With multiple VM instances running in parallel, if one instance fails or becomes unresponsive, the remaining instances can continue to serve requests, minimizing the impact on end-users.
- Load balancing mechanisms are used to distribute the workload evenly across the available VM instances, ensuring optimal resource utilization and preventing any single instance from becoming a bottleneck.
- Horizontal scaling introduces additional complexity in terms of managing and coordinating multiple VM instances, requiring robust load balancing, auto-scaling mechanisms, and ensuring that your applications are designed to operate in a distributed environment.
- It can result in higher overall costs, as each additional VM instance incurs its own resource charges. However, the ability to scale out or in based on demand can help optimize costs in the long run.
- Azure offers various services and features to facilitate horizontal scaling, such as Virtual Machine Scale Sets, Azure Load Balancer, and Azure Autoscale, which allow you to automatically scale out or in based on predefined rules or schedules.
- Horizontal scaling is particularly useful for applications that experience periodic or seasonal spikes in traffic, as you can quickly provision additional VM instances to handle the increased workload and then scale back down when the demand subsides.
In summary, horizontal scaling in Azure VMs allows you to dynamically adjust the number of VM instances based on your workload demands, providing the ability to handle spikes in traffic, improve fault tolerance, and distribute the load across multiple instances, while also introducing additional management complexities and potential cost implications.
To Know More About horizontal And Vertical scaling more refer to the Overview of Scaling: Vertical And Horizontal Scaling.
How is Horizontal and Vertical Scaling is done in Azure – A Practical Guide
Vertical Scaling (Scaling Up/Down):
- Log in to the Azure Portal (https://portal.azure.com).
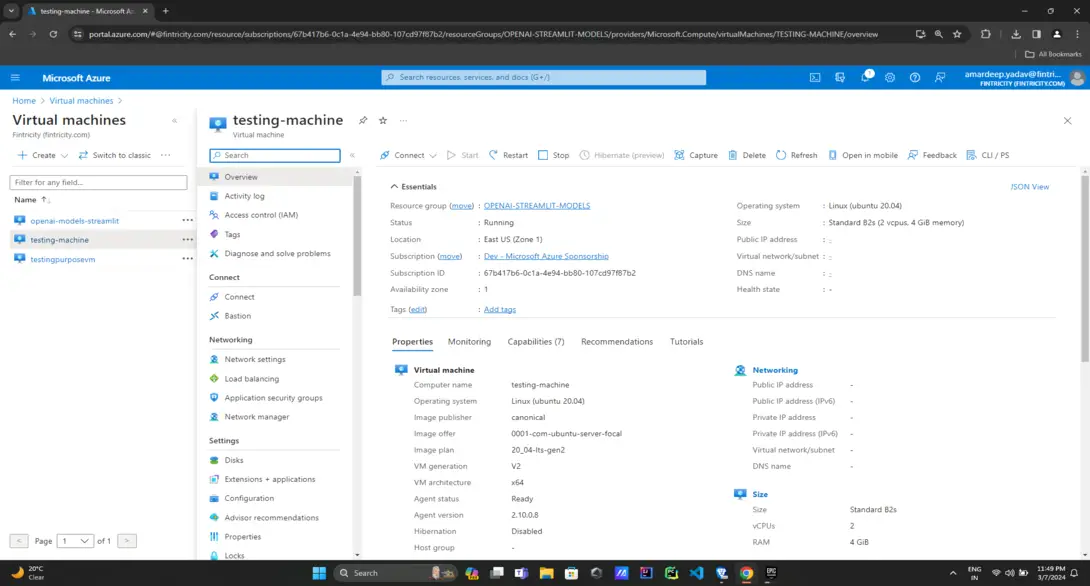
- Navigate to the “Virtual Machines” service in the Azure Portal.
- Select the specific VM instance you want to vertically scale.
- From the VM instance details pane, click on the “Size” option under the “Settings” section.
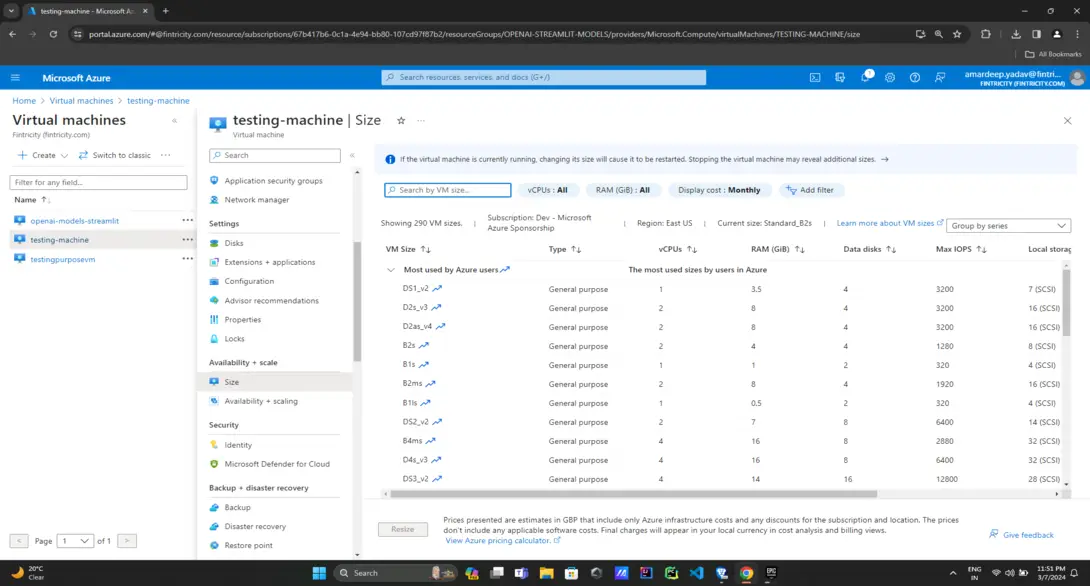
- In the “Size” blade, you’ll see a list of available VM sizes with different combinations of CPU, RAM, and storage. Choose the desired size that meets your new resource requirements.
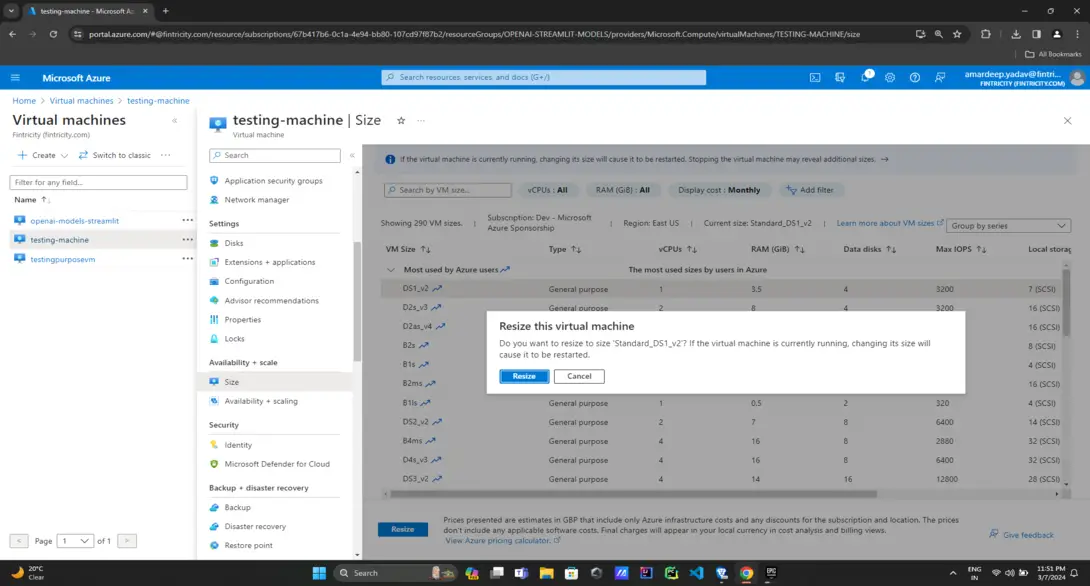
- Review the estimated pricing for the new VM size and click “Resize” to proceed.
- Azure will now stop the VM, resize it to the new specifications, and then restart the VM with the new resource configuration.
Note: Vertical scaling typically requires some downtime or a brief period of unavailability during the resizing process.
Horizontal Scaling (Scaling Out/In)
- Log in to the Azure Portal (https://portal.azure.com).
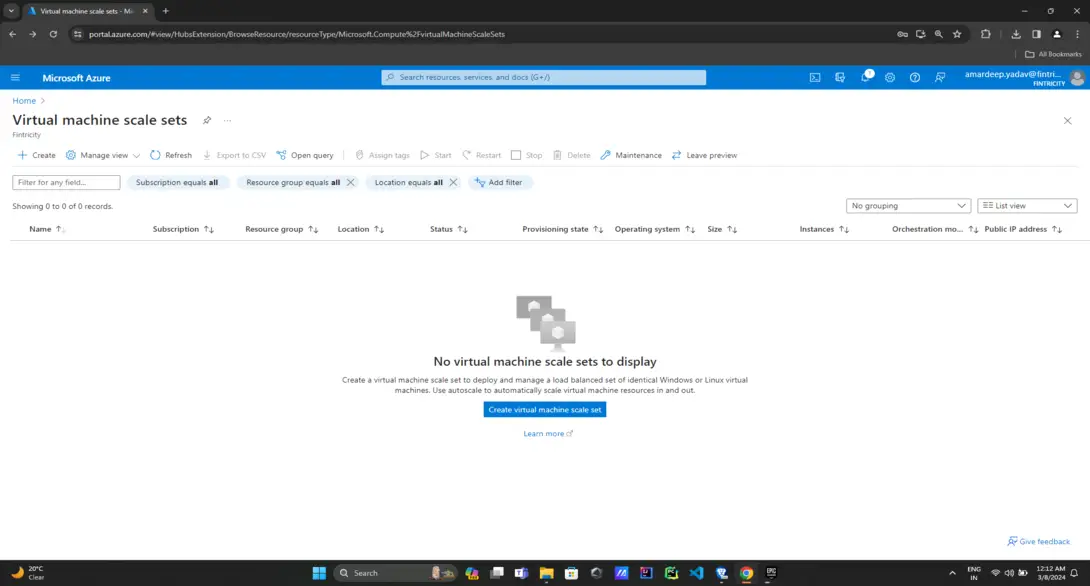
- Navigate to the “Virtual Machine Scale Sets” service in the Azure Portal.
- Click “Add” to create a new Virtual Machine Scale Set (VMSS).
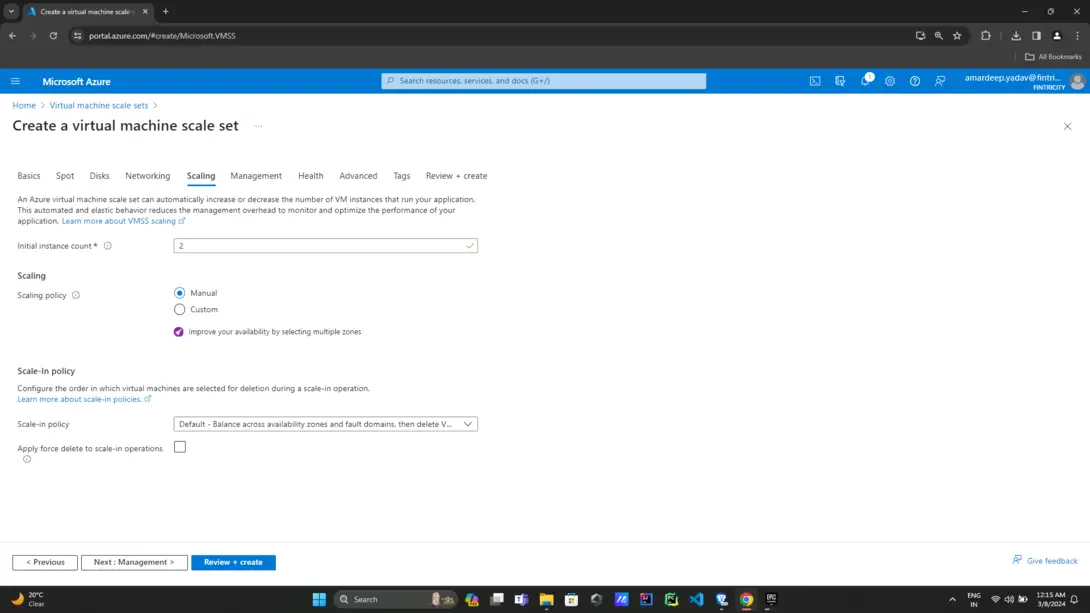
- In the “Create Virtual Machine Scale Set” blade, provide the necessary details such as resource group, instance details (VM size, image, etc.), and networking configuration.
- Under the “Scaling” section, configure the initial instance count (number of VMs) and the scaling rules for automatically scaling out or scaling in based on specific metrics (e.g., CPU usage, memory usage).
- Configure any additional settings as per your requirements, such as load balancing, health probes, and auto-scaling policies.
- Review and create the Virtual Machine Scale Set.
Once the VMSS is created, Azure will automatically manage the scaling out (adding more VM instances) or scaling in (removing VM instances) based on the configured scaling rules and policies.
Alternatively, you can also manually scale out or scale in a VMSS by
- Navigate to the specific Virtual Machine Scale Set in the Azure Portal.
- Under the “Settings” section, click on “Instances.”
- In the “Instances” blade, you’ll see the current number of instances (VMs) in the scale set.
- Click on the “Increase” or “Decrease” button to manually scale out (add more instances) or scale in (remove instances), respectively.
- Specify the new desired instance count and click “Save” to apply the changes.
- Azure will then automatically provision or terminate the VM instances based on your specified instance count.
It’s important to note that for horizontal scaling to work effectively, your application should be designed to operate in a distributed environment and be able to handle multiple instances seamlessly. Additionally, you’ll need to configure load balancing and auto-scaling mechanisms to distribute the workload across the available instances and automatically adjust the instance count based on demand.
Conclusion
At the end of the day, having the ability to scale Azure Virtual Machines (VMs) has been a game-changer for me and my organization. Whether it’s vertical scaling or horizontal scaling, these strategies have allowed us to adapt to changing workloads and demands seamlessly. Vertical scaling, or scaling up and down, has been incredibly useful when we need to quickly respond to temporary spikes or gradual growth in resource requirements. It’s as simple as upgrading or downgrading the components of a physical computer, but without the hassle of actually handling the hardware. Just a few clicks in the Azure Portal, and we can adjust the CPU, RAM, or storage of a single VM instance. And the best part? With horizontal scaling, we get improved fault tolerance and high availability. If one VM instance fails or becomes unresponsive, the others can seamlessly pick up the slack, minimizing the impact on our users. It’s like having a backup plan built right into our infrastructure. Of course, horizontal scaling isn’t without its challenges. Managing multiple VM instances introduces some complexity, and we’ve had to invest in robust load balancing and auto-scaling mechanisms. But in my opinion, the benefits far outweigh the effort.
Scaling Azure VMs: Vertical and Horizontal Strategies – FAQ’s
What is the difference between vertical and horizontal scaling in Azure VMs?
Vertical scaling involves increasing or decreasing the resources (CPU, RAM, storage) of an existing VM instance, while horizontal scaling involves adding or removing multiple VM instances to accommodate fluctuating workloads.
When should I choose vertical scaling over horizontal scaling for my Azure VMs?
Vertical scaling is suitable for handling temporary spikes or gradual growth in resource requirements for a specific application or workload that cannot be easily distributed across multiple instances. Horizontal scaling is better for applications that can be distributed across multiple instances and need to handle massive spikes in demand or workload.
Is there a limit to how much I can vertically scale an Azure VM?
Yes, there is an upper bound to the resources that can be allocated to a single VM instance based on Azure’s VM size limitations and the underlying hardware.
How can I implement horizontal scaling for my Azure VMs?
You can implement horizontal scaling by using Azure Virtual Machine Scale Sets (VMSS), which allow you to automatically scale out (add more instances) or scale in (remove instances) based on predefined rules or schedules. You can also manually scale out or scale in a VMSS by adjusting the desired instance count.
What are the benefits of horizontal scaling in Azure VMs?
Horizontal scaling offers improved fault tolerance and high availability, as multiple VM instances can continue serving requests if one instance fails. It also provides the ability to handle massive spikes in demand or workload by linearly increasing your computing capacity.
Share your thoughts in the comments
Please Login to comment...