React MUI TypeScript
Last Updated :
10 Nov, 2023
React MUI TypeScript refers to using the MUI Module in React written in the Typescript. MUI provides UI components that are easy to use in React TypeScript.
Prerequisites:
Material-UI is a React UI framework based on Google’s Material Design system that provides pre-built components and styling for building modern and intuitive web applications. It has a large and active community of contributors and a theme customization system for easy branding and design customization.
Modules required:
- react
- node
- @emotion/react
- @emotion/styled
- @material-ui/core
- @mui/icons-material
- @mui/material
Steps to Create React Application and Install Modules:
Step 1: Create a React app using the following command.
npx create-react-app react-mui-typescript --template typescript
Step 2: Now get into the project directory
cd react-mui-typescript
Step 3: Installing dependencies using the following command.
npm i @emotion/react @emotion/styled @material-ui/core @mui/icons-material @mui/material
Project Structure:
.png)
The updated dependencies in package.json file will look like.
"dependencies": {
        "@emotion/react": "^11.11.1",
        "@emotion/styled": "^11.11.0",
        "@material-ui/core": "^4.12.4",
        "@mui/icons-material": "^5.14.16",
        "@mui/material": "^5.14.17",
        "@testing-library/jest-dom": "^5.17.0",
        "@testing-library/react": "^13.4.0",
        "@testing-library/user-event": "^13.5.0",
        "@types/jest": "^27.5.2",
        "@types/node": "^16.18.61",
        "@types/react": "^18.2.37",
        "@types/react-dom": "^18.2.15",
        "react": "^18.2.0",
        "react-dom": "^18.2.0",
        "react-scripts": "5.0.1",
        "typescript": "^4.9.5",
        "web-vitals": "^2.1.4"
}
Example 1: Here, in order to learn about the usage of MUI in React we will take an example of a text field and onChange event changing values in the page.
Javascript
import React from 'react';
import LoginForm from './components/LoginForm';
function handleLogin(
username: string,
password: string
) {
console.log(username, password);
}
function App() {
return (
<div>
{
}
<h1 style={{ textAlign: 'center' }}>
Login Form
</h1>
{}
<LoginForm onSubmit={handleLogin} />
</div>
);
}
export default App;
|
Javascript
import React, { useState } from 'react';
import { makeStyles } from '@material-ui/core/styles';
import TextField from '@material-ui/core/TextField';
import Button from '@material-ui/core/Button';
const useStyles = makeStyles({
form: {
display: 'flex',
flexDirection: 'column',
alignItems: 'center',
},
input: {
marginBottom: '1rem',
},
button: {
marginTop: '1rem',
},
});
interface LoginFormProps {
onSubmit: (
username: string,
password: string
) => void;
}
export default function LoginForm(props: LoginFormProps) {
const classes = useStyles();
const [username, setUsername] = useState('');
const [password, setPassword] = useState('');
const handleSubmit =
(event: React.FormEvent<HTMLFormElement>) => {
event.preventDefault();
props.onSubmit(username, password);
};
return (
<form className={classes.form} onSubmit={handleSubmit}>
<TextField
className={classes.input}
label="Username"
variant="outlined"
value={username}
onChange={(event) => setUsername(event.target.value)}
/>
<TextField
className={classes.input}
label="Password"
type="password"
variant="outlined"
value={password}
onChange={(event) => setPassword(event.target.value)}
/>
<Button
className={classes.button}
variant="contained"
color="primary"
type="submit"
>
Login
</Button>
</form>
);
}
|
Steps to run the application: Use this command in the terminal inside the project directory.
npm start
Output: This output will be visible on http://localhost:3000/
.png)
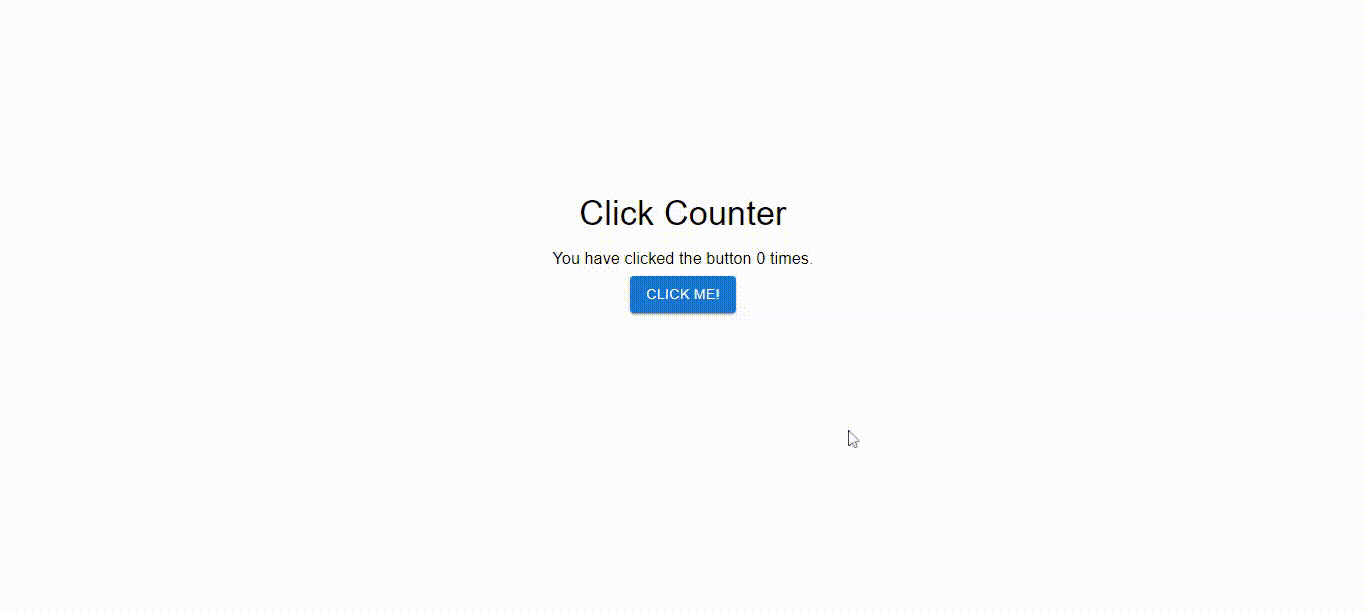
Example 2: This example implements ClickCounter App with TypeScript similar to the above project.
Javascript
import ClickCounter from './components/ClickCounter';
function App() {
return (
<ClickCounter />
);
}
export default App;
|
Javascript
import React, { useState } from 'react';
import Button from '@mui/material/Button';
import Typography from '@mui/material/Typography';
const ClickCounter: React.FC = () => {
const [count, setCount] = useState(0);
const handleButtonClick = () => {
setCount(count + 1);
};
return (
<>
<Typography variant="h4" gutterBottom>
Click Counter
</Typography>
<Typography variant="body1" gutterBottom>
You have clicked the button {count} times.
</Typography>
<Button variant="contained"
onClick={handleButtonClick}>
Click me!
</Button>
</>
);
};
export default ClickCounter;
|
Steps to run the application: Use this command in the terminal inside the project directory.
npm start
Output: This output will be visible on http://localhost:3000/
Share your thoughts in the comments
Please Login to comment...