Postman – Mock Server
Last Updated :
11 Jan, 2024
Postman is an open-source platform that we are using for managing the API in the project. It is the interface that both backend and frontend developers use for different work. We can manage our APIs using Postman Collections, we can perform different tests using the Pre-request or Tests in the request. Similarly in the early stage of software development, it is difficult to share the API between different teams and there we can use Mock Server.
What is a Mock Server?
A mock server is a dummy server just like a dummy actor. The mock server imitates the real server, it will work exactly like we have deployed our service on any server.
- They are mainly used at the start of the development phase when the front end asks for the API for building and checking the behavior of the site but the backend work remains.
- At that point, we will create a mock server in which we will add all the endpoints that are required and they will give the response based on the request. This helps to faster development and both teams can work concurrently.
- Mock servers will contain request and their response when the client gives the request to the server it will match it with the fed request and if the server finds any request the same as the given one then the respective response is delivered to the client.
Menu
Creating a Mock Server
Mock servers are created with predefined endpoints in which we already have a Request body, Response Body, Status Code, Request Method and Request URL. This all information can be found in the collections but sometimes in the early phase, there might be a situation where we don’t have a final collection on which we can create a server.
Thus in Postman, we have two methods with which we can create a server. And they are:
- With the existing Collections: The server will be created based on the examples we have saved in the collection.
- With the new Collections: We have to specify all the information mentioned above.

Ways to create a Mock Server
1. Creating a Server with an Existing Collection
So first, we will go with the existing Collections. We have to select the collections from already present in the workspace and then click next.
Step 1: To create a mock server on the existing collections, It is mandatory to have a saved example with the request body and all. You can store different examples according to the different situations. When the request is sent to the Mock server it will look into the Examples and the best-suited response will be given back to the developers.
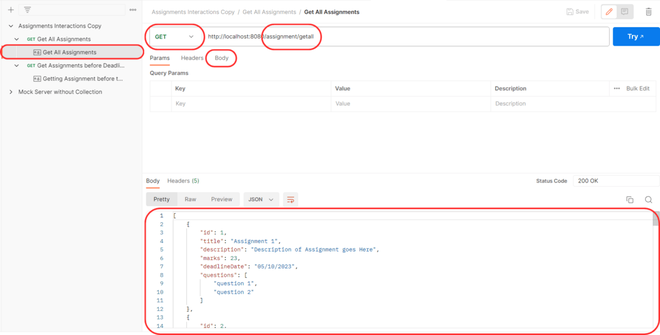
Example stored in the Request
Step 2: Next, the configuration screen opens up in which we have to give the name of the Mock server and some basic configurations for the basic server.
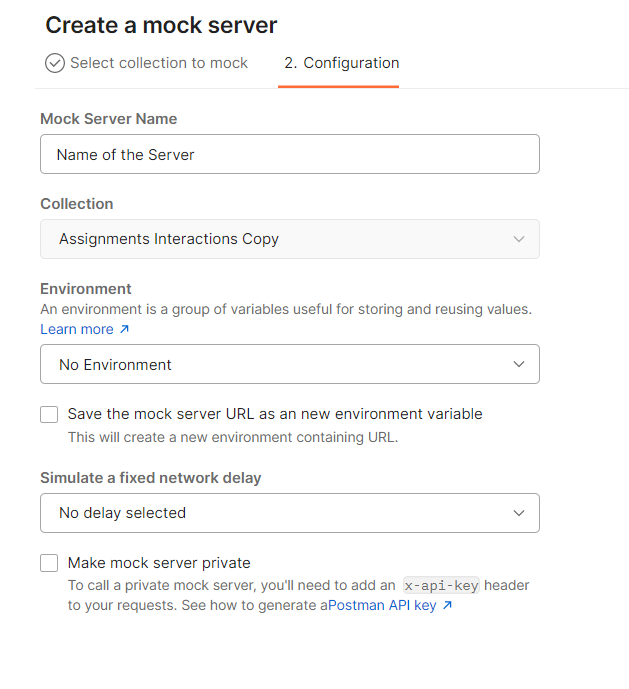
Configurations
Step 3: On clicking next, our first server has been created and the URL will be shared with us which we can use as a domain name, and we have to append the request path and then we can get the desired output.
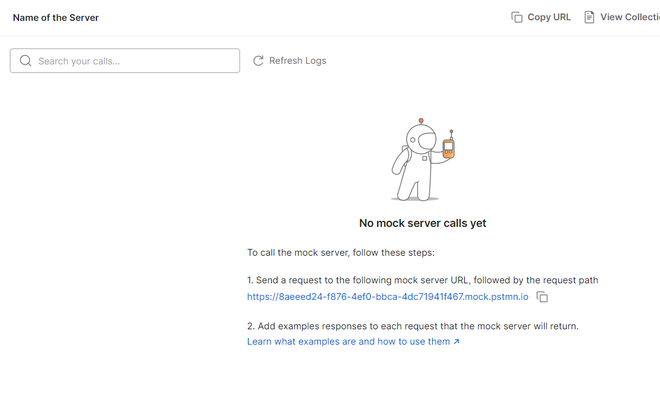
URL of Mock Server
Step 4: This is also a screen that shows the logs of the Server and all the requests made to the server will be shown here. , the request body and response that was delivered are also shown here. Let’s call some API on this server and have a look at the logs.
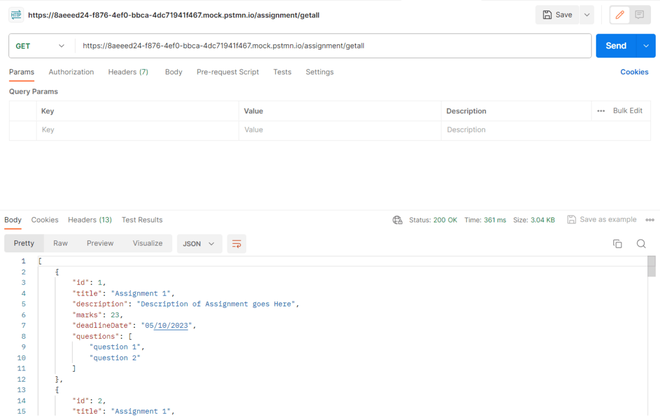
Execution of Endpoint on Mock Server
Step 5: Also have a look at the logs, here all the requests made will be shown with the response served whether successful or error, both are shown below. If the error occurred then it will be shown in the red color with the object sent for error. In the image shown below the error of “Not Matching Requests” gives the message “Double check your method and the request path and try again“.
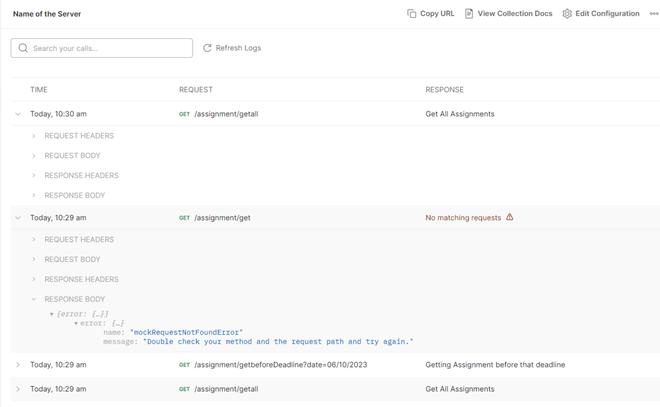
Logs
2. Creating a Server with a new Collection
With this method, all the configurations and the logs configuration are the same as discussed above, but we don’t have a collection which means that we don’t have the endpoints to be served. Thus we have to give the information by ourselves to the postman to serve the endpoints.
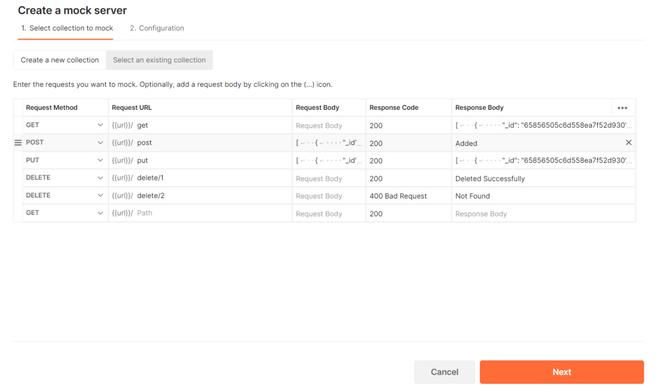
Mentioning the necessary Information for the endpoints
After creating your desired endpoints you can click on Next and the same configuration screen will open which we have seen above. After that, the server will be created with these settings. You can create as many as endpoints you want to create on this server. However, the only limitation is that you cannot add or remove the endpoint after the creation of the mock server at this point.
Dive into Configuration
Let’s look at the Configuration part more in detail. You can click on “Edit Configuration“, where you can view the configurations we have set before. But this time we will see one more option of “Request Matching“.

Edit Configuration Screen
Let’s Look at every part of the Screen:
- Environment: In Postman, the environment contains the variables for reusing the values and we select the environment if we have to use any value repetitively.
- Simulate a fixed network delay: It is a fixed network delay that can help us to mimic the actual network latency that generally occurs when interacting with real server
- Marking the mock server private will restrict anyone on the web from accessing the API and only the person with the key will able to access it.
- Response Matching: When the request is made what server should match, only the request path, or with the request path, the request body should also validate.
You can change the configurations of the server according to your requirements.
Conclusion
Mock servers are mainly created for front-end developers or to get a basic idea of the design of the APIs. With the mock server, we can start the frontend work parallel to the backend part and this can reduce the time of development.
Share your thoughts in the comments
Please Login to comment...