OpenCV C++ Program to blur an image
Last Updated :
19 Dec, 2022
The following is the explanation to the C++ code to blur an Image in C++ using the tool OpenCV.
Things to know:
(1) The code will only compile in Linux environment.
(2) Compile command: g++ -w article.cpp -o article `pkg-config –libs opencv`
(3) Run command: ./article
(4) The image bat.jpg has to be in the same directory as the code.
Before you run the code, please make sure that you have OpenCV installed on your system.
// Title: OpenCV C++ Program to blur an image.
// Import the core header file
#include <opencv2/core/core.hpp>

// core - a compact module defining basic data structures,
// including the dense multi-dimensional array Mat and
// basic functions used by  all other modules.

// highgui - an easy-to-use interface to video
// capturing, image and video codecs, as well
// as simple UI capabilities.
#include <opencv2/highgui/highgui.hpp>

// imgproc - an image processing module that
// includes linear and non-linear image filtering,
// geometrical image transformations (resize, affine
// and perspective warping, generic table-based
// remapping) color space conversion, histograms,
// and so on.
#include <opencv2/imgproc/imgproc.hpp>

// The stdio.h header defines three variable types,
// several macros, and various functions for performing
// input and output.
#include <stdio.h>
#include <iostream>

// Namespace where all the C++ OpenCV functionality resides
using namespace cv;

using namespace std;

// We can also use 'namespace std' if need be.

int main() // Main function
{
    // read the image data in the file "MyPic.JPG" and
    // store it in 'img'
    Mat image = imread("bat.jpg", CV_LOAD_IMAGE_UNCHANGED);

    // Mat object is a basic image container.
    // imread: first argument denotes the image to be loaded
    // the second arguments specifies the image format.
    // CV_LOAD_IMAGE_UNCHANGED (<0) loads the image as is
    // CV_LOAD_IMAGE_GRAYSCALE ( 0) loads the image as an
    //                         intensity one
    // CV_LOAD_IMAGE_COLOR (>0) loads the image in the
    //                          BGR format
    // If the second argument is not specified, it is
    // implied CV_LOAD_IMAGE_COLOR

    // Check for no data
    if (! image.data )
    {
        cout << "Could not open or find the image.\n";
        return -1; // unsuccessful
    }

    // Function to blur the image
    // first argument: input source
    // second argument: output source
    // third argument: blurring kernel size
    blur(image,image,Size(10,10));

    // Create a window
    // first argument: name of the window
    // second argument: flag- types:
    // WINDOW_NORMAL If this is set, the user can resize the
    //                window.
    // WINDOW_AUTOSIZE If this is set, the window size is
    //                 automatically adjusted to fit the
    //                 displayed image() ), and you cannot
    //                 change the window size manually.
    // WINDOW_OPENGL If this is set, the window will be
    //              created with OpenGL support.
    namedWindow( "bat", CV_WINDOW_AUTOSIZE );

    // Displays an image in the specified window.
    // first argument: name of the window
    // second argument: image to be shown(Mat object)
    imshow( "bat", image );

    waitKey(0); // Wait infinite time for a keypress

    return 0; // Return from the main function
}
To Run the program in the Windows, VISUAL STUDIO you can use following approach:
The idea is to first use a function called cvtColor to convert the input image into Grayscale image, then we will convert that Grayscale image to Blurred Image using a function GaussianBlur.
SYNTAX:
cvtColor(source_image, destination_image, code);
GaussianBlur(source_image, destination_image, kernel-size, sigmaX);
PARAMETERS:
cvtColor is the in-built function in the C++ that is used to convert one color space(number of channels) to another using the color space conversion code. Color space conversion code are easily accessible and are pre-defined. You can learn more about them over here.
GaussianBlur takes Grayscale image as input and returns a blurred image.
Kernel size is used to define how much we want the kernel to affect the pixels in our image. Now kernel is the matrix of pixels in the image, so when we define kernel size it will first pickup an anchor(a center point) and then it will affect the pixels in its neighborhood. In a 3*3 matrix only the neighborhood pixel’s will be affected while in a 10*10 matrix will affect the pixels in range of 10*10 matrix from the center.
SigmaX: A variable of the type double representing the Gaussian kernel standard deviation in X direction.
Implementation of the above approach.
C++
#include <iostream>
#include <opencv2/highgui.hpp>
#include <opencv2/imgcodecs.hpp>
#include <opencv2/imgproc.hpp>
using namespace std;
using namespace cv;
void main()
{
string path = "Resources/face.jpeg";
Mat img = imread(path);
Mat imgGray, Blur_img;
cvtColor(img, imgGray,
COLOR_BGR2GRAY);
GaussianBlur(img, Blur_img, Size(7, 7), 5,
0);
imshow("Image", img);
imshow("GrayImage",imgGray);
imshow("Blurimg", Blur_img);
waitKey(0);
}
|
OUTPUT:
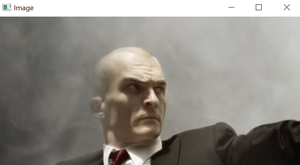
Original image
GrayScale Image:
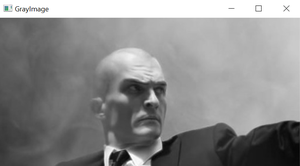
GrayImage
Blur Image:
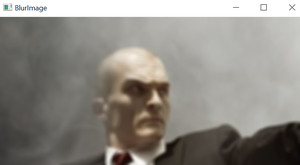
Blurred Image
OpenCV Python Program to Blur Image
About the Author:
Aditya Prakash is an undergraduate student at Indian Institute
of Information Technology, Vadodara. He primarily codes in C++. The motto for him is: So far so good. He plays cricket, watches superhero movies, football and is a big fan of answering questions.
If you also wish to showcase your blog here, please see GBlog for guest blog writing on GeeksforGeeks.
Share your thoughts in the comments
Please Login to comment...