Making a simple PWA under 5 minutes
Last Updated :
01 Jun, 2021
Progressive Web Apps, that is PWAs, are a type of application that is developed using web technologies and can be installed on any device like a traditional application. Creating a simple PWA is very easy as it involves adding two important files to the project. After that, the PWA would be ready to be installed on any Operating System.
The below steps have to be followed to create a progressive web application:
Step 1: Create an HTML page that would be the starting point of the application. This HTML will contain a link to the file named manifest.json. This is an important file that would be created in the next step.
Code:
html
<!DOCTYPE html>
<html>
<head>
<meta charset="utf-8">
<meta name="viewport"
content="width=device-width,
initial-scale=1">
<meta http-equiv="X-UA-Compatible"
content="ie=edge">
<title>PWA Tutorial</title>
<meta name=
"apple-mobile-web-app-status-bar"
content="#aa7700">
<meta name="theme-color"
content="black">
<link rel="manifest"
href="manifest.json">
</head>
<body>
<h1 style="color: green;">
GeeksforGeeks</h1>
<p>
This is a simple tutorial for
creating a PWA application.
</p>
<script>
// Script for Service Worker
</script>
</body>
</html>
|
Step 2: Create a manifest.json file in the same directory. This file basically contains information about the web application. Some basic information includes the application name, starting URL, theme color, and icons. All the information required is specified in the JSON format. The source and size of the icons are also defined in this file.
Javascript
{
"name":"PWA Tutorial",
"short_name":"PWA",
"start_url":"index.html",
"display":"standalone",
"background_color":"#5900b3",
"theme_color":"black",
"scope": ".",
"description":"This is a PWA tutorial.",
"icons":[
{
"src":"images/icon-192x192.png",
"sizes":"192x192",
"type":"image/png"
},
{
"src":"images/icon-512x512.png",
"sizes":"512x512",
"type":"image/png"
}
]
}
|
Step 3: Create a new folder named images and place all the icons related to the application in that folder. It is recommended to have the dimensions of the icons at least 192 by 192 pixels and 512 by 512 pixels. The image name and dimensions should match that of the manifest file.
Step 4: Serve the directory using a live server so that all files are accessible.
Step 5: Open the index.html file in Chrome navigate to the Application Section in the Chrome Developer Tools. Open the manifest column from the list.
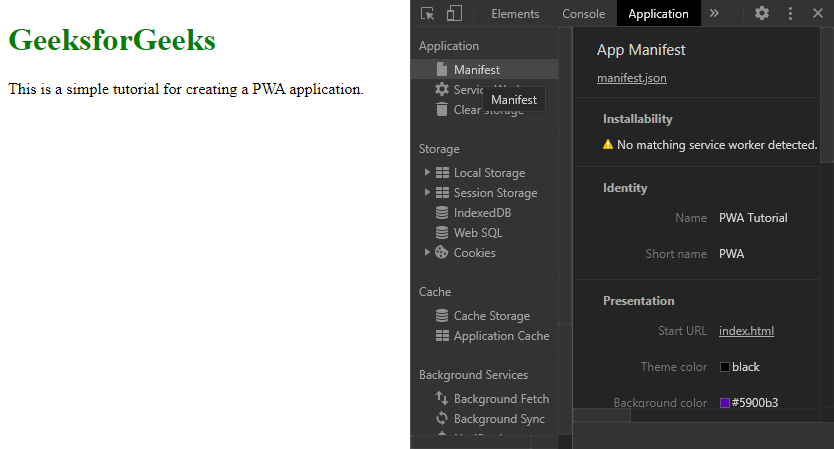
Step 6: Under the installability tab, it would show that no service worker is detected. We will need to create another file for the PWA, that is, serviceworker.js in the same directory. This file handles the configuration of a service worker that will manage the working of the application.
Code:
Javascript
var staticCacheName = "pwa";
self.addEventListener("install", function (e) {
e.waitUntil(
caches.open(staticCacheName).then(function (cache) {
return cache.addAll(["/"]);
})
);
});
self.addEventListener("fetch", function (event) {
console.log(event.request.url);
event.respondWith(
caches.match(event.request).then(function (response) {
return response || fetch(event.request);
})
);
});
|
Step 7: The last step is to link the service worker file to index.html. This is done by adding a short JavaScript script to the index.html created in the above steps. Add the below code inside the script tag in index.html.
Code:
HTML
<script>
window.addEventListener('load', () => {
registerSW();
});
// Register the Service Worker
async function registerSW() {
if ('serviceWorker' in navigator) {
try {
await navigator
.serviceWorker
.register('serviceworker.js');
}
catch (e) {
console.log('SW registration failed');
}
}
}
</script>
|
Installing the application:
- Navigating to the Service Worker tab, we see that the service worker is registered successfully and now an install option will be displayed that will allow us to install our app.
- Click on the install button to install the application. The application would then be installed, and it would be visible on the desktop.
- For installing the application on a mobile device, the Add to Home screen option in the mobile browser can be used. This will install the application on the device.
Output:
- Manifest Section after all the steps have been completed

- Installing the web application using the Install app button

- The final application along with its desktop icon

Share your thoughts in the comments
Please Login to comment...