Make 3D interactive Matplotlib plot in Jupyter Notebook
Last Updated :
15 Mar, 2024
Matplotlib is a data visualization library. It is difficult to analyze/get an insight into the data without visualizing it. And matplotlib is a great library for doing the visual analysis of data in python. Using matplotlib we can plot 1-D, 2-D and even 3-D data. In this article, we are going to learn how we can plot various 3-D plots using the matplotlib. To plot 3-D plots in python, we need to import the mplot3d library from the standard installation of matplotlib library from python.
As matplotlib is a third-party library, it doesn’t come with a standard installation of python, so you need to install matplotlib before following this article. Below is the command using which you can install the matplotlib library.
Syntax:
pip3 install matplotlib
To make the plots interactive all you need to do is install another library called ipympl i.e. interactive python matplotlib.
Syntax:
pip3 install ipympl
For creating 3d figure Axes3D.plot() function is used.
Syntax:
Axes3D.plot(xs, ys, zs,*args, **kwargs)
Parameter:
- xs: the x coordinate value of the vertices.
- ys: the y coordinate values of the vertices.
- zs: The z coordinate value(s), either one for all points or one for each point.
To generate an interactive 3D plot first import the necessary packages and create a random dataset. Now using Axes3D(figure) function from the mplot3d library we can generate a required plot directly. Pass the data to the 3D plot and configure the title and labels.
Note: We must needed to add ” %matplotlib widget “, it is a Jupyter magic widget and used to tell jupyter to use interactive backend for plot. We have to add it to the top of the script to create an interactive plot in the ipython notebook (i.e. Jupyter notebook, Google Colab, Kaggle Kernel, etc.) to render the figure as an interactive figure.
Given below are some implementations to do the same.
Example: Interactive scatter plot
Python3
%matplotlib widget
from mpl_toolkits.mplot3d import Axes3D
import matplotlib.pyplot as plt
xs = [14, 24, 43, 47, 54, 66, 74, 89, 12,
44, 1, 2, 3, 4, 5, 9, 8, 7, 6, 5]
ys = [0, 1, 2, 3, 4, 5, 6, 7, 8, 9, 6, 3,
5, 2, 4, 1, 8, 7, 0, 5]
zs = [9, 6, 3, 5, 2, 4, 1, 8, 7, 0, 1, 2,
3, 4, 5, 6, 7, 8, 9, 0]
fig = plt.figure()
ax = Axes3D(fig)
plot_geeks = ax.scatter(xs, ys, zs, color='green')
ax.set_title("3D plot")
ax.set_xlabel('x-axis')
ax.set_ylabel('y-axis')
ax.set_zlabel('z-axis')
plt.show()
|
Output:
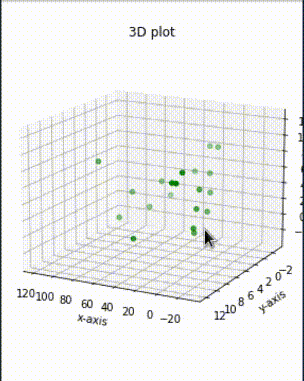
Interactive 3D plot in Jupyter notebook
Example: Interactive bar plot
Python
%matplotlib widget
from mpl_toolkits.mplot3d import Axes3D
import matplotlib.pyplot as plt
import numpy as np
xs = [2, 3, 4, 5, 1, 6, 2, 1, 7, 2]
ys = [1, 2, 3, 4, 5, 6, 7, 8, 9, 10]
zs = np.zeros(10)
dx = np.ones(10)
dy = np.ones(10)
dz = [1, 2, 3, 4, 5, 6, 7, 8, 9, 10]
figg = plt.figure()
ax = figg.add_subplot(111, projection='3d')
plot_geeks = ax.bar3d(xs, ys, zs, dx,
dy, dz, color='green')
ax.set_title("3D bar plot")
ax.set_xlabel('x-axis')
ax.set_ylabel('y-axis')
ax.set_zlabel('z-axis')
plt.show()
|
Output:
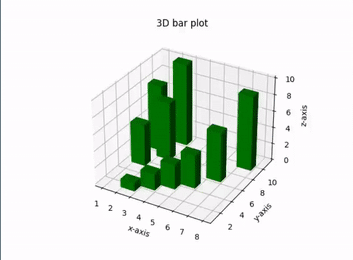
Interactive 3D plot
Share your thoughts in the comments
Please Login to comment...