JPA – Advanced Mappings
Last Updated :
05 Apr, 2024
JPA in Java is defined as the Java Persistence API and Advanced Mapping in JPA allows developers to define complex relationships and data mappings between entities and database tables. These mappings include One-to-One mapping, One-to-Many, Many-to-One, Many-to-Many relationships. Also, it can embed objects and sequential methods.
Steps to Implement Advanced Mappings:
- We can define the entity classes representing the data model.
- We can use annotations such as @Entity, @ManyToOne, @OneToMany, @OneToOne, and @ManyToMany to specify the relationships between the entities.
- We can configure the mapping details such as the foreign keys, join columns, and the cascade operations of the application.
- Finally, we can access and manipulate the entities using the EntityManager of the JPA application.
Project Implementation of Advanced Mappings in JPA
Below are the steps to implement JPA Advanced Mappings.
Step 1: Create the new JPA project using the IntelliJ Idea named advanced-mapping-demo.
Step 2: Open the pom.xml and add the below dependencies to the project.
Dependencies:
  <dependency>
            <groupId>org.hibernate.orm</groupId>
            <artifactId>hibernate-core</artifactId>
            <version>6.0.2.Final</version>
        </dependency>
        <dependency>
            <groupId>org.glassfish.jaxb</groupId>
            <artifactId>jaxb-runtime</artifactId>
            <version>3.0.2</version>
        </dependency>
        <dependency>
            <groupId>org.junit.jupiter</groupId>
            <artifactId>junit-jupiter-api</artifactId>
            <version>${junit.version}</version>
            <scope>test</scope>
        </dependency>
        <dependency>
            <groupId>org.junit.jupiter</groupId>
            <artifactId>junit-jupiter-engine</artifactId>
            <version>${junit.version}</version>
            <scope>test</scope>
        </dependency>
        <dependency>
            <groupId>mysql</groupId>
            <artifactId>mysql-connector-java</artifactId>
            <version>8.0.28</version>
        </dependency>
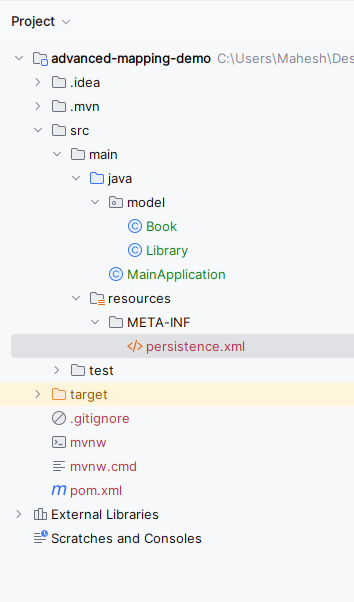
Once the project is created successfully, the file structure will look like the below image.
Step 3: Open persistence.xml file and paste the below code into the project to configure the project database.
XML
<?xml version="1.0" encoding="UTF-8" standalone="yes"?>
<persistence xmlns="https://jakarta.ee/xml/ns/persistence"
             xmlns:xsi="http://www.w3.org/2001/XMLSchema-instance"
             xsi:schemaLocation="https://jakarta.ee/xml/ns/persistence https://jakarta.ee/xml/ns/persistence/persistence_3_0.xsd"
             version="3.0">
    <persistence-unit name="jpa-example">
        <class>model.Book</class>
        <class>model.Library</class>
        <properties>
        <property name="javax.persistence.jdbc.url" value="jdbc:mysql://localhost:3306/example"/>
        <property name="javax.persistence.jdbc.user" value="root"/>
        <property name="javax.persistence.jdbc.password" value=""/>
        <property name="javax.persistence.jdbc.driver" value="com.mysql.jdbc.Driver"/>
        <property name="hibernate.dialect" value="org.hibernate.dialect.MySQL5Dialect"/>
        <property name="hibernate.hbm2ddl.auto" value="update"/>
    </properties>

    </persistence-unit>
</persistence>
Step 4: Create a new Java package named model and in that package, create a new Entity Java class named Book .
Go to src > main > java > model > Book and put the below code.
Java
package model;

import jakarta.persistence.*;

@Entity
public class Book {
    @Id
    @GeneratedValue(strategy = GenerationType.IDENTITY)
    private Long id;

    private String title;

    @ManyToOne
    @JoinColumn(name = "library_id")
    private Library library;

    // Constructors, getters, and setters
    public Book() {
    }

    public Book(String title, Library library) {
        this.title = title;
        this.library = library;
    }

    public Long getId() {
        return id;
    }

    public void setId(Long id) {
        this.id = id;
    }

    public String getTitle() {
        return title;
    }

    public void setTitle(String title) {
        this.title = title;
    }

    public Library getLibrary() {
        return library;
    }

    public void setLibrary(Library library) {
        this.library = library;
    }
}
Step 5: In the model package, create the new Entity Java class named as the Library .
Go to src > main > java > model > Library and put the below code.
Java
package model;

import jakarta.persistence.*;

import java.util.ArrayList;
import java.util.List;

@Entity
public class Library {
    @Id
    @GeneratedValue(strategy = GenerationType.IDENTITY)
    private Long id;

    private String name;

    @OneToMany(mappedBy = "library", cascade = CascadeType.ALL)
    private List<Book> books = new ArrayList<>();

    // Constructors, getters, and setters
    public Library() {
    }

    public Library(String name) {
        this.name = name;
    }

    public Long getId() {
        return id;
    }

    public void setId(Long id) {
        this.id = id;
    }

    public String getName() {
        return name;
    }

    public void setName(String name) {
        this.name = name;
    }

    public List<Book> getBooks() {
        return books;
    }

    public void setBooks(List<Book> books) {
        this.books = books;
    }
}
Step 6: Create the new Java class named as the MainApplication.
Go to src > main > java > MainApplication and write the below code.
Java
import jakarta.persistence.EntityManager;
import jakarta.persistence.EntityManagerFactory;
import jakarta.persistence.Persistence;
import model.Book;
import model.Library;

public class MainApplication {
    public static void main(String[] args) {
        EntityManagerFactory entityManagerFactory = Persistence.createEntityManagerFactory("jpa-example");
        EntityManager entityManager = entityManagerFactory.createEntityManager();

        // Create a library
        Library library = new Library("Public Library");

        // Create books
        Book book1 = new Book("Introduction to Java", library);
        Book book2 = new Book("Data Structures and Algorithms", library);

        // Associate books with the library
        library.getBooks().add(book1);
        library.getBooks().add(book2);

        // Start transaction
        entityManager.getTransaction().begin();

        // Persist library and books
        entityManager.persist(library);
        entityManager.persist(book1);
        entityManager.persist(book2);

        // Commit transaction
        entityManager.getTransaction().commit();

        // Retrieve library and print books
        Library retrievedLibrary = entityManager.find(Library.class, library.getId());
        System.out.println("Library: " + retrievedLibrary.getName());
        for (Book book : retrievedLibrary.getBooks()) {
            System.out.println("Book: " + book.getTitle());
        }

        // Close EntityManager and EntityManagerFactory
        entityManager.close();
        entityManagerFactory.close();
    }
}
pom.xml:
XML
<?xml version="1.0" encoding="UTF-8"?>
<project xmlns="http://maven.apache.org/POM/4.0.0"
         xmlns:xsi="http://www.w3.org/2001/XMLSchema-instance"
         xsi:schemaLocation="http://maven.apache.org/POM/4.0.0 https://maven.apache.org/xsd/maven-4.0.0.xsd">
    <modelVersion>4.0.0</modelVersion>

    <groupId>org.example</groupId>
    <artifactId>advanced-mapping-demo</artifactId>
    <version>1.0-SNAPSHOT</version>
    <name>advanced-mapping-demo</name>

    <properties>
        <project.build.sourceEncoding>UTF-8</project.build.sourceEncoding>
        <maven.compiler.target>11</maven.compiler.target>
        <maven.compiler.source>11</maven.compiler.source>
        <junit.version>5.9.2</junit.version>
    </properties>

    <dependencies>
        <dependency>
            <groupId>org.hibernate.orm</groupId>
            <artifactId>hibernate-core</artifactId>
            <version>6.0.2.Final</version>
        </dependency>
        <dependency>
            <groupId>org.glassfish.jaxb</groupId>
            <artifactId>jaxb-runtime</artifactId>
            <version>3.0.2</version>
        </dependency>
        <dependency>
            <groupId>org.junit.jupiter</groupId>
            <artifactId>junit-jupiter-api</artifactId>
            <version>${junit.version}</version>
            <scope>test</scope>
        </dependency>
        <dependency>
            <groupId>org.junit.jupiter</groupId>
            <artifactId>junit-jupiter-engine</artifactId>
            <version>${junit.version}</version>
            <scope>test</scope>
        </dependency>
        <dependency>
            <groupId>mysql</groupId>
            <artifactId>mysql-connector-java</artifactId>
            <version>8.0.28</version>
        </dependency>
    </dependencies>

    <build>
        <plugins>
        </plugins>
    </build>
</project>
Step 7: Once the project is completed, run the application then show the library and books as output the products as output. Refer the below image for the better understanding of the concept.
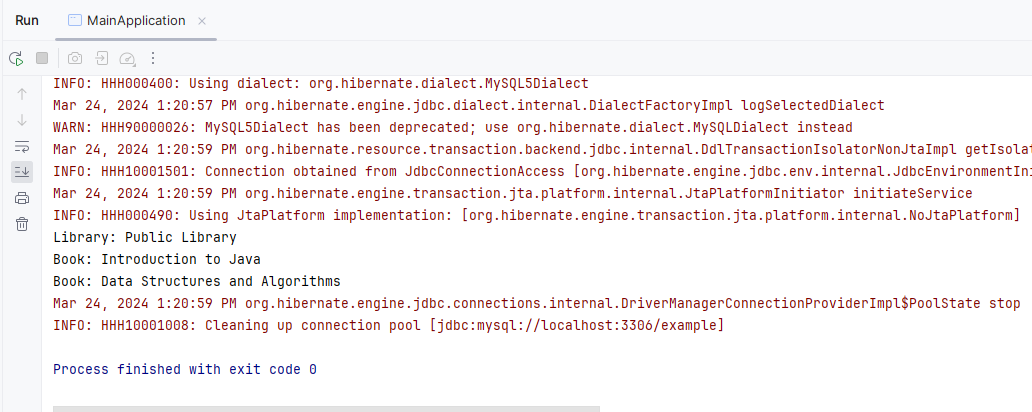
- In the above project, we have two entity classes that are Library and Book. They represents the data model of the library system.
- Library has the one-to-many relationship with the Book as the one library can have the mutiple books.
- And we can create the instance of the library and Book that can associate the books with the library.
- It can persist them into the database.
- Finally, we can retrieve the library from database along with its associated books and print as results of JPA application.
Share your thoughts in the comments
Please Login to comment...