Implement CircleImageView Library in HarmonyOS
Last Updated :
30 Jan, 2022
Are you looking to create a Profile Image that is perfectly clean and rounded for your application in HarmonyOS then we have got you covered. In this article, we will introduce you to the CircleImageView library which is been created in HarmonyOS, and also guide you on how easy it is to create simple applications based on it. Let’s get started.
CircleImageView is a very easy to use and very powerful library. The performance of the library is very good even when it works on one of the latest operating systems in the world, which is HarmonyOS!. CircleImageView not only covers displaying the image in a circular format we do have some additional properties that could be included. A few of them are listed below.
- Creating a circular image with a specified border ( color, width) values
- You can adjust the brightness/contrast of images and also the transparency value(alpha)
- Different ways to feed the images like URI, resource Id, PixelMap, PixelMapElement, etc.
Before we proceed further, I would definitely like to highlight the original CircleImageView package (de.hdodenhof:circleimageview) which inspired us, and port to it HarmonyOS with ease. There are multiple uses cases that are available that you can think off
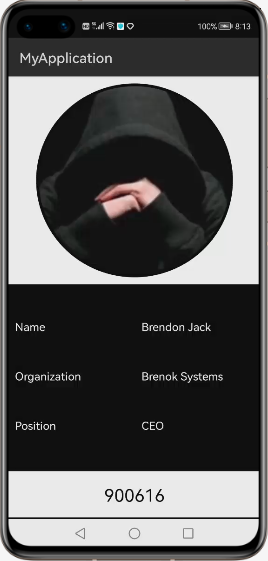
- Use it as a Single Profile Image
- Use it as Contact Images in your Contact Pages.
- If you have been using any chat application then definitely you must have come across a profile image in the list view format and CircleImageView suits you best here.
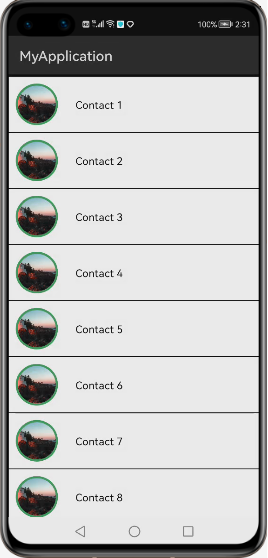
CircleImageView in Chat Application
Now that we know what can CircleImageView could be used for, now let’s see how to implement and start creating simple innovative applications.
Step by Step Implementation
Step 1: Here we would be using DevEco studio IDE which is designed exclusively to run HarmonyOS applications, if you haven’t installed one then you can get it from the official link with the SDK. Also, we have a step by step instructions for the environment setup available here.
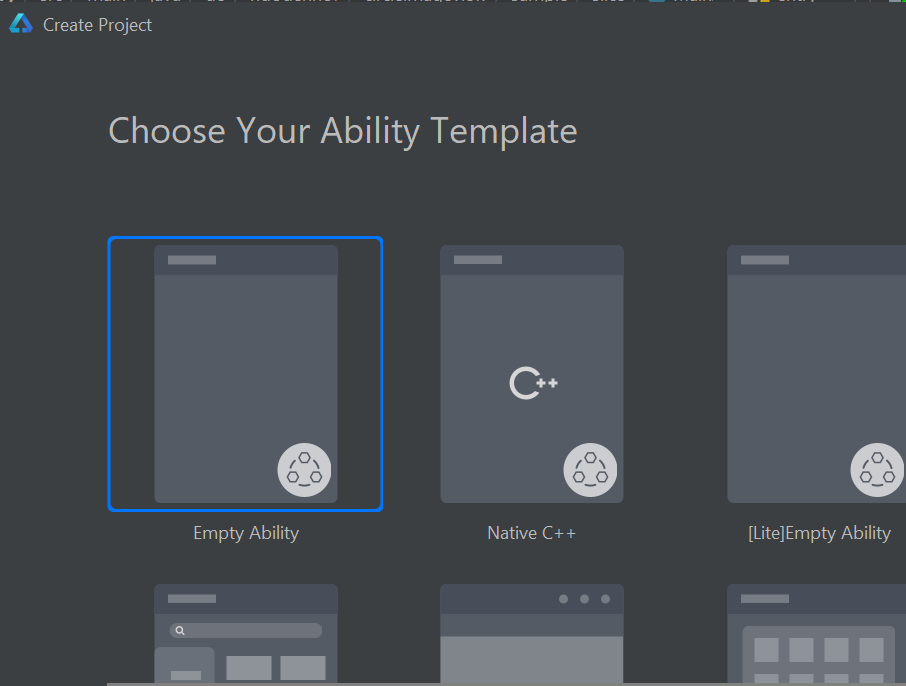
Step 2: Once you have the DevEco Studio up running you can create a select a “File” -> New -> New Project Option, then you are presented with multiple templates to choose from, select the template as shown below which is Empty Ability.
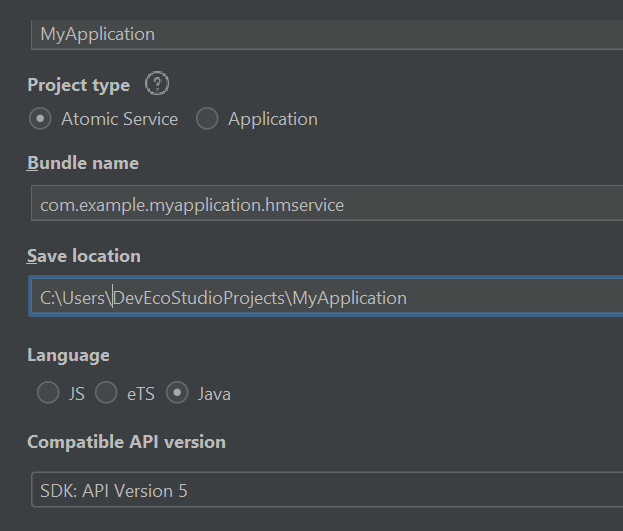
Step 3: As a next step you will have to “Configure the Project” with the project details, path and ensure to select
- Language as Java and
- API version to 5
Step 4: After the initial setup you are ready to start working on the application.
Step 5: Next add the CircleImageView Dependency, in order to use the library in your HarmonyOS mobile app, you need to first install it by adding the below dependency in your entry/build.gradle file.
dependencies {
implementation fileTree(dir: ‘libs’, include: [‘*.har’])
implementation ‘io.openharmony.tpc.thirdlib:circleimageview:1.0.0’
testCompile ‘junit:junit:4.12’
}
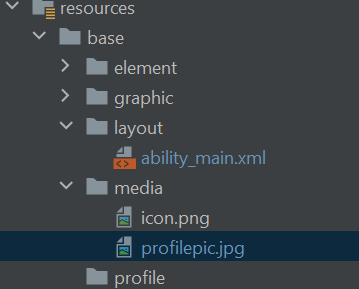
Step 6: After adding the dependency let’s define the layout file, you can find the layout by navigating to the below path “entry” -> src-> resources ->base -> layout ->ability_main.xml
In ability_main.xml add the below code
XML
<?xml version="1.0" encoding="utf-8"?>
<DirectionalLayout
ohos:height="match_parent"
ohos:width="match_parent"
ohos:orientation="vertical"
ohos:background_element="#000000">
<de.hdodenhof.circleimageview.CircleImageView
ohos:id="$+id:tempciv"
ohos:height="290vp"
ohos:width="290vp"
ohos:image_src="$media:profilepic"
ohos:orientation="vertical"
ohos:layout_alignment="center"
ohos:top_padding="10vp"
app:civ_border_width="4vp"
app:civ_color="#000000"
app:civ_bg_color="#FF0000"/>
</DirectionalLayout>
|
You might have observed that we have ohos:image_src=”$media:profilepic” in the above code, here we are referring to the image that is to be displayed in the CircleImageView. The image is stored in the Media folder and referenced as shown below.
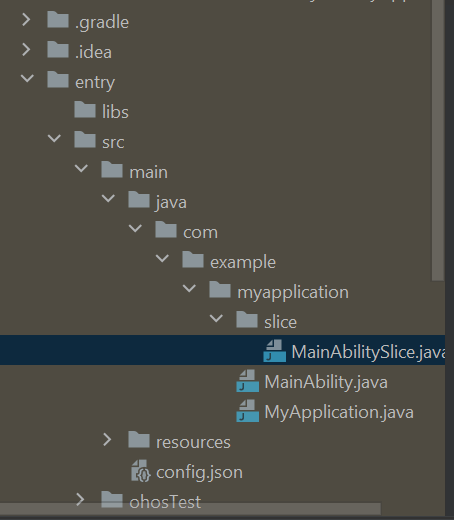
Step 7: Now that we have added the dependency and layout details, now let’s add the functional part in the Java file. Navigate to “MainAbilitySlice.java” as shown below.
Step 8: Replace the onStart functionality with the below code, in which we are referencing the layout which is Layout_ability_main, component id which is Id_tempciv, and then setting the border to the CircleImage.
Java
@Override public void onStart(Intent intent)
{
super.onStart(intent);
super.setUIContent(ResourceTable.Layout_ability_main);
CircleImageView civ;
civ = (CircleImageView)findComponentById(
ResourceTable.Id_tempciv);
civ.setBorderColor(Color.BLACK);
}
|
Step 9: That’s it we have added the dependency, created the layout file, then the java file to call onStart and media file which holds the image. Now we can rebuild the project by choosing the “Build” -> Rebuild Project
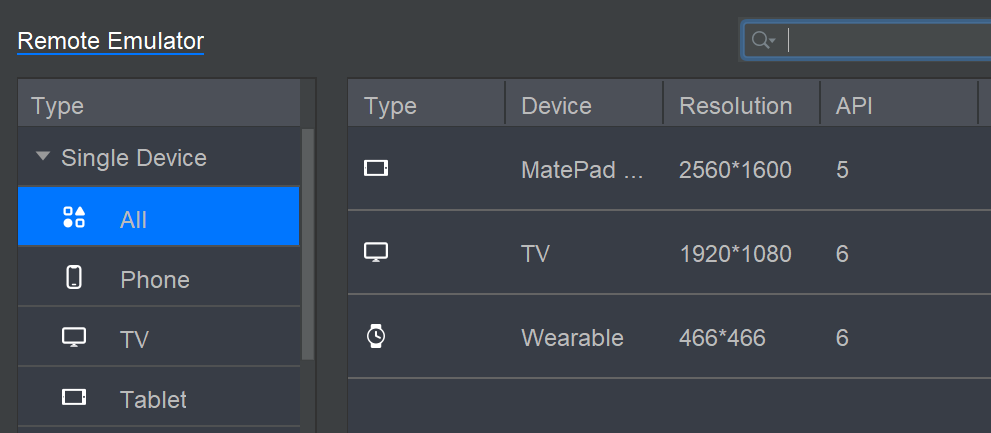
Step 10: Once the build is successful, you can run the app on the local remote emulators. In order to access the simulators, you need to register your id and complete the verification. Next Navigate to “Tools” -> “Device Manager” you will be prompted to sign in and grant access, on completion you will be displayed with a dialog with the list of emulators as shown below you can select the emulator by clicking on the play button on each emulator you can activate it.
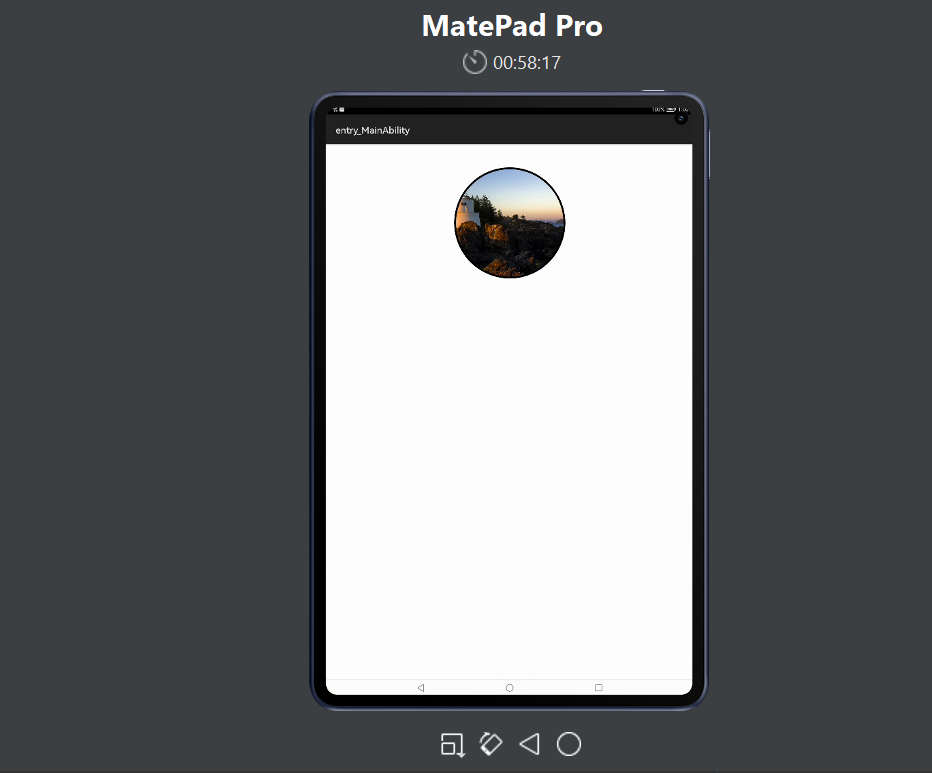
Step 11: If the emulator is up running then you should see as shown as the below screen.
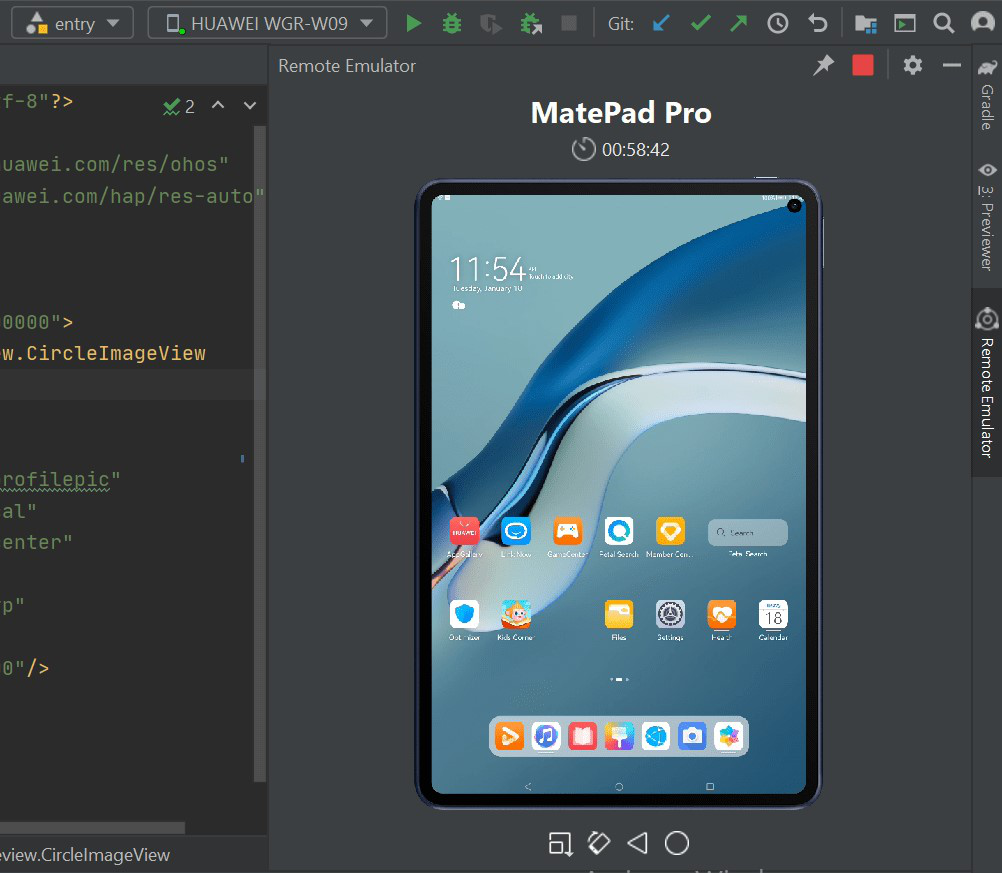
Step 12: You are almost done to kick start your first application up running using the CircleImageView Library built in HarmonyOS, now that the emulator is up running click on “Run” the Green play button and this will display the CircleImageView as shown below.
You have built your first HarmonyOS application using CircleImageView Library successfully, you can find the entire code with the library here. Under the “circleimageview” folder you can find the library code and under “entry” you will find the application code. Now it’s time to customize the CircleImageView. Below is the list of XML attributes that are supported by the library.
- civ_color – To specify the border color.
- civ_border_width – To specify border width.
- civ_bg_color – To specify a background color
List of public APIs for app-developer
Setter Methods
| setAlpha() |
setDisableCircularTransformation() |
| setBorderColor() |
setImageDrawable() |
| setBorderOverlay() |
setImageUri() |
| setBorderWidth() |
setPadding() |
| setCircleBackgroundColor() |
setPaddingRelative() |
| setColorFilter() |
setPixelMap() |
Getter Methods
| getAlpha() |
getColorFilter() |
| getBorderColor() |
isBorderOverlay() |
| getBorderWidth() |
isDisableCircularTransformation() |
| getCircleBackgroundColor() |
|
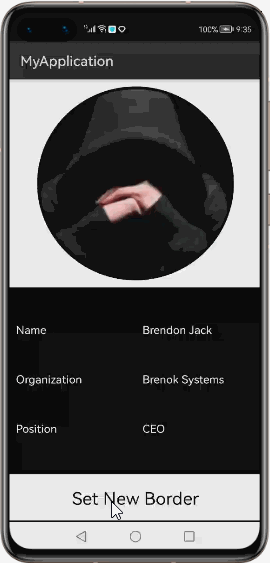
Let’s customize border-related attributes
In this customization, we are initially set the border color to black and on the button click the border color changes to Blue as shown below.
XML
Layout.xml:
<de.hdodenhof.circleimageview.CircleImageView
ohos:id="$+id:tempciv"
ohos:height="290vp"
ohos:width="290vp"
ohos:image_src="$media:profilepic"
ohos:orientation="vertical"
ohos:layout_alignment="center"
ohos:top_padding="10vp"
app:civ_border_width="4vp"
app:civ_color="#000000"
app:civ_bg_color="#FF0000"/>
|
Java
CircleImageView civ;
civ = (CircleImageView)findComponentById(ResourceTable.Id_tempciv);
civ.setBorderColor(Color.BLUE);
civ.setBorderWidth(20);
|
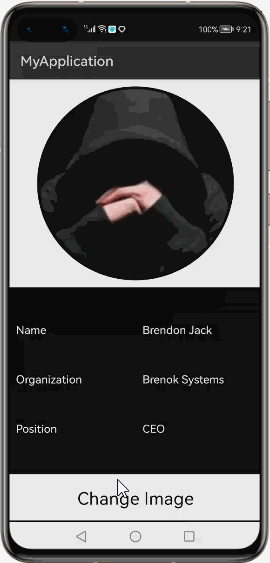
In this example, we are changing the image at runtime
Here we have two different images stored in the media folder and on button click, we change the image as shown below.
XML
<de.hdodenhof.circleimageview.CircleImageView
ohos:id="$+id:tempciv"
ohos:height="290vp"
ohos:width="290vp"
ohos:image_src="$media:profilepic"
ohos:orientation="vertical"
ohos:layout_alignment="center"
ohos:top_padding="10vp"
app:civ_border_width="4vp"
app:civ_color="#000000"
app:civ_bg_color="#FF0000"/>
|
Java
CircleImageView civ;
civ = (CircleImageView)findComponentById(ResourceTable.Id_tempciv);
civ.setPixelMap(ResourceTable.Media_Desert);
|
Share your thoughts in the comments
Please Login to comment...