How to Upload File and JSON Data in Postman?
Last Updated :
07 May, 2024
Postman is a very famous API development tool used to test APIs. Postman simplifies the process of the API lifecycle to create and test better APIs. Now, while we are working with APIs sometimes we need to send JSON as data or upload a file through API. There may be a scenario where we have to do both tasks in a single API.
Prerequisites:
Steps to upload file and JSON data in Postman
Step 1: Create an ExpressJS Application
We need to handle the requests send through Postman, for that we must have a Backend service ready. Here we are using ExpressJS for the Backend.
npm init -y
Step 2: Install the required dependencies.
npm i express multer body-parser
Folder Structure
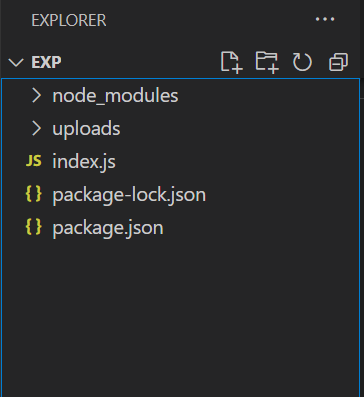
Upload File and JSON Data in Postman
Dependencies:
"dependencies": {
    "body-parser": "^1.20.2",
    "express": "^4.19.2",
    "multer": "^1.4.5-lts.1"
  }
Step 3: Configure index.js
Here we will define framework as Express and import Multer for handling file uploads and Body Parser for parsing JSON body. The uploaded files will be stored in the uploads folder of the project. We have configured three different endpoints for uploading JSON data, uploading File, uploading JSON and File respectively. These endpoints shows the data on successful operation and return status code as 200 OK and shows error message in case any error occurs.
JavaScript
//index.js

const express = require('express');
const multer = require('multer');
const bodyParser = require('body-parser');

const app = express();
const upload = multer({ dest: 'uploads/' });

// Middleware to parse JSON bodies
app.use(bodyParser.json());

// Upload Json Data only
app.post('/controller/uploadJson', (req, res) => {
    const user = req.body;
    res.status(200).send(Json Data Uploaded Successfully
        \nJson Data: ${ JSON.stringify(user) });
});

// Upload File only
app.post('/controller/uploadFile', upload.single('file'), (req, res) => {
    const file = req.file;
    res.status(200).send(File Uploaded Successfully
        \nFile Name: ${ file.originalname });
});

// Upload Both Json Data and File in a single request
app.post('/controller/uploadJsonAndFile',
upload.single('file'), (req, res) => {
    const user = req.body.user;
    const file = req.file;

    try {
        const userOriginal = JSON.parse(user);
        res.status(200).send(Json Data and File Received
            \nJson Data: ${ JSON.stringify(userOriginal) }
            \nFile Name: ${ file.originalname });
    } catch (error) {
        res.status(400).send('Invalid Json Data');
    }
});

const PORT = process.env.PORT || 8080;
app.listen(PORT, () => console.log
    (Server running on port ${ PORT }));
To start the application run the following command.
node index.js
The Express application is configured to run on port number 8080.
Step 4: Test APIs using Postman
Now it’s time to check the APIs using Postman application and see if we are being able to upload JSON data and file or not. In Postman all the Controllers are available under,
localhost:8080/controller

4.1 Upload JSON:
Let’s first try sending JSON Data using Postman. All the request will be sent using HTTP POST method. For this use the URL as,
localhost:8080/controller/uploadJson
Click on the Body tab and select raw and then write the JSON formatted data for the user class.
{
    "id": 1,
    "name": "Thala Dhoni",
    "phoneNo": 7777777777
}
Now click on Send to upload the data.
Output:

As you can see we got the response code as 200 OK which means operation is successful. We also the received the message we have set in the Controller with the User Details.
4.2 Upload File
For file upload the URL will be,
localhost:8080/controller/uploadFile
Now for file upload, Go to the Body section. Click on form data and write key as file. Select type as File using the dropdown. For Value select a file from your computer.

Now Click on Send.
Output:

As you can see in the above picture, it has returned 200 OK status and successful message with File name is received as response.
4.3 Upload File and JSON
Now we will upload the File and JSON data using a single endpoint. For this use the URL as following,
localhost:8080/controller/uploadJsonAndFile
For this also, Go to Body and then select form-data. For file write file as Key, Type as File and in Value choose the File to upload. For JSON Data, write Key as User, Type as Text and in the text box given, write JSON Formatted Data.
JSON Data
{
    "id": 2,
    "name": "King Kohli",
    "phoneNo": 1818181818
}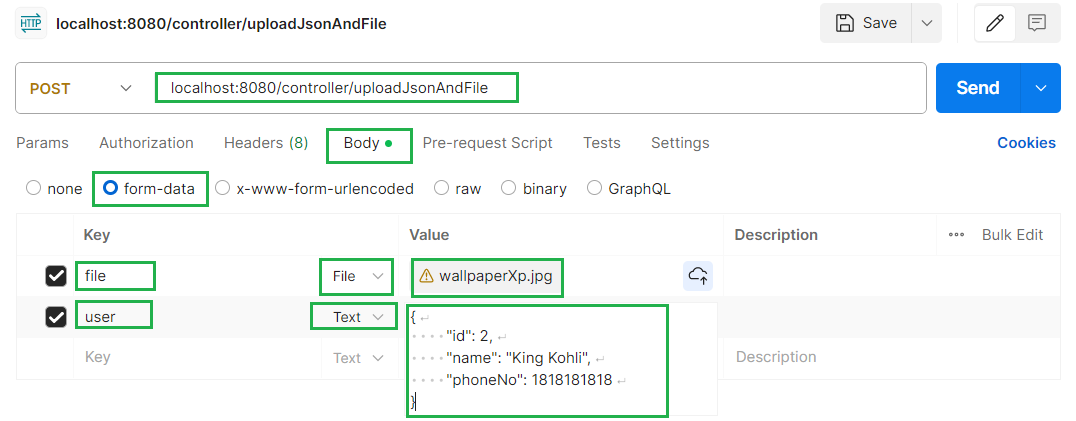
Click on Send.
Output:

And you can see that we got response code as 200 OK and the success message including User information for JSON Data and File name for File upload.
Share your thoughts in the comments
Please Login to comment...