How to Set Up Scala Development Environment for Apache Spark?
Last Updated :
24 Oct, 2023
Apache Spark is a powerful open-source data processing framework that enables you to process large datasets quickly and efficiently. While Spark supports multiple programming languages, including Python and Java, it is built on top of Scala. Setting up a Scala development environment for Apache Spark is essential for developing Spark applications in Scala. In this article, we will walk you through the steps to set up your environment on a Windows machine. Now, let’s dive into setting up your Scala development environment for Apache Spark.
Set Up Scala Development Environment for Apache Spark
Installation
Step 1: Install Java
Download OpenJDK. Choose the version that matches your system (e.g., HotSpot or OpenJ9). Click on the installer and install OpenJDK. For more information follow this link.
Step 2: Setup IntelliJ IDEA
Using IntelliJ IDEA for Spark development offers several advantages, such as a powerful integrated development environment (IDE) with code completion, debugging capabilities, and project management features. Here’s an overview of how to effectively use IntelliJ IDEA for Spark development:
- To download IntelliJ IDEA, follow these steps:
- Go to the JetBrains website to download IntelliJ IDEA.
- Click on the “Download” button for the edition you selected (Community in this case). Your download should start automatically. If not, you may be redirected to a page with download options.
.png)
- Once it download open Intellij IDEA. Follow the on-screen instructions to install IntelliJ IDEA. The installation process is straightforward, and you can generally accept the default settings.
- After installation is complete, you can launch IntelliJ IDEA from your system’s applications or start menu.
Initial Setup
- On the first run, IntelliJ IDEA will ask you to choose a UI theme and configure some basic settings.
- Follow the on-screen prompts to set up your development environment to your liking. That’s it! You should now have IntelliJ IDEA installed and ready to use on your system. You can create new projects, import existing ones, and start coding right away.
- Remember that while the Community edition is free, the Ultimate edition requires a paid license or a trial period. Make sure to choose the edition that aligns with your development needs and budget.
Create a Scala project In IntelliJ
Creating a Scala project in IntelliJ IDEA is a straightforward process. Follow these steps to create a new Scala project:
Open IntelliJ IDEA
Launch IntelliJ IDEA on your computer.
Create Maven Project
- Go to files Select New Project to open the new project window.
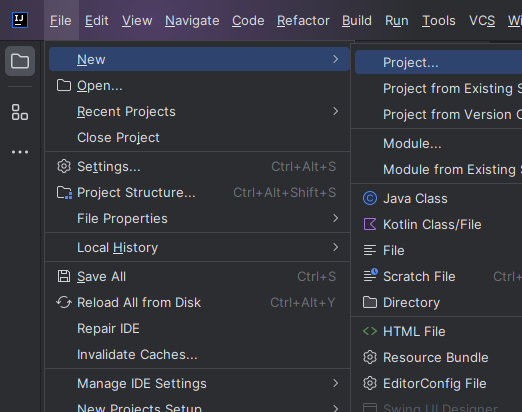
Fill all the respective fields properly.
.png)
Example: The fields will be the following
- Project Name – ScalaProject
- JDK version – which you have installed in your system it will automatically filled.
- Archetype – org.apache.maven.archetypes:maven-archetype-archetype
- Version – 1.0
- Select Finish.
Basically archetype is template which creates directory structure and also downloads the required dependencies automatically without making)
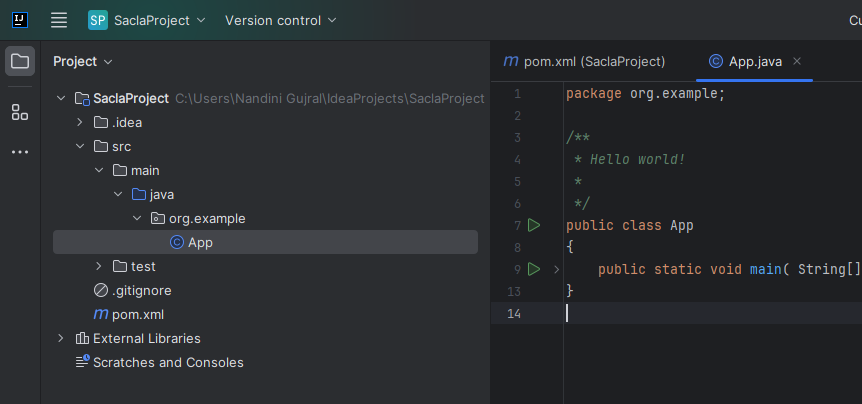
You will see on the left side in project explorer a project structure Scala Project.
Install Scala Plugin
- Now go to Open File > Settings to add plugins of Scala.
- Select the Plugins option from the given option from the left side. After that you can search Scala or any Plugin you want add in your project.
- Click on Install, restart the IntelliJ IDE.
.png)
Create file in New Project
- Right click on package then create file with .scala extension. (e.g. class name as App.scala). IntelliJ IDEA will automatically configure your project with the necessary settings. It may also prompt you to download the Scala library.
- You can find “Setup Scala SDK” option on top right side. Then for add library click on Create button.
.png)
- Download library select the version.
.png)
.png)
You can now start writing Scala code in your project. To create a new Scala class
- Right-click on the “src” folder in your project’s directory structure.
- Select “New” -> “Scala Class” from the context menu.
- Enter a name for your Scala class and select the type of class (e.g., “object,” “class”).
- Click “OK.”
Add Dependencies changes in pom.xml file
Basically, is to add Spark dependencies into pom.xml file
XML
<dependency>
<groupId>org.apache.spark</groupId>
<artifactId>spark-core_2.13</artifactId>
<version>3.2.1</version>
<scope>compile</scope>
</dependency>
<dependency>
<groupId>org.apache.spark</groupId>
<artifactId>spark-sql_2.13</artifactId>
<version>3.2.1</version>
<scope>compile</scope>
</dependency>
|
Create Scala file in New Project
IntelliJ IDEA will open the Scala class in the code editor. Create a new class in Scala.
Scala
package org.example
import org.apache.spark.sql.SparkSession
object Test extends App {
val spark = SparkSession.builder()
.master("local[0]")
.appName("SparkProject")
.getOrCreate();
println("Application Name :"+spark.sparkContext.appName);
println("Deploy Mode :"+spark.sparkContext.deployMode);
println("Master :"+spark.sparkContext.master);
}
|
Output
Application Name :SparkProject
Deploy Mode :client
Master :local[0]
Note – Before Run make sure you successfully built maven by using mvn clean install
Share your thoughts in the comments
Please Login to comment...