How to interface Temperature Sensor with Arduino?
Last Updated :
05 Feb, 2023
In this article, we will be interfacing TMP36 Temperature Sensor with Arduino. TMP36 is a precision centigrade temperature sensor that can precisely calculate the surrounding temperature. Connecting it with Arduino Uno can display the temperature getting from the sensor.
Components required for connection:
1. TMP36 Temperature Sensor:
Analog Devices’ TMP36 is a low-voltage, precision centigrade temperature sensor. Furthermore, the TMP36 sensor does not require calibration and has a typical accuracy of 1°C at +25°C and 2°C over the temperature range of 40°C to +125°C.
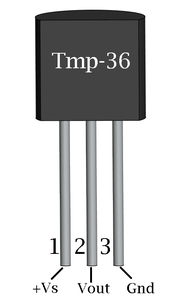
TMP36 sensor
2. Arduino Uno.
It is an open-source electronics platform. The ATmega328P-based Arduino Uno is a microcontroller board. It consists of 14 digital input/output pins, 6 analog inputs, a USB connection, a power jack, an ICSP header, and a reset button.
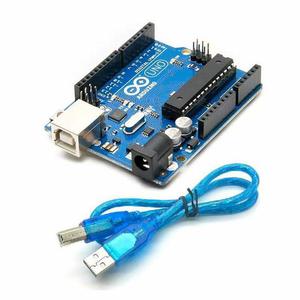
Arduino Uno
3. Breadboard.
A breadboard is a solderless device used to create temporary electronic prototypes and test circuit designs. The breadboard contains metal strips underneath it that link the holes on the top of the board.
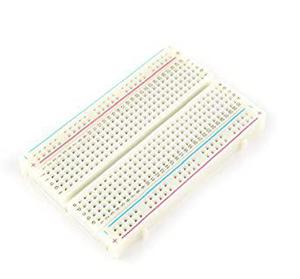
Breadboard mini
4. Jumper wires.
Jumper wires are simply wires with connector pins at each end that can be used to connect two points without soldering.

Jumper Wires
Working Principle:
The TMP36 measures temperature using a solid-state approach. It takes advantage of the fact that the voltage drop between the base and emitter (forward voltage – Vbe) of a diode-connected transistor falls at a predictable pace as the temperature rises. It is simple to construct an analog signal that is directly proportional to temperature by properly magnifying this voltage change.
Calculating the output voltage from the Analog temperature data:
We used the inbuilt analogRead() function to read the data from the A0 pin. After reading we then calculate Vout using the formula given below:
Vout = (reading from A0 pin) * (3.3 / 1024)
For Example: If the reading from the A0 pin is 248V then Vout will be ~800mV or ~0.8V.
How to measure temperature:
Simply connect the left pin to power (5V) and the right pin to the ground to use the TMP36. The analog voltage on the middle pin will thereafter be directly proportional (linear) to the temperature in °C.
Simply apply the following formula to convert voltage to temperature:
Temperature (°C) = (Vout – 0.5) * 100
For Example: If the output voltage is 0.8V then the temperature will be approx. to 30°C.
What is Tinkercad:
Tinkercad is a free 3D modeling program that is well-known for its simplicity. It is entirely web-based, so anyone with an internet connection can access it. Tinkercad ideas can be brought to life by using 3D printing, laser cutting, or building blocks. Many schools utilize it to teach projects that include 3D Design, Electronics, and Visual Code Blocks.
Steps to start working on Tinkercad:
- Make an account on tinkercad.com.
- Click on the ‘new+’ button in the right corner.
- click on Circuit.
- Now you drag and drop components and make connections using wires.
- After making the connection we have to write code in C/C++.
- After that, we have to click on Start Simulation.
- In the end, you can then click on the Stop Simulation button to end the simulation.
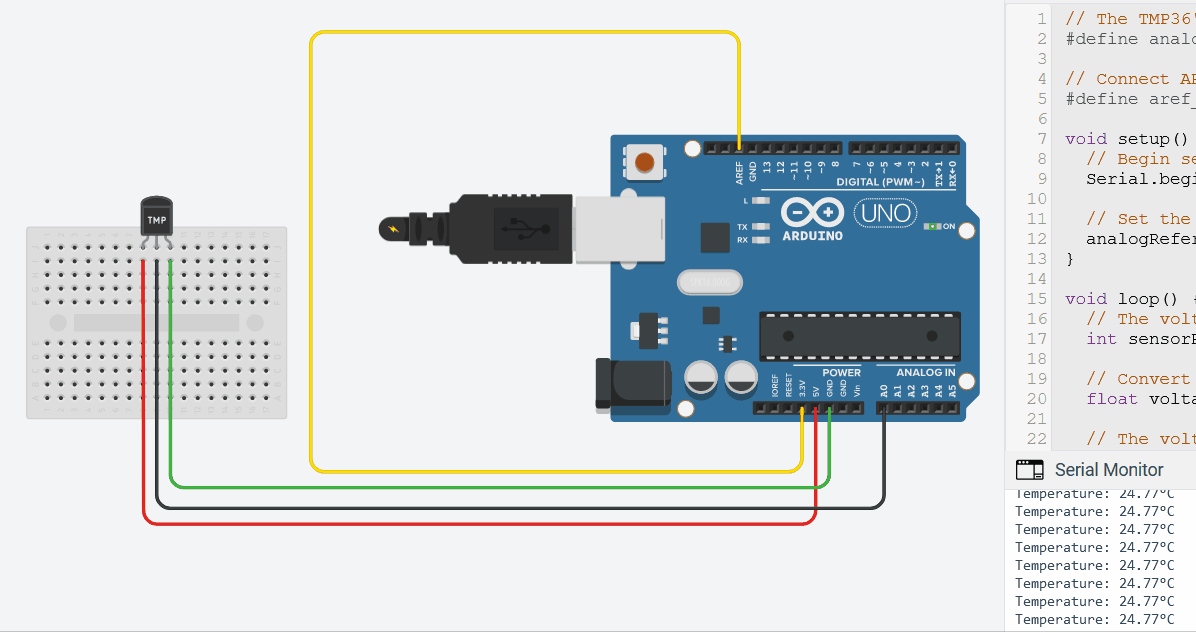
Connection of Arduino Uno with TMP36:
- The red wire is connected from 5V power from Arduino to TMP36’s power(Vs+).
- The black wire is connected from TMP36’s Vout to Arduino’s A0(Analog) pin.
- Green wire is connected from the ground(GND) of Arduino to the ground of the TMP36 sensor.
- The yellow wire is connected from the 3.3V of Arduino to the reference voltage(AREF) pin in Arduino. It is used to improve the accuracy of the TMP36 sensor.
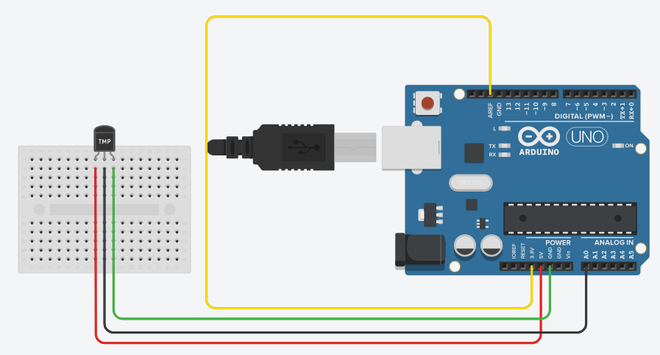
Circuit Diagram
Working Code for the above circuit:
C++
#define analogPin A0
#define aref_voltage 3.3
void setup() {
Serial.begin(9600);
analogReference(EXTERNAL);
}
void loop() {
int sensorRead = analogRead(analogPin);
float voltageOut = sensorRead * (aref_voltage / 1024.0);
float tempInC = (voltageOut - 0.5) * 100;
Serial.print("Temperature: ");
Serial.print(tempInC);
Serial.print("\xB0");
Serial.print("C");
Serial.print("\n");
delay(2000);
}
|
Simulation:
After you start the simulation, you can change the surrounding temperature by clicking on the TMP36 sensor and using the sliding button present on the top of it to change the surrounding temperature.
The output will be shown in the serial monitor section given below the code section in Tinkercad as:
Simulation
Share your thoughts in the comments
Please Login to comment...