How to implement the Tailwind CSS with Custom Angular Library ?
Last Updated :
02 Nov, 2023
Tailwind CSS is basically a Utility-first CSS framework for building rapid custom UI. It is a highly customizable, low-level CSS framework that gives you all of the building blocks that you need. Also, it is a cool way to write inline styling and achieve an awesome interface without writing a single line of your own CSS.
Angular is a client-side TypeScript-based, front-end web framework developed by the Angular Team at Google, that is mainly used to develop scalable single-page web applications(SPAs) for mobile & desktop. Angular CLI (Command Line Interface) is a powerful tool that provides developers with a set of commands for creating, building, testing, and deploying Angular applications and libraries.
Integrating Tailwind CSS into a custom Angular library is widely used in regular Angular projects. In this article, we will see how to use Tailwind CSS in a custom Angular library. Before proceeding, make sure that the Node.js & NPM must be installed in the system.
Steps to Configure TailwindCSS with Angular Library
Step 1: Setup a new project by creating a new directory
- To make the new directory use the ‘mkdir‘ command.
mkdir Tailwind-angular
- Now, navigate inside that directory using the ‘cd‘ command
cd Tailwind-angular
Step 2: Install the Angular CLI
To Install it write the following command in the terminal
npm install -g @angular/cli
Step 3: Creating a new angular project
Make a new angular project via the command ‘ng new my-angular-app’ and move inside it by ‘cd’ commands.
ng new my-angular-app
cd my-angular-app
Step 4: Installing TailwindCSS
Install tailwind using NPM using this command
npm install tailwindcss --save-dev
Step 5: Create a Tailwind CSS configuration file
Run the init command from Tailwind CSS to create a new tailwind.config.js file inside the project directory
npx tailwindcss init
Javascript
module.exports = {
content: [],
theme: {
extend: {},
},
plugins: [],
}
|
Step 6: Import the Tailwind CSS Directives
Add the layer directives of tailwind CSS by writing the following code inside the “./src/styles.css file”
CSS
@tailwind base;
@tailwind components;
@tailwind utilities;
|
Step 7: Configure your tailwind.config.js
To do that go inside “tailwind.config.js” and update it as given below, so that it will apply tailwind-CSS in all the files.
Javascript
module.exports = {
content: [],
theme: {
extend: {},
},
plugins: [],
}
|
content: [
    "./src/**/*.{html,ts}", // add this line
  ]
- After adding the above line:
Javascript
module.exports = {
content: [
"./src/**/*.{html,ts}",
],
theme: {
extend: {},
},
plugins: [],
}
|
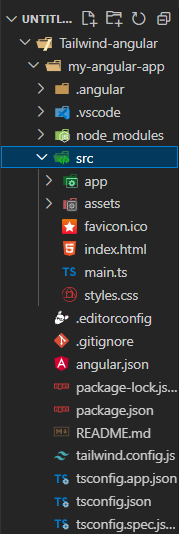
Step 8: Project Structure
The below project structure will be generated by following the above commands:
Step 9: Run the Application
The below line of code will generate a localhost server, & follow the server link to open the application on the web browser.
ng serve --open
Example 1: This example illustrates the setting up of Tailwind-CSS with the Angular Library. In the following code, we are using the text class with a <h1> tag & including the bold style which makes the content bold and underlines it. Add Tailwind’s utility classes to style your content inside “./src/app/app.component.html”
HTML
<h1 class="text-3xl font-bold underline">
GeeksforGeeks
</h1>
|
Output: To run it write the following command in the terminal ng serve –open

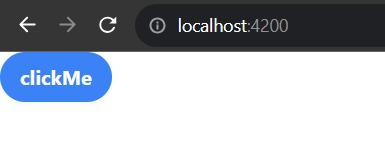
Example 2: This example illustrates the successful execution of code after setting up Tailwind-CSS with the Angular Library. In the following code, we are using Tailwind class=”bg-blue-500 hover:bg-blue-700 text-white font-bold py-2 rounded-full” with Button tag which makes the button background blue, text white and round the corners and it changes color when we hover on it.
HTML
<button class="bg-blue-500
hover:bg-blue-700
text-white
font-bold py-2 rounded-full">
clickMe
</button>
|
Output:
Share your thoughts in the comments
Please Login to comment...