How to Download and Install iTunes on Linux
Last Updated :
08 Jan, 2024
Introducing iTunes to the Linux platform provides users with a seamless way to manage and organize their media libraries on diverse operating systems. While iTunes is primarily designed for Windows and macOS, Linux users can still access its features through compatibility layers. This article will guide you through downloading and installing iTunes on a Linux system, enabling users to synchronize their music, movies, and other media content across devices and providing a comprehensive solution for those who prefer or require the Linux environment while enjoying the functionality of iTunes. Follow the steps below to bring the iTunes experience to your Linux desktop.
Features of iTunes
- Media Library Management: iTunes allows users to organize and manage their music, movies, TV shows, podcasts, and audiobooks in a centralized media library.
- iTunes Store: Users can purchase and download music, movies, TV shows, and more from the iTunes Store. The Apple Music and Apple TV apps in recent macOS versions have largely replaced this feature.
- Syncing Devices: iTunes facilitates the syncing of content to iPods, iPhones, iPads, and other Apple devices. This includes transferring music, videos, photos, and apps.
- Home Sharing: Users can share their iTunes library with other devices on the same network, allowing for easy access to media content.
How to Download and Install iTunes on Linux?
In this section, we will see the complete steps to download and install the iTunes application in a Linux environment. Follow the below-specified steps with proper command execution to install without encountering any error.
Step 1: Downloading WineHQ GPG Key
Firstly, we need to add the repository of Wine, so to add we need to download the WineHQ GPG key using the wget command.
sudo sh -c 'wget -O - https://dl.winehq.org/wine-builds/winehq.key | gpg --dearmor -o /usr/share/keyrings/winehq-archive-keyring.gpg'
- sudo sh -c: Executes the subsequent command with superuser privileges.
- ‘wget -O – https://dl.winehq.org/wine-builds/winehq.key | gpg –dearmor -o /usr/share/keyrings/winehq-archive-keyring.gpg’: This is a pipeline of commands.
- wget -O – https://dl.winehq.org/wine-builds/winehq.key: Retrieves the WineHQ GPG key from the specified URL.
- |: Pipes the output of the wget command to the next command.
- gpg –dearmor -o /usr/share/keyrings/winehq-archive-keyring.gpg’: This part of the command performs two functions.
- -o /usr/share/keyrings/winehq-archive-keyring.gpg’: Specifies the output location and filename for the de-armored key, typically stored in the system’s keyring directory.

Downloading WineHQ GPG Key
Step 2: Add Wine Repository
Once we have downloaded the WineHQ GPG Key, we need to add it to our system repositories. So to add, execute the below command in the terminal.
sudo add-apt-repository 'deb https://dl.winehq.org/wine-builds/ubuntu/ groovy main'
- sudo: Executes the subsequent command with superuser privileges.
- add-apt-repository: Adds a new repository to the system’s list of repositories.
- ‘deb https://dl.winehq.org/wine-builds/ubuntu/ groovy main’: Specifies the repository to be added.

Add Wine Repository
Step 3: Update the System
After adding the Wine repository, update the system repositories using the apt package manager. Execute the below command.
sudo apt update
- sudo: Executes the subsequent command with superuser privileges.
- apt: The Advanced Package Tool, used for managing packages on Debian-based systems.
- update: This sub-command refreshes the local package database by fetching the latest information from all configured repositories.

Update the System
Step 4: Install Wine
Once the system gets updated with the late repositories, we need to install the Wine HQ packages on our system by using the below installation command.
sudo apt install --install-recommends winehq-stable
- sudo: Executes the subsequent command with superuser privileges.
- apt: The Advanced Package Tool, used for managing packages on Debian-based systems.
- –install-recommends: Ensures that recommended dependencies for the installed package are also installed.
- winehq-stable: The name of the WineHQ package to be installed. In this case, it installs the stable version of Wine.
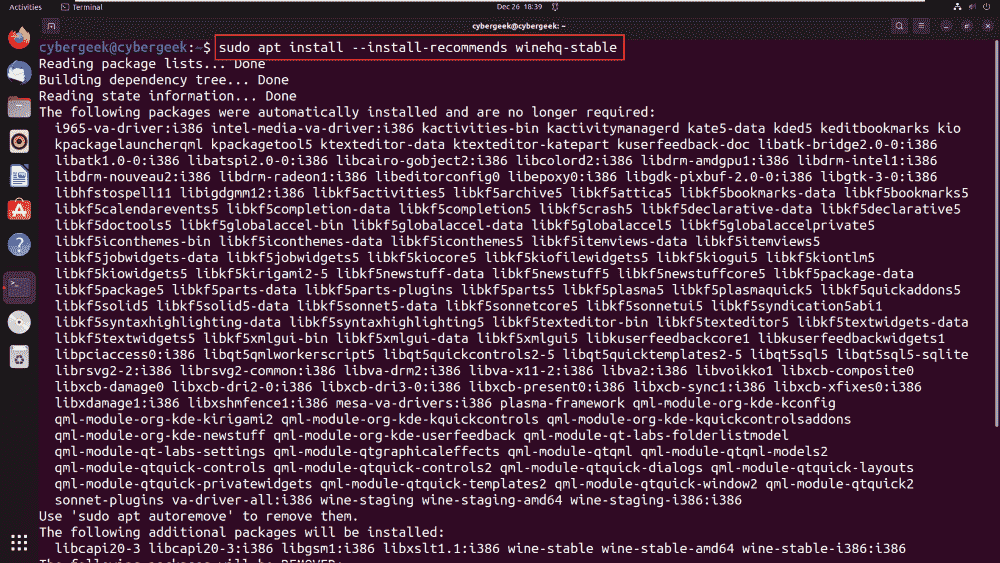
Install Wine
Step 5: Download iTunes Setup
As the installation of Wine is completed, we need to download the iTunes setup as per our system architecture, we can download it from the official website of Apple or by using the below wget command.
sudo wget https://secure-appldnld.apple.com/itunes12/001-80053-20210422-E8A3B28C-A3B2-11EB-BE07-CE1B67FC6302/iTunes64Setup.exe
- sudo: Executes the subsequent command with superuser privileges.
- wget: A command-line utility for retrieving files from the web.
- https://secure-appldnld.apple.com/itunes12/001-80053-20210422-E8A3B28C-A3B2-11EB-BE07-CE1B67FC6302/iTunes64Setup.exe: Specifies the URL from which to download the iTunes setup executable.

Download iTunes Setup
Step 6: Install iTunes using Wine
After downloading the iTunes setup, right-click on the file, choose “Open With Other Application,” and select Wine as the application to open the setup with. Follow the on-screen instructions to install iTunes using Wine, allowing compatibility with Windows applications on a Linux system.
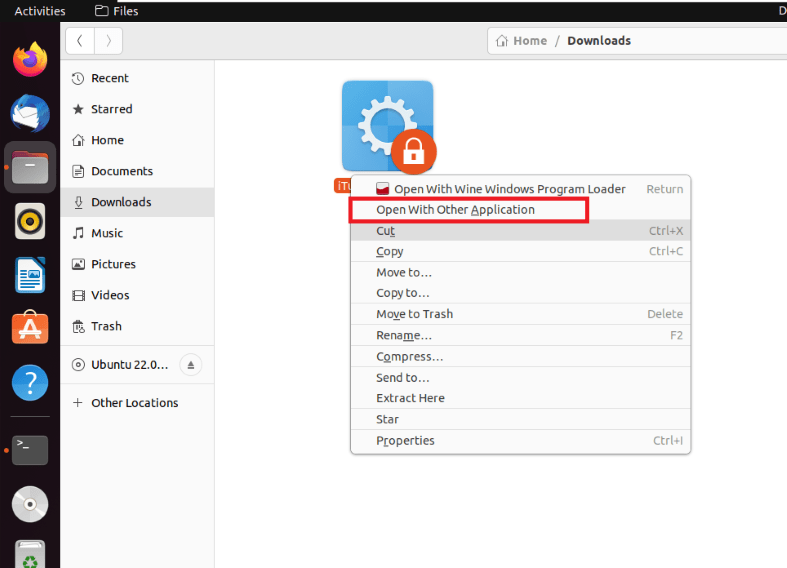
Open with Other Application
To select “Wine Windows Program Loader” from the Recommended Applications, follow these steps:
- Right-click on the downloaded iTunes setup file.
- Choose the option “Open With Other Application” from the context menu.
- Select “Wine Windows Program Loader” from the list of recommended applications.
- Click “Select” or “Open” to initiate the installation of iTunes using Wine. Follow the on-screen instructions to complete the installation process.

Selecting Wine Windows Program Loader
Step 7: Completing the Setup
After initiating the installation setup, download all the necessary packages and follow the on-screen instructions to complete the installation process. A successful completion of the setup is indicated by the displayed output, confirming that iTunes has been installed successfully using Wine on your Linux system.
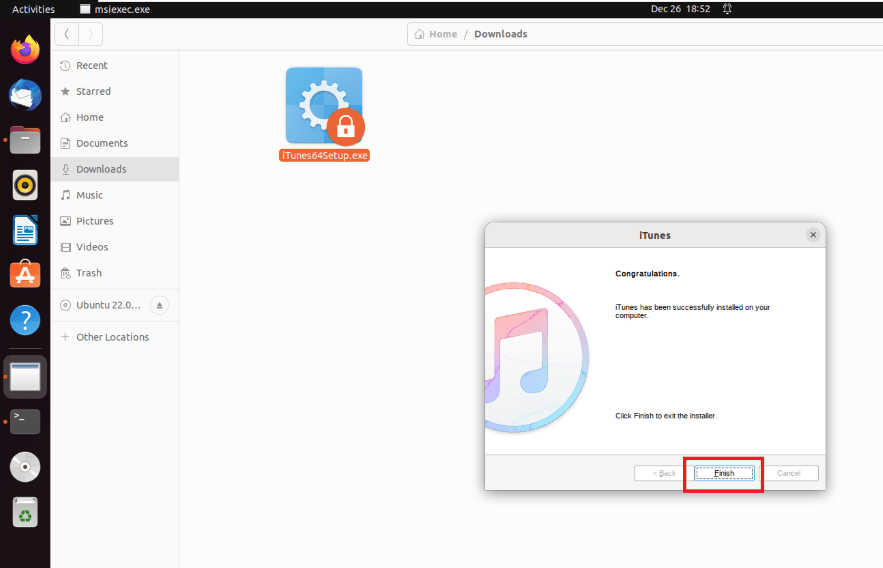
Completing the Setup
Step 8: Allow Launching Icon
After completing the installation, locate the iTunes shortcut icon on the Desktop. Right-click on the icon and select the option “Allow Launching” to ensure that the application is permitted to run. This step grants necessary permissions for the successful launch of iTunes on your Linux system.
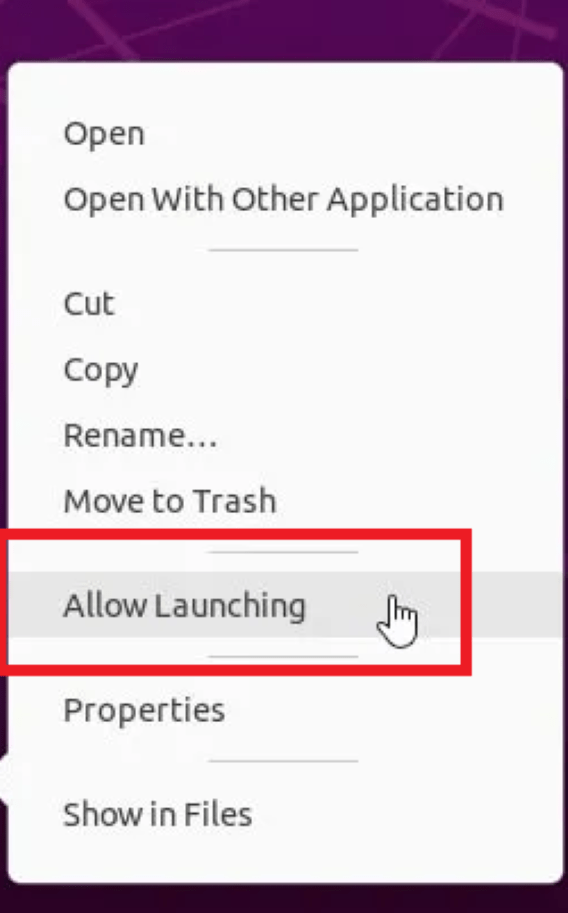
Allow Launching Icon
Step 9: Open the Application
Click on the iTunes application icon on your Desktop to open the application on your Linux operating system. This action will launch Wine, the compatibility layer, allowing iTunes to run seamlessly on Linux. Ensure that you’ve completed the previous steps correctly, including the installation of Wine and the successful setup of iTunes using the Wine Windows Program Loader. Upon clicking the icon, iTunes should open without any issues, providing access to its features on your Linux system.

Open the Application
Conclusion
In conclusion, installing iTunes on Linux involves leveraging the compatibility layer Wine to run the Windows version of iTunes seamlessly on Linux distributions. By adding the WineHQ GPG key and repository, updating the system, and installing Wine, users pave the way for accessing iTunes on their Linux machines. The process further entails downloading the appropriate iTunes setup from Apple’s official website and executing it through Wine. Although the absence of a native iTunes version for Linux requires this workaround, the step-by-step guide provided ensures a smooth installation process, allowing users to manage their media libraries, sync devices, and enjoy the functionalities of iTunes within the Linux environment.
Share your thoughts in the comments
Please Login to comment...