How to Display a Drawable Inside a Button in Android?
Last Updated :
03 Jan, 2022
A Button in Android is basically a subclass of TextView, which lets the user press or click it to perform an action. Buttons generally contain text that lets the user understand the action property of the button. Sometimes, an ImageView can also be used as a button if the developer wishes to display an image rather than some text. But some buttons contain both an image or a drawable and text. These buttons can often be seen at sign-up or login forms as the image below shows.

So in this article, we would implement a Button along with a drawable and a text in Android. Follow the below steps once the IDE is ready.
Step by Step Implementation
Step 1: Create a New Project in Android Studio
To create a new project in Android Studio please refer to How to Create/Start a New Project in Android Studio. We demonstrated the application in Kotlin, so make sure you select Kotlin as the primary language while creating a New Project.
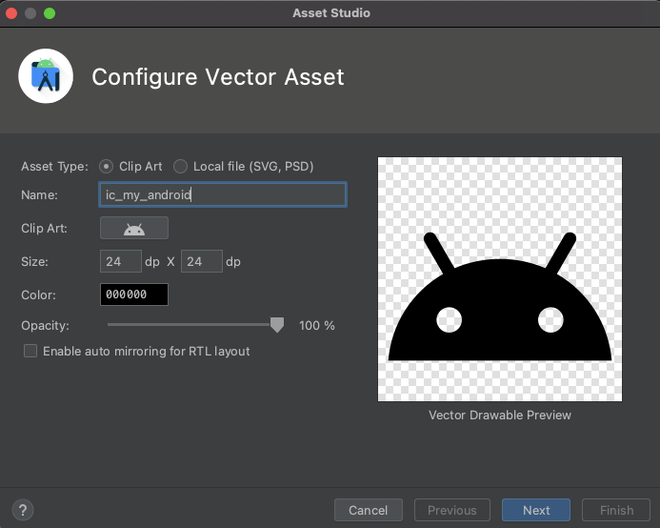
Step 2: Create a new vector asset in the drawable folder
How to Add Vector Assets in Android Studio? Follow this article to learn how to add a vector asset. As displayed below, we created a vector asset in the drawable folder. We shall be using this drawable while implementing the Button.
Step 3: Working with the activity_main.xml file
Navigate to the app > res > layout > activity_main.xml and add the below code to that file. Below is the code for the activity_main.xml file. We implemented a simple button in the layout file as shown below.
XML
<?xml version="1.0" encoding="utf-8"?>
<RelativeLayout
android:layout_width="match_parent"
android:layout_height="match_parent"
tools:context=".MainActivity">
<Button
android:id="@+id/button"
android:layout_width="wrap_content"
android:layout_height="wrap_content"
android:text="Click"
android:layout_centerHorizontal="true"/>
</RelativeLayout>
|
Step 4: Working with the MainActivity.kt file
In the main code, we stored the location of the vector in a local value and then applied it to the Button using the function:
setCompoundDrawablesWithIntrinsicBounds(//left, //top, //right, //bottom)
The local value must be placed either at left, top, right, or bottom place inside the function and the rest must be null. Refer to the comments.
Kotlin
import android.annotation.SuppressLint
import android.content.Context
import android.content.res.Resources
import android.os.Build
import androidx.appcompat.app.AppCompatActivity
import android.os.Bundle
import android.widget.Button
class MainActivity : AppCompatActivity() {
@SuppressLint("UseCompatLoadingForDrawables")
override fun onCreate(savedInstanceState: Bundle?) {
super.onCreate(savedInstanceState)
setContentView(R.layout.activity_main)
val mButton = findViewById<Button>(R.id.button)
val mImage = if (Build.VERSION.SDK_INT >= Build.VERSION_CODES.LOLLIPOP) {
getDrawable(R.drawable.ic_my_android)
} else {
TODO()
}
mButton.setCompoundDrawablesWithIntrinsicBounds(mImage, null, null, null)
}
}
|
Output:
You can see that the drawable is placed at the left of the text.

Similarly,
if the code were mButton.setCompoundDrawablesWithIntrinsicBounds(null, mImage, null, null), the drawable would be at the top of the text.

if the code were mButton.setCompoundDrawablesWithIntrinsicBounds(null, null, mImage, null), the drawable would be at the right of the text.

and if the code were mButton.setCompoundDrawablesWithIntrinsicBounds(null, null, null, mImage), the drawable would be at the bottom of the text.

Like Article
Suggest improvement
Share your thoughts in the comments
Please Login to comment...