Python is a very popular language, mainly known for its easy syntax and extensive libraries. It is mostly used in Data Domains and Development Fields as well. For writing our code and executing it we use an environment, called IDE or Integrated Development Environment. Likewise one of the very popular IDEs in the programming world is PyCharm. Python can be done in PyCharm with ease. PyChram is widely used to code, run and execute, customize and configure, and many more. In this article, we’ll discuss in detail about customization and Configuration in PyChram. In this article, we will learn how to customize and configure PyCharm.
Concepts Related to Customization and Configuration in PyChram
Before we jump to the Customizations and Configuration, we first should understand some key concepts related to it.
Settings and Preferences
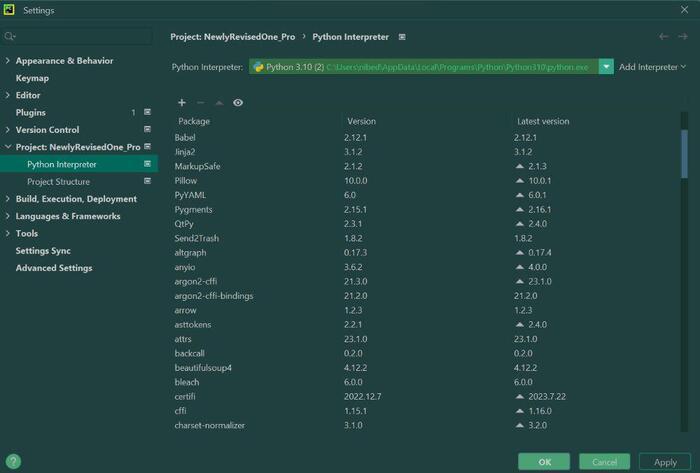
PyChram has actually two types of configuration; one is settings and another is preferences. Settings are mainly for projects in Python and inside the project section we get two options again, i.e. Python Interpreter and Project structure. This helps us to interpret our code file and choose the interpreter as per our preferences and can structure our Project. The projects are sorted in a “.idea” folder within our Project directory. Then the preferences option is apllied to all Projects. We can get both from the “file” menu under the “settings” tab or if we are one macOS then we can access them under the “appearence” tab.
- Plugins: PyChram offers a wide range of plugins which helps extending its functionality and we can see it in the “plugins” section. We can install the plugins as per our preferences and manage it through the “settings” tab under the “plugins” section within PyCharm.
- Keymaps: Keymaps is a feature in PyChram which helps in customizing the key-board shortcuts by modifying it. This is very useful to adapt our PyChram with our personal workflow. There are a bunch of keymaps such as editor actions, main menu, tool window, external tools, version control systems, external build systems, macros. intensions, quick lists and many more. We can also get more keymaps in settings or plugins.
- Color Schemes: This is very helpful feature in PyChram. It helps us to customize the color scheme. It also helps to improve code readbility and reduce eye strain as well. In PyChram we can choose the color scheme out of many built-in schemes and also we can create our own.
Steps Needed to Customize PyCharm
Let’s now discuss on how to customize PyChram.
1. Accessing Settings/Preferences
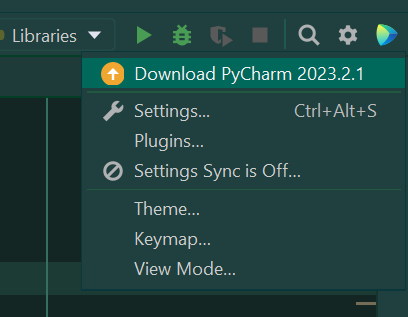
We are talking about PyCharm, but didn’t discuss on how to access all the features. In case you haven’t already installed PyCharm then install it from the official site of PyCharm and download from the “download” option. So, now open PyCharm, and then go to “File”; then “Settings”. Another way is to access the settings is to go to the “settings” tab directly from the Pycharm homepage. On the top right corner there is a option with the “setting” icon, and by clickign there you’ll be able to see “settings’, “plugins, “theme”, “keymap” and “view mode” etc.
If you still didn’t get, you can see right in the image:
.png)
Another way is to go directly to the settings tab
Settings tab
2. Customization of Appearance
To access the color sceme, first naviage to the “Editor” and then “color scheme” in the settings. If you can’t find somthing, then simply go to the search icon and then just type it and you’re done. You can see in the image below.
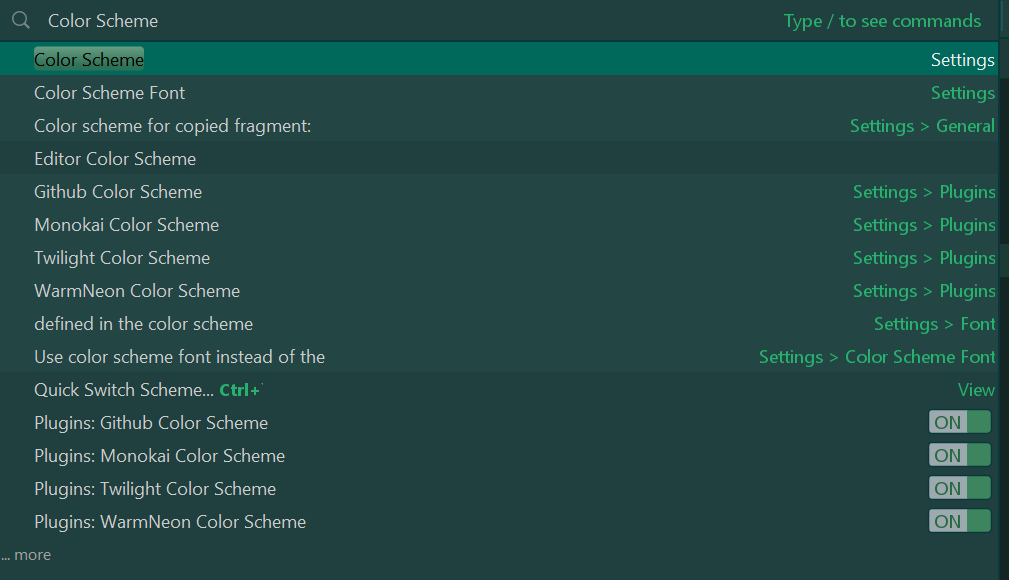
PyCharm Color Scheme
Adter that simply choose a color scheme or you can also create of your own. Or, click on the gear icon if you want ot create a custom one. Then customize the colors for different elements for code like strings, commands and keywords etc. to make your code more readable.
Under the same “editor” tab, you can also select “font” and according to your preferences, you can customize the font familty and the font size. As you want, you can adjust the line-spacing and other text settings as well.
3. Configuration of Keymaps
To configure the keymaps in PyCharm, simply go to the “settings” and then click on the “Keymaps” section to see the list of keymaps to configure it. Then you can search for the commads and actions that is used by you the most. You can also assign custom key-board short cuts in the “Editor Actions” tab. Just right click on the tab and then select one of the options such as “Add Key-board Shortcuts”, “Add Mouse Shortcuts” or “Add Abbereation” and as per your preferenced customize the keymaps.
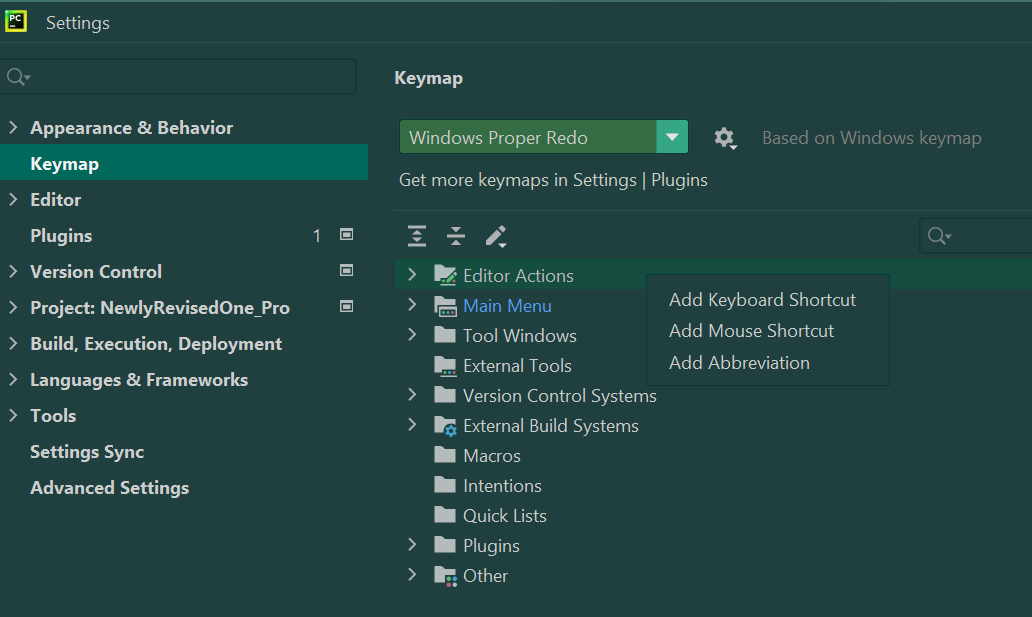
Configurations of Keymaps
4. Installation of Plugins
To install the plugins, simply go to “settings” and from there click on the “plugins” tab. Then click on the “Marketplace” tab on the right hand side of plugins and then install the required plugins and configure as per your need.
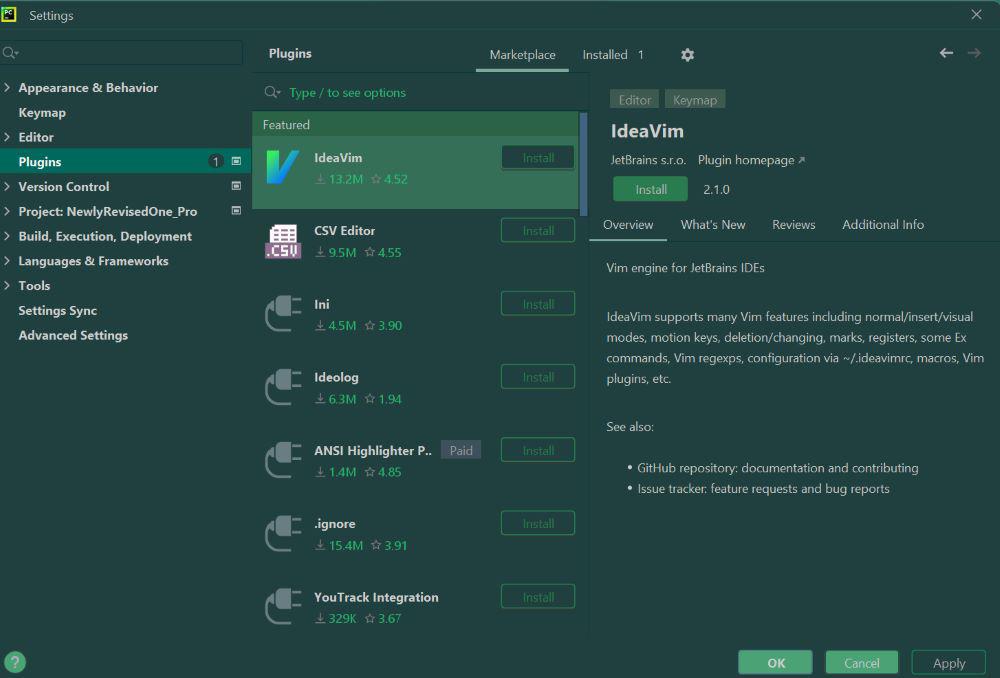
Plugins in PyCharm
5. Project-specific Settings
To configure the settings where you want it to be applied on a specific project, then for this simply go the “File” tab, and then selct “Settings” and configure according to your preferences. Another way is to go to the “Settings” icon right on the top right corner of PyCharm. If you are in doubt, check out the image above I have provided in this article.
Example: Customization of the Color Scheme
Here I wanna give an example with my prefered theme, i.e. Gradianto Nature Green in PyCharm. So, if I want this perticular color scheme, then I’ll simply go to the “Editor” tab from the “Settings” and click on the “Color Scheme” option. After that I’ll be able to see there an option “Create New Color Scheme” and by selecting this option and then adjust the color settings to create my desired theme. If I don’t want to do all these and simply want to install a theme already exists, then I don’t need to do these many things. For that I’ll simply go to the “Settings” icon on the top right corner, and select “theme” and I can see a list of different themes. In case I don’t like any from the available theme there, I’ll simply click on the “install theme” tab and install my desired theme.
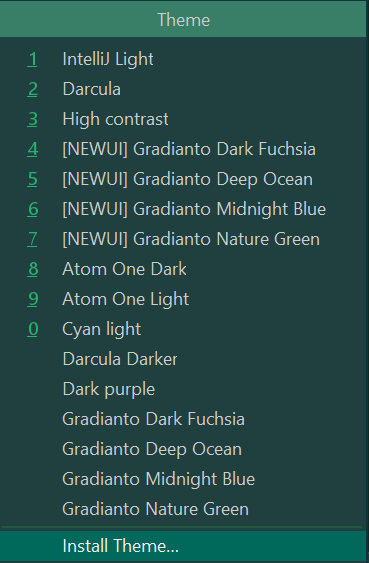
PyCharm Themes
Let’s now understand those points in more depth. I’ll devide it into two sections now: Configuration and Customization. So, this time understand clearly.
Configuration in PyCharm
Setting up a Project
To set up a project, first of all you need to open PyCharm. On the top left corner you can see the file option, click on “File” and select “new project” or else you can also work with an existing one. You can now configure Python Interpreter, that specifies its version. If you’re facing problems, see in this image below.
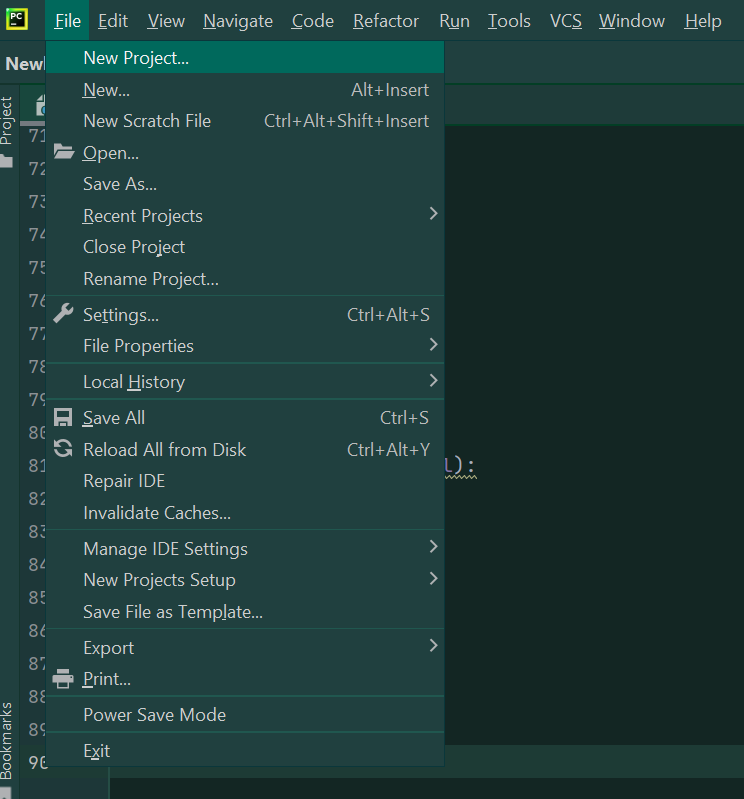
PyCharm New Project
Editor Preferences
Go to “Settings”, then “Editor” and configure your settings according to your preferences such as “code style”, “inspections”, “font” and more. If you’re facing problems finding this option, you can also see in the image below:
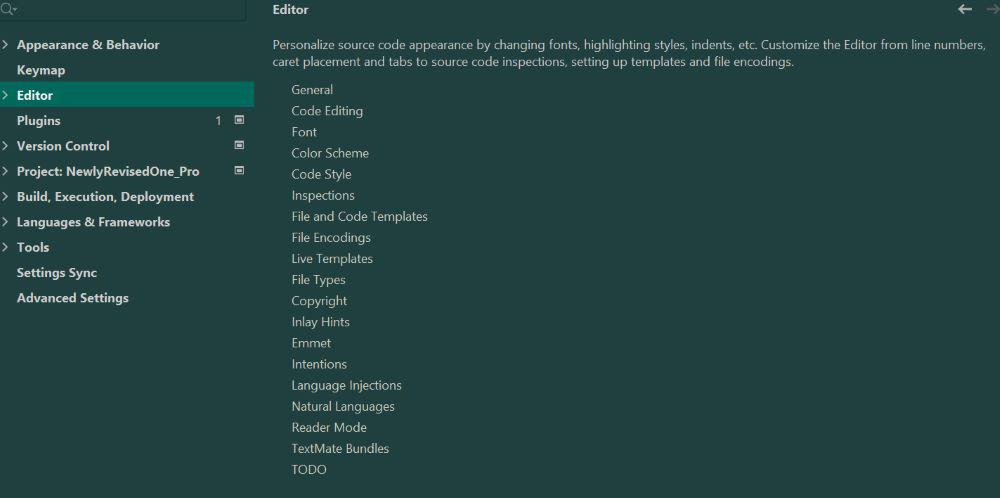
Editor Settings in PyCharm
Version Control Integration
In case you’re using version control systems like Git, you can configure your PyCharm settings. Go to the “VSC” tab on the top left corner between “tools” and “window” tabs. You can set your git username and also choose the version control tool according to your preferences.
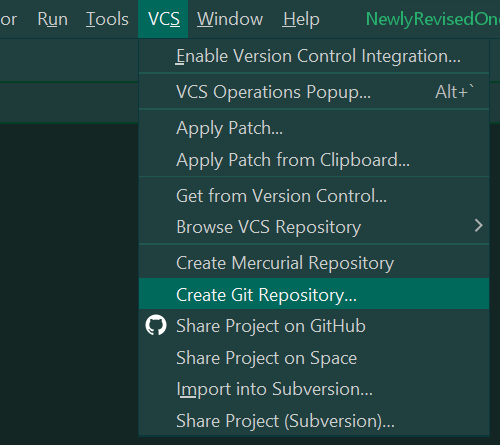
VCS in PyCharm
Customization in PyCharm
In PyCharm you can change the look, means the appearence and behaviour of your IDE to enhance the workflow, we simply call this procedures as cusomization.
Themes and Color Schemes:
You can change the look or appearence of your PyCharm by choosing different themes and color schemes. To do this, simply go to the “settings” icon on the top right corner and click on the “theme” tab and choose your preferred thems for your PyCharm. Or simply you can search on the search icon and type the specific tool name and dirrectly access it from there. I have already provide the image above in the first example, and for the seach icon, I have provided an image of it in the steps needed section on the 2nd point. You can check that too.
Keymap Customization:
You can simply go to the “settings” icon on the top right corner and go to the “settings” bar. From there by clicking on the “keymap” option you can choose different keymap settings to customize it and also you can add different key-board shortcuts as well. I have also provided the image above to find this in the “Keymaps configutation” section.
Plugins and Extensions:
As we’ve dicussed this above, PyCharm does support a variety of plugins and extensions that help us cutomize our IDE. These extensions can extend the functionality of our IDE. You can choose your preferred plugins, install them and configure your chosen plugins and it’ll help in supporting different programming languages and frameworks. I have provided the requied images above as well to understand well.
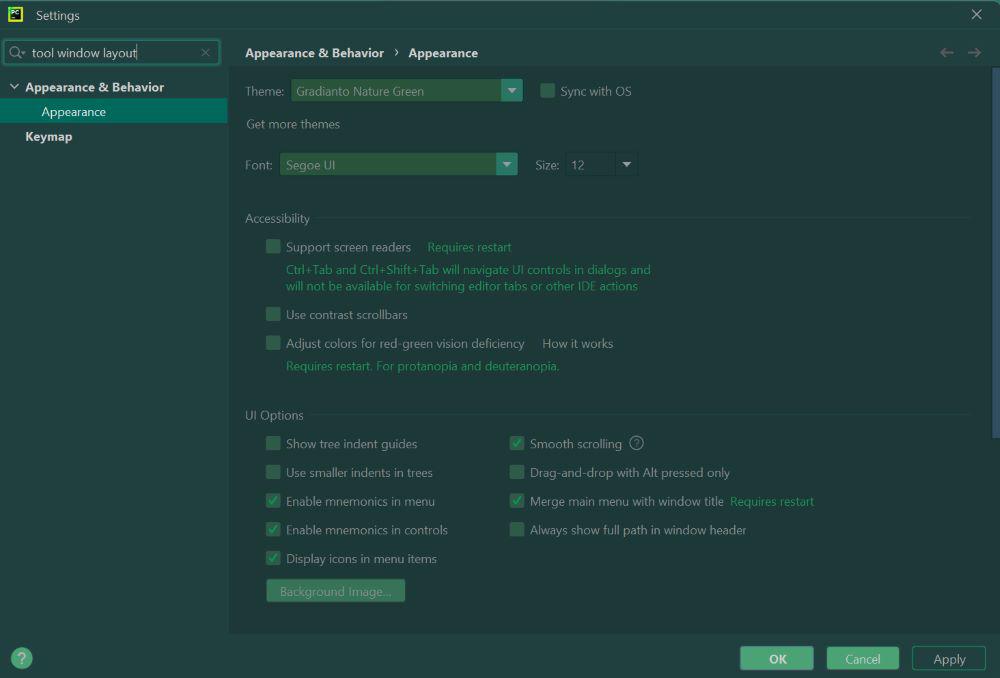
Tool Windows Layout:
You can simply go to the settings tab and search for “tool window layout”. According to your need you can customize your window layout. Arrange the tool window within your PyCharm and customize the layout of your tool so that you can maximize your workspace efficiency. You can simply drag and drop the tool windows to the locations you prefer.
PyCharm Tool Window Layout
Share your thoughts in the comments
Please Login to comment...