How to Create Classes in Android Studio?
Last Updated :
18 Feb, 2021
In Android during the project development most of the time there is a need for classes in the projects. For example, in the case of CRUD operation, we need a model class to insert and retrieve data. Also to hold the info in our custom view we need to create a getter setter class. So basically in android, there are two types of classes we can create and we use frequently.
- Creating Java Class
- Creating Kotlin Class
So in this article, we are going to create both Java and Kotlin class in Android studio.
Creating Java Class in Android Studio
A class is a user-defined blueprint or prototype from which objects are created. It represents the set of properties or methods that are common to all objects of one type. In general, java class declarations can include these components, in order:
- Modifiers: A class can be public or has default access (Refer this for details).
- class keyword: class keyword is used to create a class.
- Class name: The name should begin with an initial letter (capitalized by convention).
- Superclass(if any): The name of the class’s parent (superclass), if any, preceded by the keyword extends. A class can only extend (subclass) one parent.
- Interfaces(if any): A comma-separated list of interfaces implemented by the class, if any, preceded by the keyword implements. A class can implement more than one interface.
- Body: The class body surrounded by braces, { }.
Step by Step Implementation
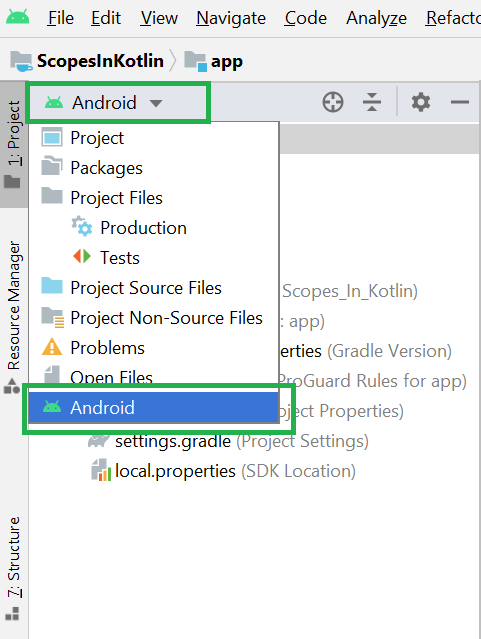
Step 1: Go to Android Studio and open the project in Android mode as shown in the below image.
Step 2: Now go to the app > java > your package name > right-click > New > Java Class as shown in the below image.

Step 3: After completing step 2 a pop-up screen will arise like below. Here enter your class name and choose Class and click the Enter button.

After completing the above steps successfully you can find your Java class here. Go to the app > java > your package name > GeeksforGeeks.java. And you can write your own Java code here.

Creating Kotlin Class in Android Studio
Like Java, the class is a blueprint for the objects having similar properties. We need to define a class before creating an object and the class keyword is used to define a class. The kotlin class declaration consists of the class name, class header, and class body enclosed with curly braces.
Syntax:
// class header
class className {
// class body
}
Where:
Class name: every class has a specific name
Class header: header consist of parameters and constructors of a class
Class body: surrounded by curly braces, contains member functions and other property
Both the header and the class body are optional; if there is nothing in between curly braces then the class body can be omitted. For example:
class emptyClass
Step by Step Implementation
Step 1: Go to Android Studio and open the project in Android mode as shown in the below image.
Step 2: Now go to the app > java > your package name > right-click > New > Kotlin File/Class as shown in the below image.

Step 3: After completing step 2 a pop-up screen will arise like below. Here enter your class name and choose Class and click the Enter button.

After completing the above steps successfully you can find your Kotlin class here. Go to the app > java > your package name > GeeksforGeeks.kt. And you can write your own Kotlin code here.

Share your thoughts in the comments
Please Login to comment...