How To Convert Figma Design To React JS
Last Updated :
23 Apr, 2024
Translating a design from Figma to a functional React JS application is a crucial step in the web development process. Figma provides powerful tools for designing user interfaces, and React JS offers a robust framework for building interactive and dynamic web applications. This article will explore various approaches to converting a Figma design to React JS, covering different techniques and best practices.
Manual Conversion:
This approach involves manually inspecting the Figma design and writing React components from scratch to replicate the layout, styles, and interactions. Designers or developers analyze the design in Figma, identify elements, and translate them into code using HTML, CSS, and JavaScript.
Advantages:
- Full control over code structure and implementation.
- Flexibility to customize code according to specific project requirements.
- Suitable for complex designs that require custom logic and interactions.
Disadvantages:
- Time-consuming, especially for intricate designs with many elements.
- Prone to human error and inconsistencies if not meticulously implemented.
- Requires a good understanding of both design principles and coding practices.
Exporting Assets
In this approach, designers export assets such as images, icons, SVGs, and CSS styles from Figma and then import them into the React project. These assets are used within React components to recreate the design, focusing primarily on visual elements rather than interactive functionalities.
Advantages:
- Simplifies the conversion process for static designs with minimal interactivity.
- Allows for efficient reuse of design assets across multiple components.
- Can speed up development for straightforward UI elements like images, icons, and basic styles.
Disadvantages:
- Limited support for dynamic or interactive elements that require complex logic.
- May result in larger file sizes if all assets are exported, impacting performance.
- Still requires manual coding effort to integrate assets into React components and ensure responsiveness.
Using Figma Plugins
Figma plugins like Figmotion or Reactifier automate the conversion process by generating React components directly from the Figma design. These plugins analyze Figma layers, styles, animations, and interactions, translating them into ready-to-use React code.
Advantages:
- Streamlines the conversion process, saving time and effort.
- Ensures consistency between design and code by directly extracting design elements.
- Supports complex animations and interactions without manual coding.
Disadvantages:
- Limited flexibility compared to manual conversion in terms of code customization.
- Relies on plugin functionality, which may have limitations or require updates for new features.
- Requires familiarity with Figma plugins and integration with the React development workflow.
Steps to Convert Figma Design to React
To convert a Figma design to a React JS application, follow these steps:
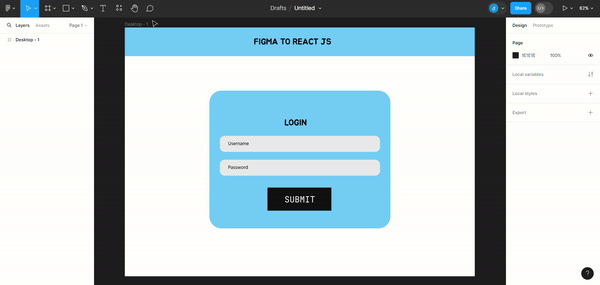
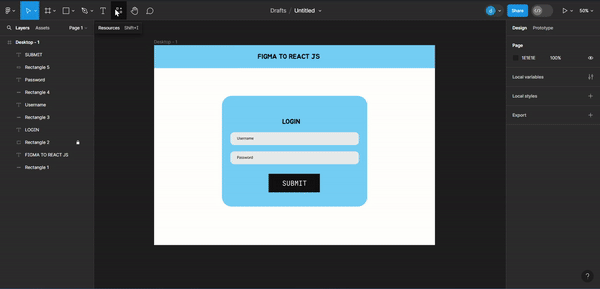
Step 1: Create a design in Figma.

Step 2: Click on Resources and search for Builder.io extension.
Step 3: Select the design and then click on generate Code button.
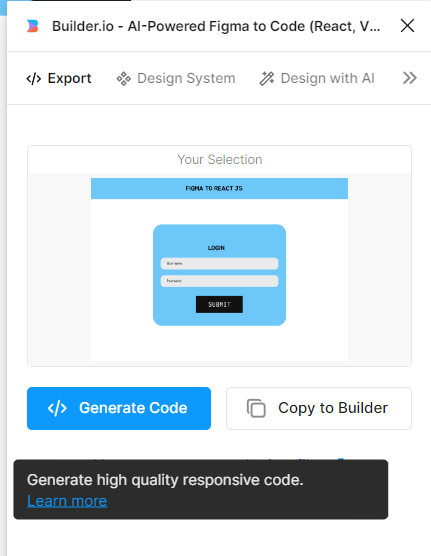
Step 4: Now you will be directed to new webpage, Choose whichever style you want to use.
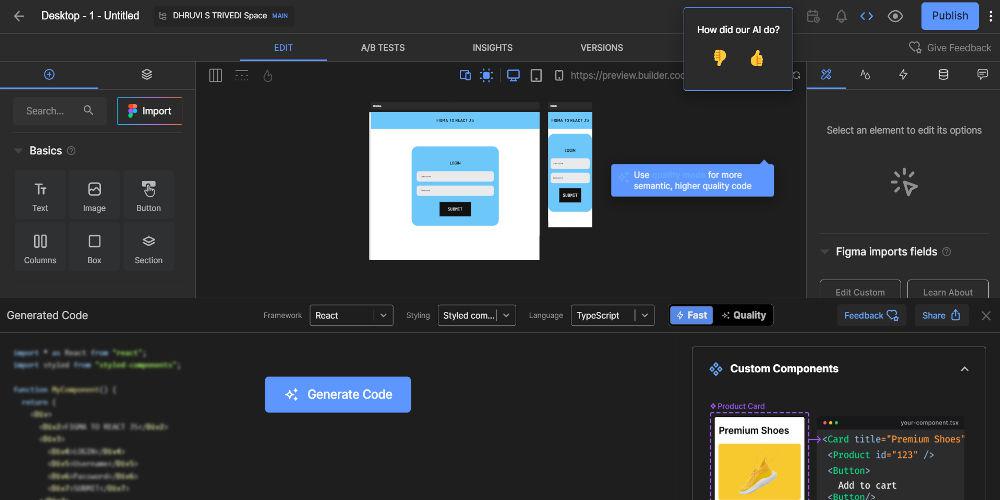
Step 5: Copy the code and paste it in App.js .
Step 6: Run the development server using :-
npm start
Example: The code generated from figma design.
JavaScript
//App.js

import * as React from "react";
import styled from "styled-components";

function MyComponent() {
    return (
        <Div>
            <Div2>
                FIGMA TO REACT JS
            </Div2>
            <Div3>
                <Div4>LOGIN</Div4>
                <Div5>Username</Div5>
                <Div6>Password</Div6>
                <Div7>SUBMIT</Div7>
            </Div3>
        </Div>
    );
}

const Div = styled.div`
  background-color: #fff;
  display: flex;
  padding-bottom: 80px;
  flex-direction: column;
  font-size: 35px;
  color: #000;
  font-weight: 400;
`;

const Div2 = styled.div`
  font-family: Jua, sans-serif;
  background-color: #6ec7f9;
  width: 100%;
  align-items: center;
  justify-content: center;
  padding: 46px 60px;
  @media (max-width: 991px) {
    max-width: 100%;
    padding: 0 20px;
  }
`;

const Div3 = styled.div`
  border-radius: 50px;
  background-color: #6ec7f9;
  align-self: center;
  display: flex;
  margin-top: 142px;
  width: 745px;
  max-width: 100%;
  flex-direction: column;
  white-space: nowrap;
  padding: 77px 43px;
  @media (max-width: 991px) {
    margin-top: 40px;
    white-space: initial;
    padding: 0 20px;
  }
`;

const Div4 = styled.div`
  font-family: Jua, sans-serif;
  align-self: center;
  margin-top: 38px;
`;

const Div5 = styled.div`
  border-radius: 20px;
  background-color: #e9eaeb;
  margin-top: 42px;
  align-items: start;
  justify-content: center;
  padding: 27px 34px;
  font: 20px Hind, sans-serif;
  @media (max-width: 991px) {
    max-width: 100%;
    margin-top: 40px;
    white-space: initial;
    padding: 0 20px;
  }
`;

const Div6 = styled.div`
  border-radius: 20px;
  background-color: #e9eaeb;
  margin-top: 32px;
  align-items: start;
  justify-content: center;
  padding: 26px 34px;
  font: 20px Hind, sans-serif;
  @media (max-width: 991px) {
    max-width: 100%;
    white-space: initial;
    padding: 0 20px;
  }
`;

const Div7 = styled.div`
  font-family: JetBrains Mono, sans-serif;
  background-color: #111;
  align-self: center;
  margin-top: 49px;
  color: #fff;
  justify-content: center;
  padding: 35px 60px;
  @media (max-width: 991px) {
    margin-top: 40px;
    white-space: initial;
    padding: 0 30px 0 20px;
  }
`;

export default MyComponent;
Output:
Conclusion
Converting a Figma design to React JS involves several approaches, including manual conversion, exporting assets, and using Figma plugins. Each method has its advantages and is suitable for different scenarios. By following the steps outlined in this guide, you can efficiently translate your Figma designs into fully functional React JS applications.
Share your thoughts in the comments
Please Login to comment...