How To Control Traffic To Subnets Using Network ACLs In AWS ?
Last Updated :
27 Mar, 2024
Controlling traffic to subnets utilizing Network Access Control Lists (NACLs) is a vital part of managing the security and openness of resources inside an Amazon Web Services (AWS) Virtual Private Cloud (VPC). NACLs act as virtual firewalls, managing inbound and outbound traffic flow at the subnet level. By defining explicit standards, administrators can manage the types of traffic allowed to enter or exit assigned subnets, subsequently upgrading network security and ensuring consistency with authoritative policies.
We will dive into the essentials of network ACLs and clarify the step-by-step process of designing them to manage traffic inside an AWS VPC. We’ll define key terminologies like NACLs and subnets, explore how to make and modify NACLs, and examine best practices for partnering with subnets. Furthermore, we’ll give practical examples, diagrams, and screenshots to work with a complete comprehension of the topic.
What is Network Access Control Lists (NACLs)?
Network Access Control Lists (NACLs) are a kind of security control mechanism in Amazon Web Services (AWS) that work at the subnet level inside a Virtual Private Cloud (VPC). NACLs act as a virtual firewall, permitting you to control traffic entering and leaving at least one subnet. They give an extra layer of security beyond security groups, which work at the instance level.
Here are a few key points about Network Access Control Lists (NACLs):
- Subnet Level Control: NACLs are associated with subnets inside a VPC. This association allows you to apply rules that oversee traffic flow to and from resources inside that subnet.
- Numbered Rules: NACLs utilize numbered rules to define the request where they are evaluated. Lower rule numbers have higher priority. Rules are processed in numerical order until a match is found. Assuming no rules match, the default action (allow or deny) is applied.
- Allow/Deny Actions: Each rule in a NACL specifies whether to allow or deny traffic that matches the standard’s criteria. Rules can be configured in based of source and destination IP addresses, ports, and protocols.
- Implicit Deny: By default, NACLs have an implicit “deny all” rule toward the end of the rule set. This means intends that in the event that traffic doesn’t match any express allow rules, it is automatically denied.
- Associating with Subnets: You can associate a single NACL with multiple subnets inside a VPC. Be that as it may, each subnet must be associated with each NACL at a time.
Step-By-Step To Control traffic to subnets using network ACLs
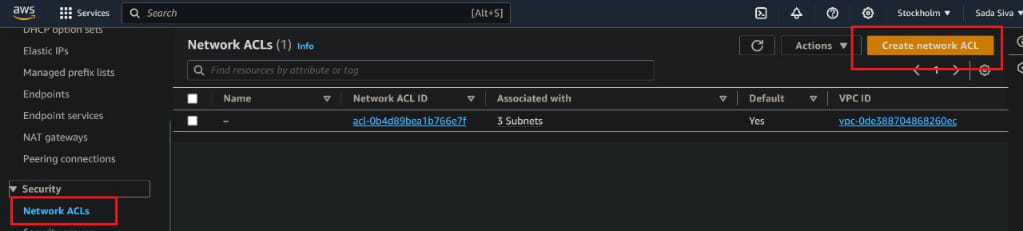
Step 1: Access Network ACLs
- Log in to the AWS Management Console with your credentials or create new account and navigate to the VPC Dashboard.
- In security block they have a option Network ACLs and click on create Network ACL
- Now Give name to your Network ACLs and select VPC which is existing in your account or create new VPC
- Click on Create Network ACL
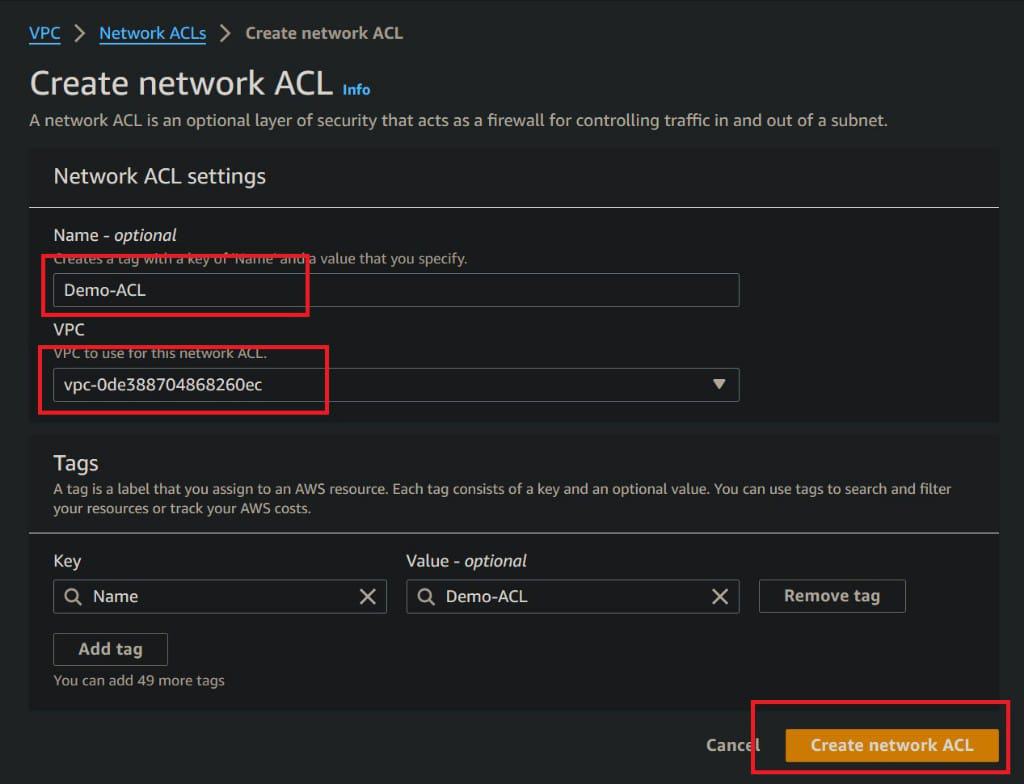
- In below figure shows that our newly created Network ACL

Step 2: Configure Inbound and Outbound Rules
- Define inbound rules and outbound rules based on your security requirements.
Inbound Rules
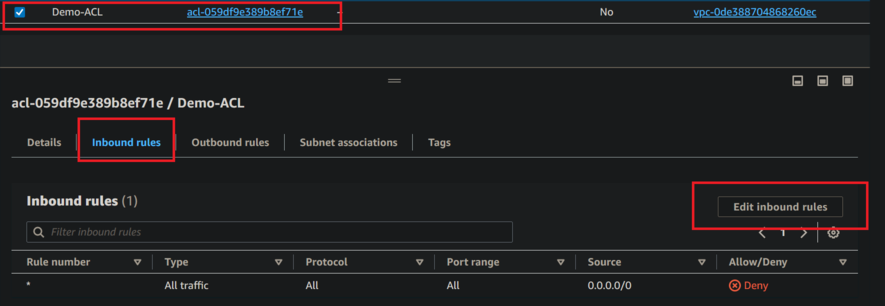
- Now click on created Network ACL its shows option in below like details, inbound rules, outbound rules subnet associations and Tags.
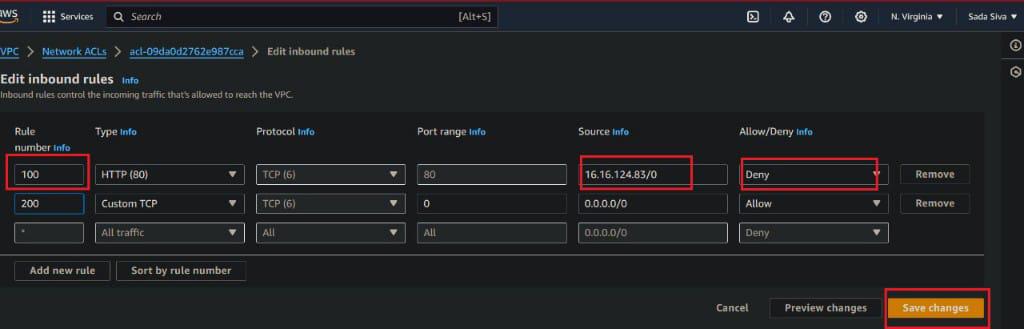
- Choose inbound rules and click on edit inbound rules. Follow below figure
- Now click on add new rule.
- Now click save changes.
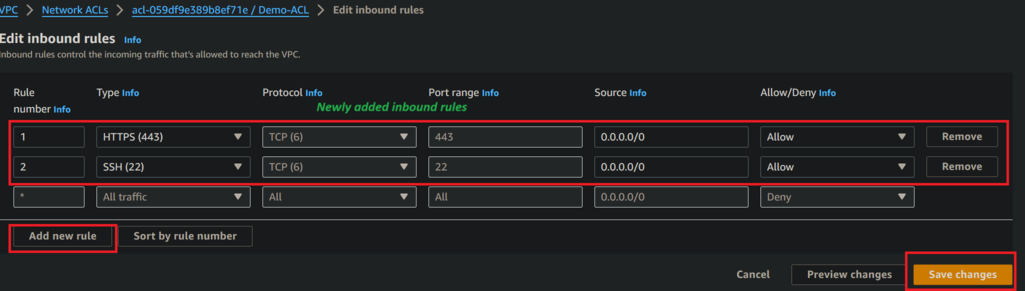
- In below figure see that newly added rules was successfully added

By default, all inbound rules and outbound rules are deny for newly created Network ACL. We cannot do for that deny option just leave it.
Outbound Rules
- Now click on created Network ACL its shows option in below like details, inbound rules, outbound rules subnet associations and Tags.
- Choose outbound rules and click on edit inbound rules. Follow below figure

- Now click on add new rule.
- Each rule consists of a rule number and type of traffic (e.g., HTTP, SSH), the source or destination CIDR block, and the action (allow or deny).
- Now click save changes
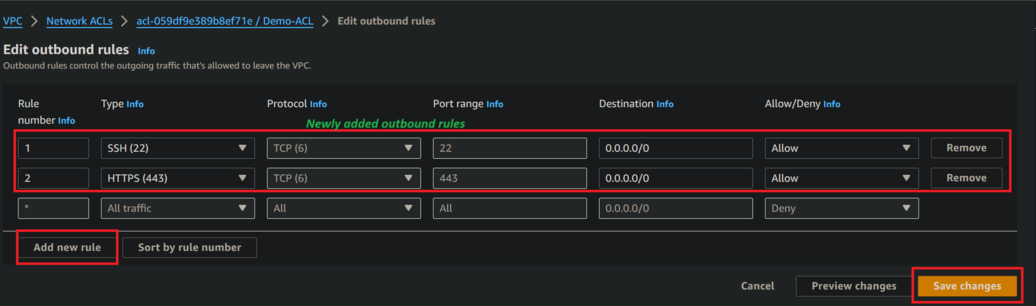
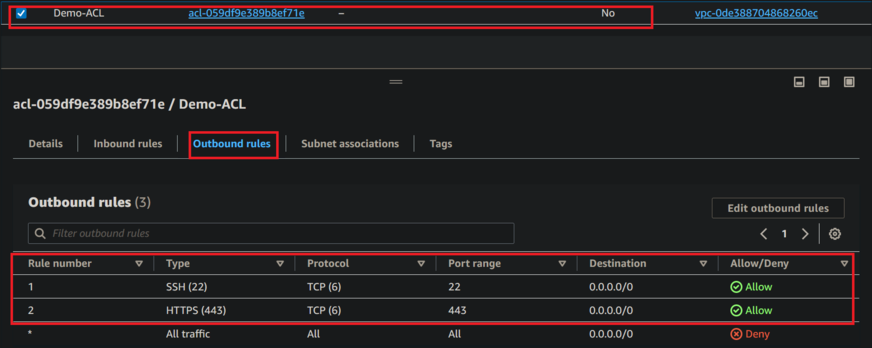
- In below figure see that newly added rules was successfully added
Step 3: Associate NACL with Subnets
- Once rules are configured, associate the NACL with the desired sub-nets. This can be done by selecting the sub-net and clicking “Edit sub-net associations.”
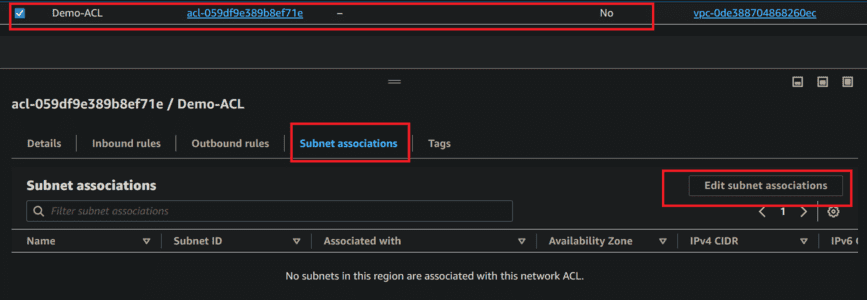
- Now select available subnets or select which subnet want to use.
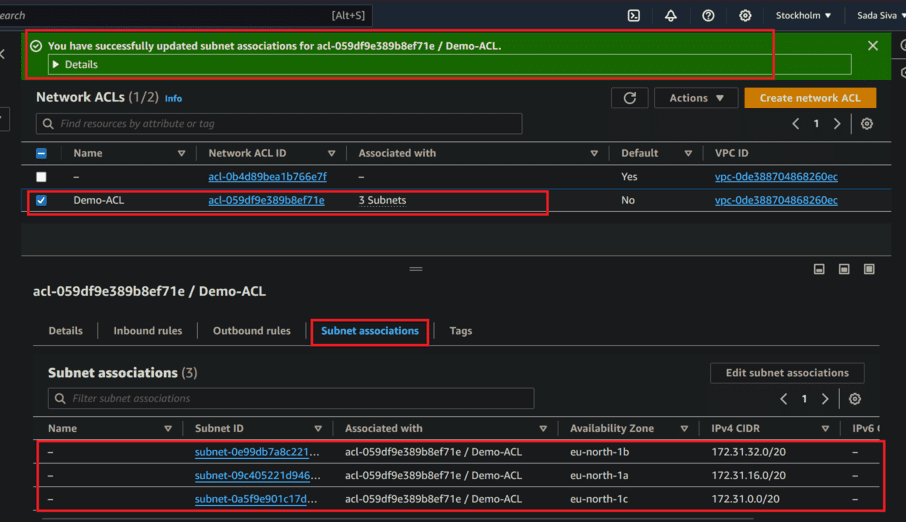
- After adding subnets Click on save changes.

- Now you have successfully added subnet associations for created Network ACLs
Blocked IP Address
To block your own IP Address go to inbound rule and click on edit inbound rules and add IP Address and click Deny then choose save changes.
Here we can see when we browse public IP its restrict the connection and shown connection time out

Conclusion
Dominating the control of traffic to subnets using Network Access Control Lists (NACLs) is fundamental for maintaining a secure and very much managed Amazon Web Services (AWS) environment. All through this aide, we have explored the key ideas, terminologies, and cycles associated with arranging NACLs to direct inbound and outbound traffic inside an AWS Virtual Private Cloud (VPC).
By understanding how to create, modify, and focus on NACL rules, as well as associate them with specific subnets, administrators can really implement network security policies, restrict unauthorized access, and moderate potential security threats. Additionally, we’ve featured the importance of aligning NACL configurations to authoritative security requirements and best practices.
As AWS continues to develop and associations progressively depend on cloud-based infrastructure, the ability to control traffic flow at the subnet level turns out to be progressively basic. With the information acquired from this guide, readers are enabled to use NACLs as a fundamental tool for upgrading the security stance of their AWS environments and safeguarding their valuable resources and data.
Control traffic to subnets using network ACLs – FAQ’s
Can I apply different NACLs to a single subnet?
No, each subnet can be related with just a single NACL. Be that as it may, a single NACL can be related with multiple subnets.
What happens if there is a conflict between NACL rules and security group rules?
NACL rules are evaluated before security group rules. In the event that a packet is allowed by the NACL however denied by a security group, it will be blocked.
Do NACLs support stateful filtering?
No, NACLs are stateless. This implies that each inbound rule should have a relating outbound rule to permit bring traffic back.
How do NACLs vary from security groups?
NACLs work at the subnet level and assess traffic crossing subnet boundaries, while security groups work at the instance level and assess traffic entering or leaving a instance.
Could NACLs at any point be utilized to channel traffic inside the same subnet?
No, NACLs can’t channel traffic inside the same subnet. They just control traffic entering or leaving the subnet. For intra-subnet traffic filtering, consider using security groups or other application-level controls.
Share your thoughts in the comments
Please Login to comment...