How to Connect MongoDB Atlas Cluster From an Application?
Last Updated :
29 Dec, 2023
MongoDB Atlas is a Cloud-based NoSQL Document type database that provides a scalable and secure platform for managing the MongoDB Database. In this article, We are going to learn about How to Create a New MongoDB Atlas Cluster, Create of New User, Whitelist your IP Address, and How you can Get a Connection URL to Connect the MongoDB Atlas Cluster with your Application.
Create a MongoDB Atlas Account and Cluster
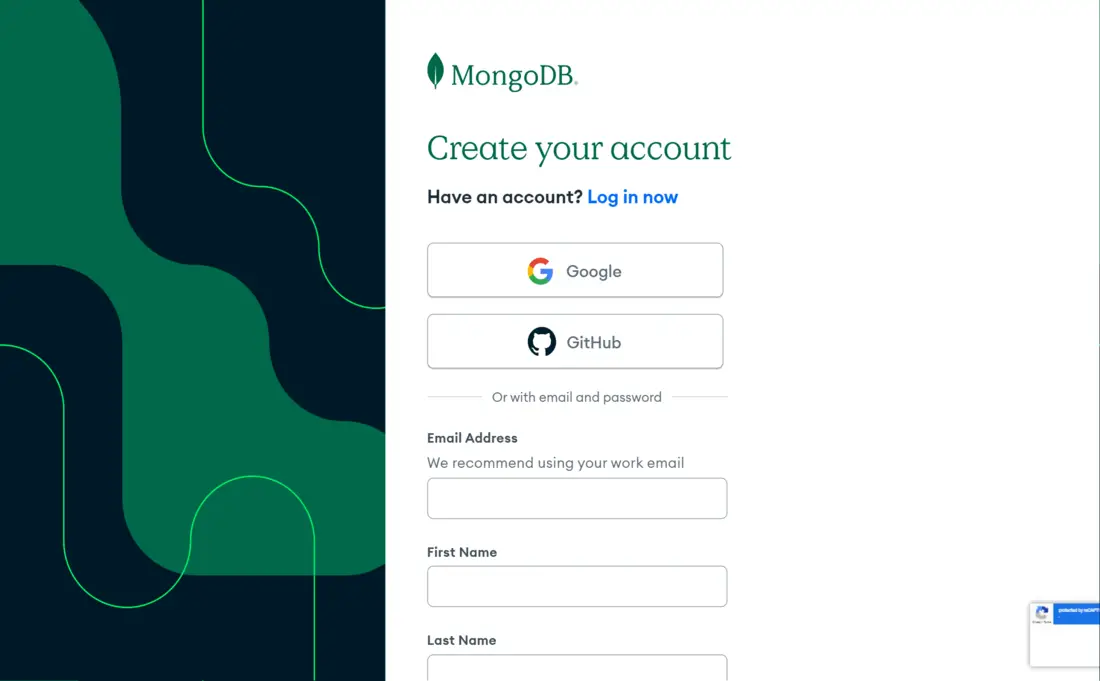
Step 1: Create a New Account
To create a new MongoDB Atlas Account, You need to visit the MongoDB Atlas website and register yourself by using an Email ID, Google, or a GitHub Account.
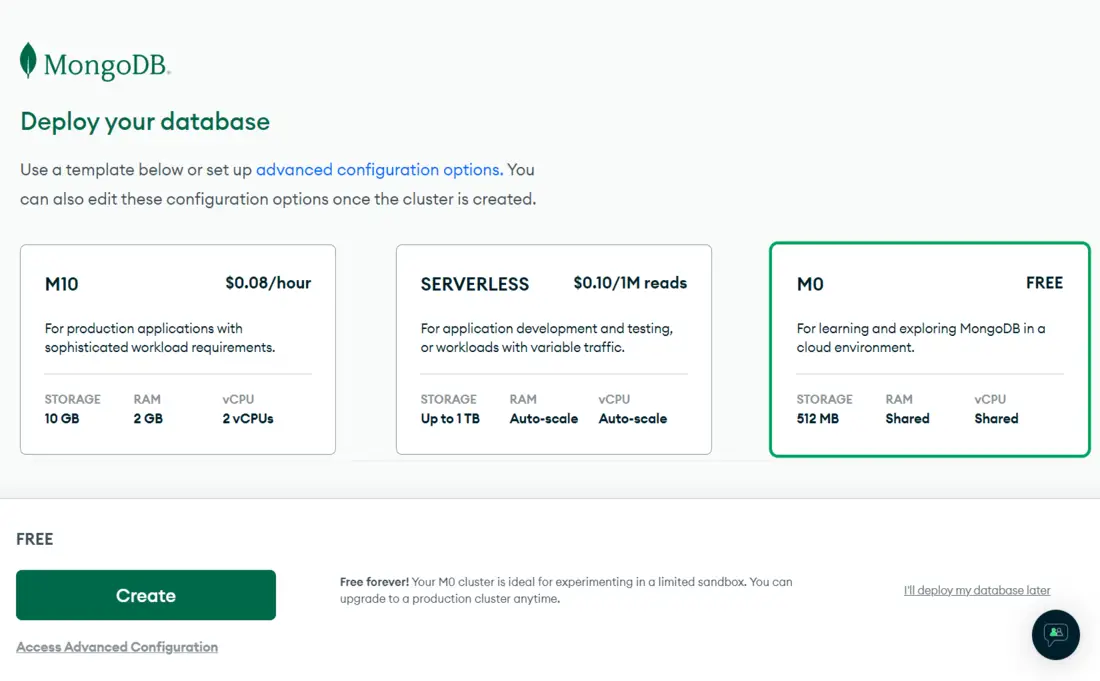
Step 2: Creating New Cluster
After completing registration it will redirect you to create a new Cluster. you can choose M0 free plan for learning and exploring MongoDB (you can also integrate your application with a free plan). after that configure your cluster by filling some details like cluster name, server region etc..
Create a New Database User
After completing registration you will be redirected to the Quick Start page in a Security Section, where you have to create a new database user and Whitelisting your IP Address by which you can access your Database.
You can also create a new Database user by following this:
Step 1: Navigate to Create a New User
To create a new user, In Sidebar you will find a Database Access page in a Security section. Open that page and click on ADD NEW DATABASE USER button on the top right hand side to create a new database user.
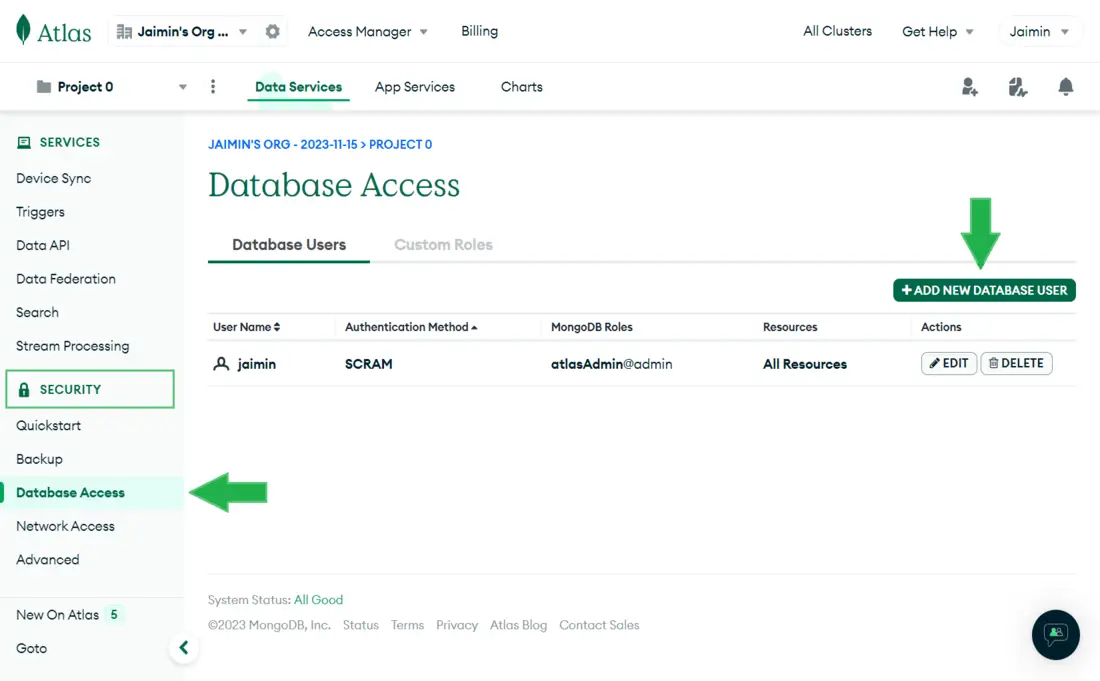
Step 2: Create a New User and Configure the Role
After that enter a Username and Password. Now, scroll down to Configure the privileges of that User. you can select a role for a user. click on the Add User button to create a new user.

How to Whitelist Your IP Address
It is necessary to whitelist your IP Address by which you can access your database. it is like giving permission for your computer to connect to the database.
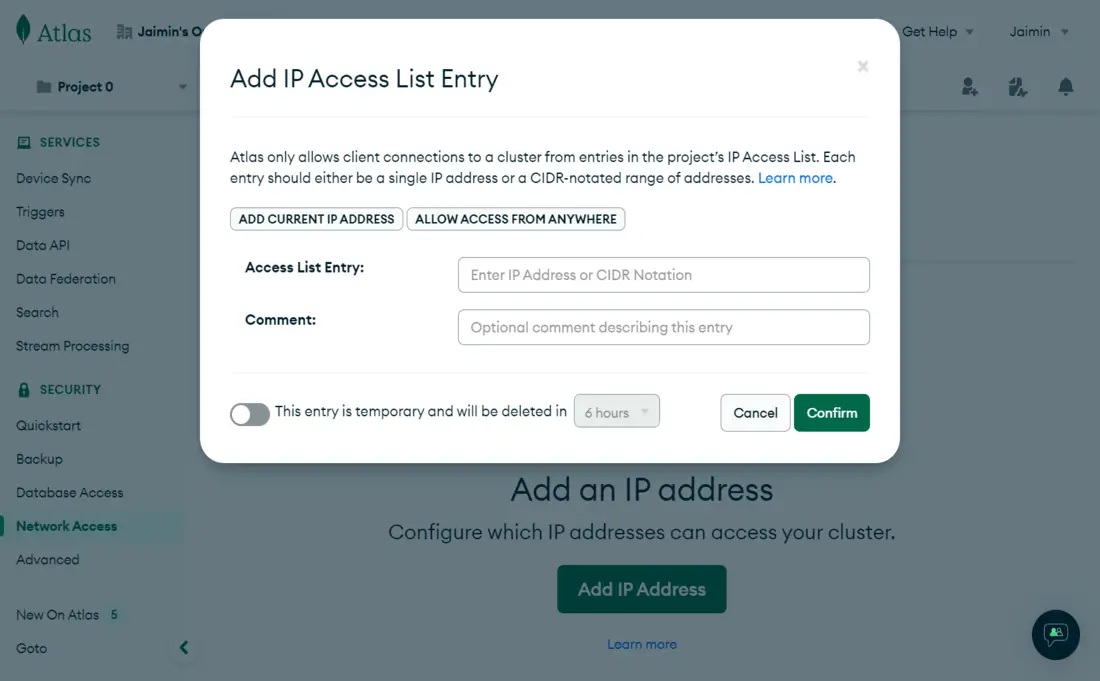
Step 1: Navigate to Network Access Page
To Whitelist your IP Address, In Side Bar you will find a Network Access page in the Security section. Open that page and click on ADD IP ADDRESS button.
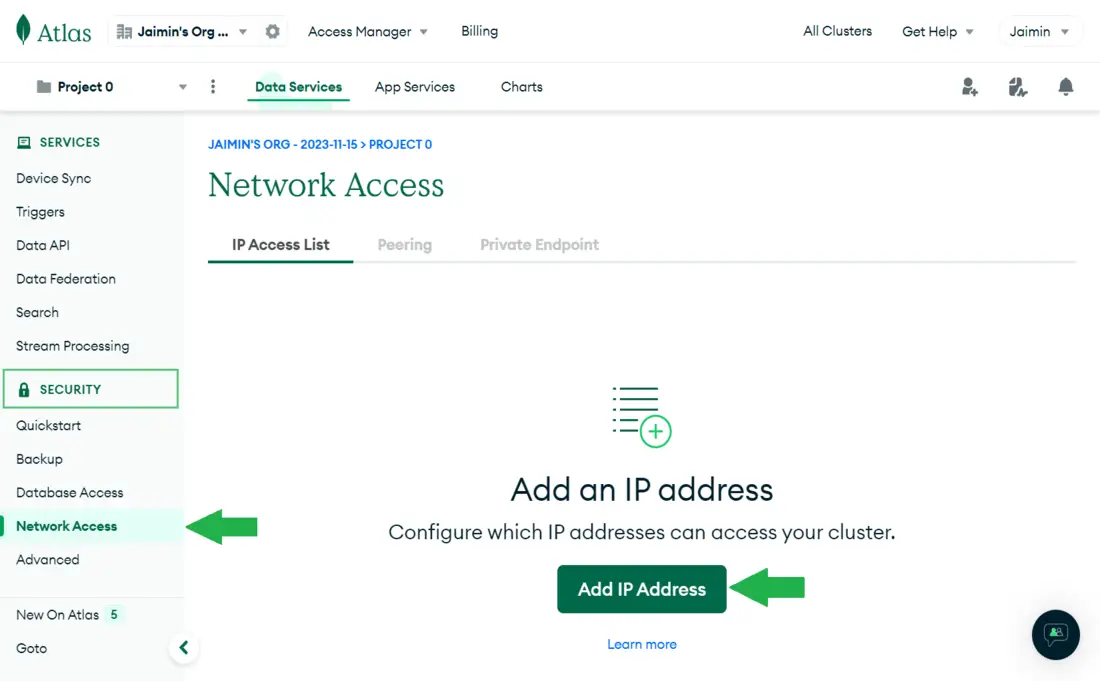
Step 2: Whitelist and Configure IP Address
After that Click on ADD CURRENT IP ADDRESS button to add your current IP Address. It is recommended that you add a 0.0.0.0/0 IP Address by clicking on the ALLOW ACCESS FROM ANYWHERE button so you can access your cluster with any device with your username and password. You can also Add an IP Address for temporarily by enabling that option. After doing that click on the Confirm button to add the IP Address.
Connection String and MongoDB Driver
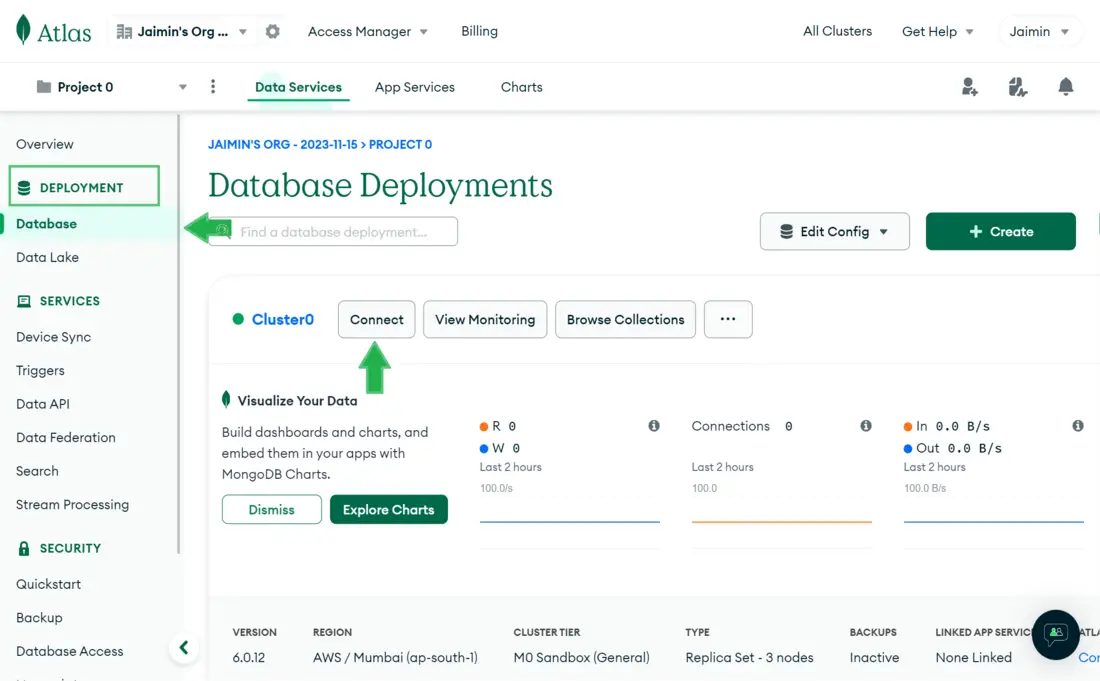
Step 1: Navigate to Connect Page
To get the connection string and choose a driver, In the Sidebar you will find a Database page in the Deployment section. Open that page and click on the Connect button.
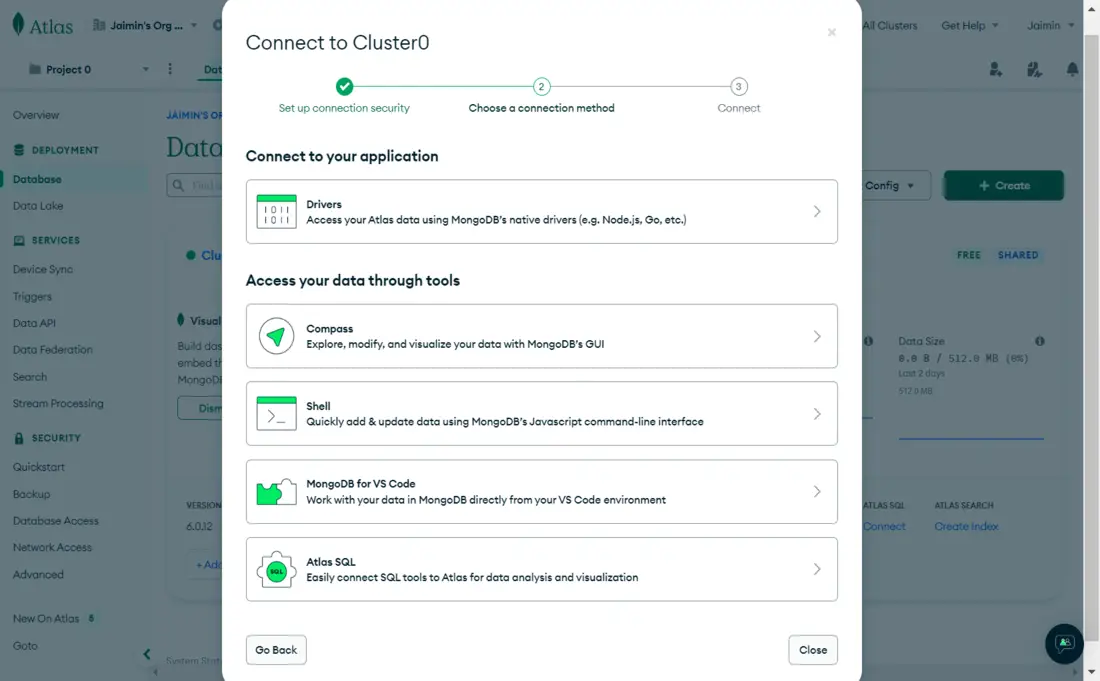
Step 2: Choose Driver Option
After that it will show you all the options to access your data through tools and applications. Among those options choose the Drivers. After that select a driver according to your application requirement and follow the given step-by-step instruction to install driver and get a connection URL. It provides Drivers for languages such as Node.js, Java, C, C++, Python, Kotlin, .NET, etc…
Example: Connect MongoDB Cluster with Node.js
In this example, We are going to use a Node.js driver to connect with a Node.js Application. Follow this below steps to create and connect your application with Cluster.
Step 1: Get the Connection URL from MongoDB Atlas
To get a Connection string follow the instructions given above, By choosing Node.js Driver the connection string will look like this:
mongodb+srv://<username>:<password>@cluster0.k018jn6.mongodb.net/?retryWrites=true&w=majority
Step 2: Create a new Project and Install Driver
To create a new project, first make sure that Node.js and NPM (It will be included in Node.js) is installed and paths are defined. Now create a new folder and then open the terminal and move to that folder. After doing this type the following command into your terminal:
npm init
After doing this, Install MongoDB Driver by using the following command:
npm install mongodb
Make sure you have properly completed the project setup.
Step 3: Create an index.js File
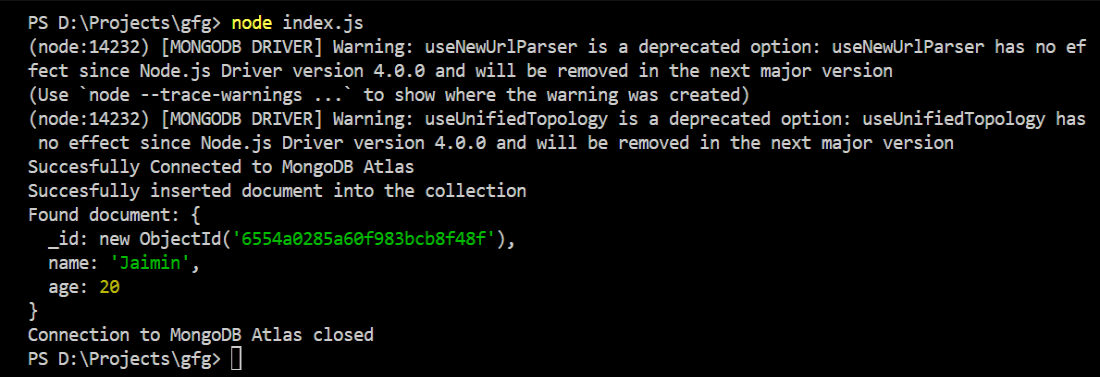
After project setup is completed, create an index.js file, this is the main file of our application. The below code will automatically create a new database and collection (if not present) and insert a new document (data) inside a collection then it is retrieves the document that we have inserted.
// Import the MongoDB Node.js driver
const { MongoClient } = require('mongodb');

// Replace uri with your actual connection string
//const uri = "mongodb+srv://<username>:<password>@cluster0.k018jn6.mongodb.net/?retryWrites=true&w=majority";
const uri = "YOUR_CONNECTION_URI";
const dbName = 'GeeksforGeeks';

// Function to connect to MongoDB Atlas and perform operations
async function connectToMongoDB() {
  const client = new MongoClient(uri, { useNewUrlParser: true, useUnifiedTopology: true });

  try {
    // Connect to MongoDB Atlas
    await client.connect();
    console.log('Succesfully Connected to MongoDB Atlas');

    // Access the database
    const database = client.db(dbName);

    // Access a collection
    const collection = database.collection('GeeksforGeeks');

    // Insert a document
    const document = { name: 'Jaimin', age: 20 };
    const result = await collection.insertOne(document);
    console.log(`Succesfully inserted document into the collection`);

    // Query the collection
    const query = { name: 'Jaimin' };
    const foundDocument = await collection.findOne(query);
    console.log('Found document:', foundDocument);

  } finally {
    // Close the MongoDB Atlas connection
    await client.close();
    console.log('Connection to MongoDB Atlas closed');
  }
}

// Calling connectToMongoDB function
connectToMongoDB();
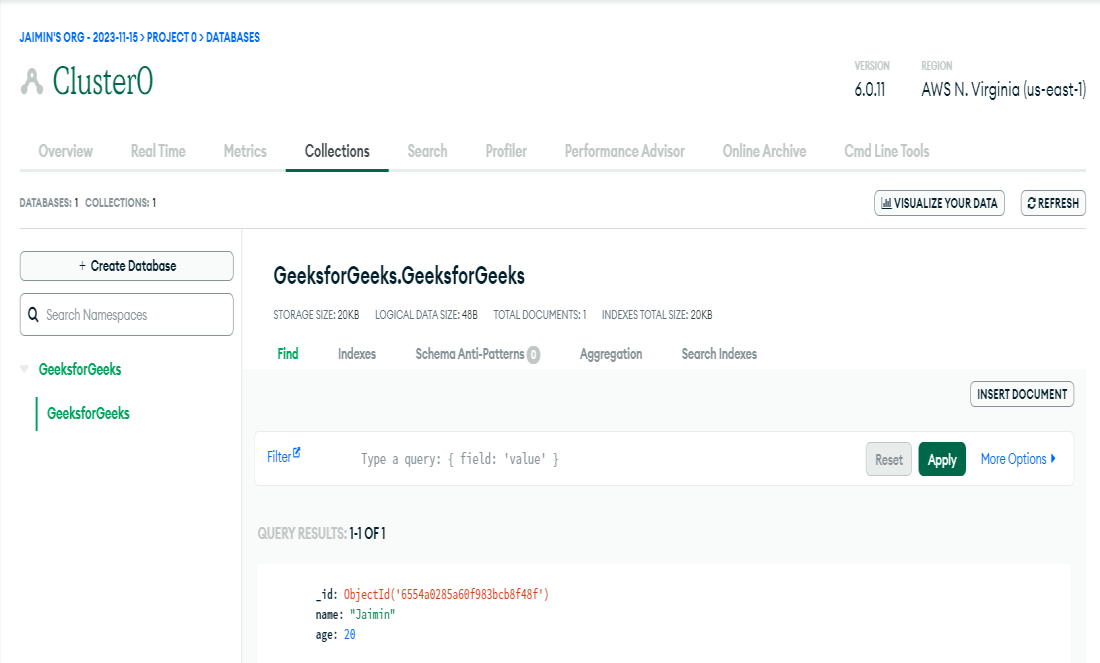
Output
To run your application, run the following command in your project folder:
node index.js
Conclusion
In conclusion, this article will help you in detail to connect your application with MongoDB Atlas Cluster. It covers step-by-step guide to Create an Account, New User, Whitelisting of IP Address and How you can get a Connection String. It also covers an Example of connecting a Node.js Application with a MongoDB Cluster.
Share your thoughts in the comments
Please Login to comment...