How to Configure multiple View Engines in Express.js ?
Last Updated :
26 Mar, 2024
View engines present in web application framework are basically the template engines that allow us to embed dynamic content into the web pages, render them on the server, and send them to the client. With the help of these, we can serve dynamic data, and utilise the template inheritance properties to server our web pages, quickly and efficiently.
Multiple View Engines available in Express.js
We can use and configure multiple view engines are available to be used in nodeJS and expressJS application. Some of the view engines that we will use and configure in this project are ejs, and pug.
- With the help of ejs, we can embed JavaScript code directly inside HTML using “<%= %>” syntax.
- With the help of pug, we can embed JavaScript code directly inside HTML templates using “${}” syntax.
Steps to create the application
Step 1: Setting up the project
Let’s create a nodeJS and expressJS project, and cd into the project using the below commands:
mkdir express-project
cd express-project
npm init -y
npm install express
Also, create sample.ejs, sample.pug, and server.js files which we will use the latter steps:
touch server.js
touch sample.ejs
touch sample.pug
Folder Structure:

The updated dependencies in package.json file will look like :-
"dependencies": {
    "ejs": "^3.1.9",
    "express": "^4.18.3",
    "pug": "^3.0.2"
}
Step 2: Using ejs and Pug view engines
In this step, we will create a new file at root level, named server.js. And inside the server file, we will initialise our express application. We will also configure “ejs” and “pug” template engines in the same file, and we will use the configuration to serve the pug and ejs files to the client.
Filename: server.js
Javascript
const express = require('express');
const app = express();

app.set('views', '.');
app.set('view engine', 'ejs');

app.engine('pug', require('pug').__express);
app.set('view engine', 'pug');

app.get('/ejs', (req, res) => {
    res.render('sample.ejs', { name: 'Will Smith' });
})

app.get('/pug', (req, res) => {
  res.render('sample.pug', { name: 'Will Smith' });
})

app.listen(3000, () => {
    console.log('Server is running on port 3000');
})
Step 3: Creating ejs view
In this step, we will create a view template using ejs, that will contain a paragraph tag with some static content, and a dynamic variable “name”.
Filename: sample.ejs
HTML
<!DOCTYPE html>
<html lang="en">
<head>
    <meta charset="UTF-8">
    <meta name="viewport"
          content="width=device-width, initial-scale=1.0">
    <title>EJS View</title>
</head>
<body>
    <p>Welcome from EJS, <%= name %>!</p>
</body>
</html>
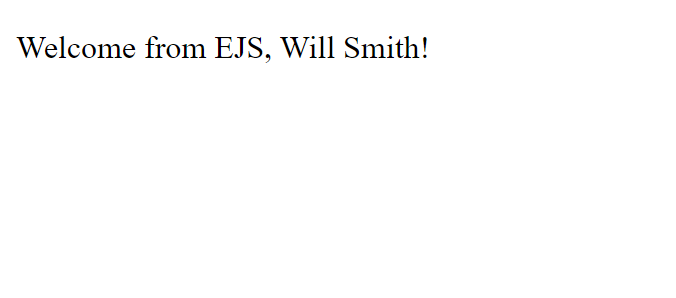
Output:
Now, run the server using the below command, and go to the url “http://localhost:3000/ejs” to see the output.
node server.js
Step 4: Creating pug view
In this step, we will create a view template using ejs, that will contain a paragraph tag with some static content, and a dynamic variable “name”.
Filename: sample.pug
HTML
doctype html
html(lang='en')
  head
    meta(charset='UTF-8')
    meta(name='viewport', content='width=device-width, initial-scale=1.0')
    title Pug View
  body
    p Welcome from PUG, #{name}!
Output:
Now, run the server using the below command, and go to the url “http://localhost:3000/pug” to see the output.
node server.js

Share your thoughts in the comments
Please Login to comment...