FileZilla is a free and cross-platform FTP client widely used to communicate with the FTP servers to upload and download files. FileZilla consists of both Client and Server applications. The client application is available for Windows, Linux, and macOS. Some of the common features are listed below :
- Supports FTP, FTP over SSL/TLS (FTPS), and SSH File Transfer Protocol (SFTP)
- IPv6 support
- Available in more than 40 languages
- Supports resume and transfer of large files >4GB
- Easy to use Site Manager and transfer queue
- Bookmarks
- Drag & drop support
- Speed limits
- Filename filters
- Directory comparison
- Network configuration wizard
- Remote file editing
- Keep-alive
- HTTP/1.1, SOCKS5 and FTP Proxy support
- Logging to file
- Synchronized directory browsing
- Remote file search
- Tabbed interface to connect to multiple servers
In this article, we will learn how to install FileZilla in Ubuntu 20.04 (Focal Fossa) and use it for bidirectional transfer of files between Desktop and Android devices using an FTP server. We will discuss the following topics –
- Installation of FileZilla on Ubuntu 20.04
- Installation of WiFi FTP Server on Android device
- Setting up a WiFi network
- Setup of WiFi FTP Server
- Setup of FileZilla
- Removal of FileZilla
Installation of FileZilla on Ubuntu 20.04
1. Open terminal by pressing Ctrl+Alt+T

Open Terminal
2. Type the following command in the terminal to add the PPA of FileZilla and press Enter.
sudo add-apt-repository ppa:sicklylife/filezilla
Add FileZilla Repository
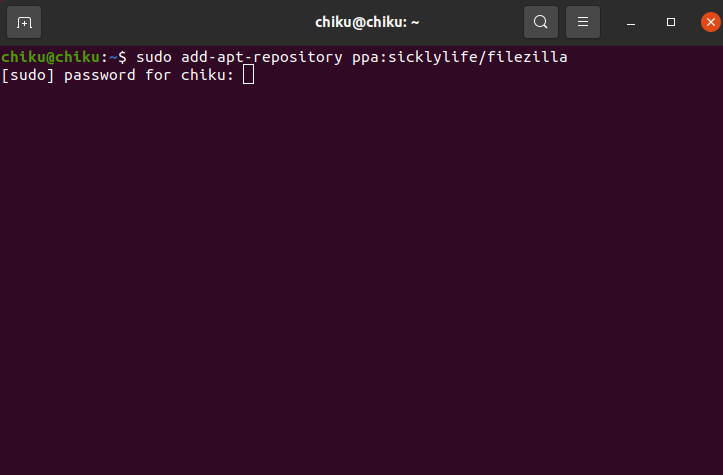
3. Type the user password when prompted and press Enter.
Grant Admin access
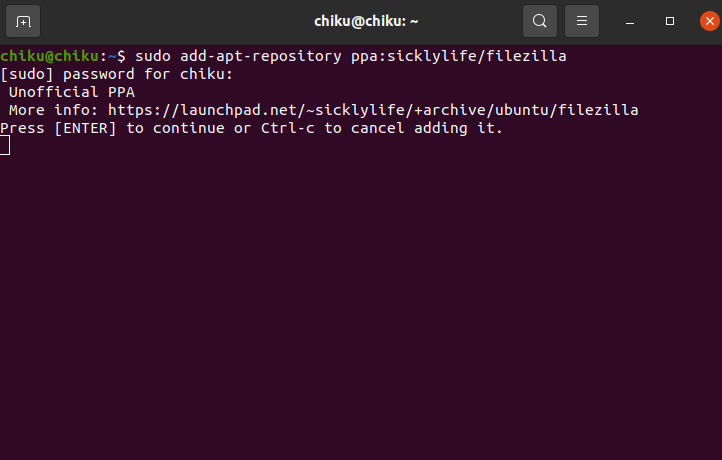
4. After that press Enter to continue to proceed.
Continue to add the repository
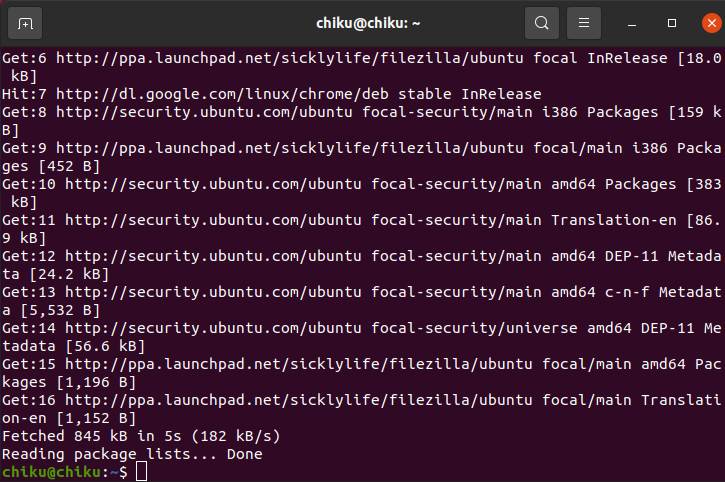
5. Once that command has finished executing, type the following command and press Enter.
sudo apt update
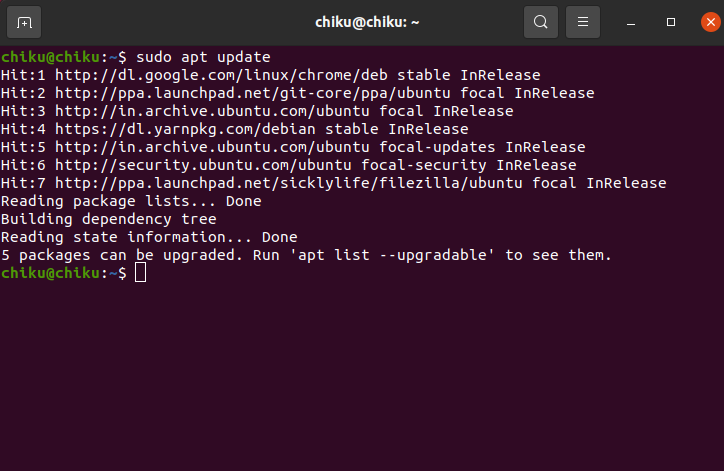
Update local cache
6. Now, install FileZilla by executing the following command:
sudo apt install -y filezilla

Install FileZilla
7. So, we have successfully installed FileZilla. We’ll be opening it at a later stage in this article.
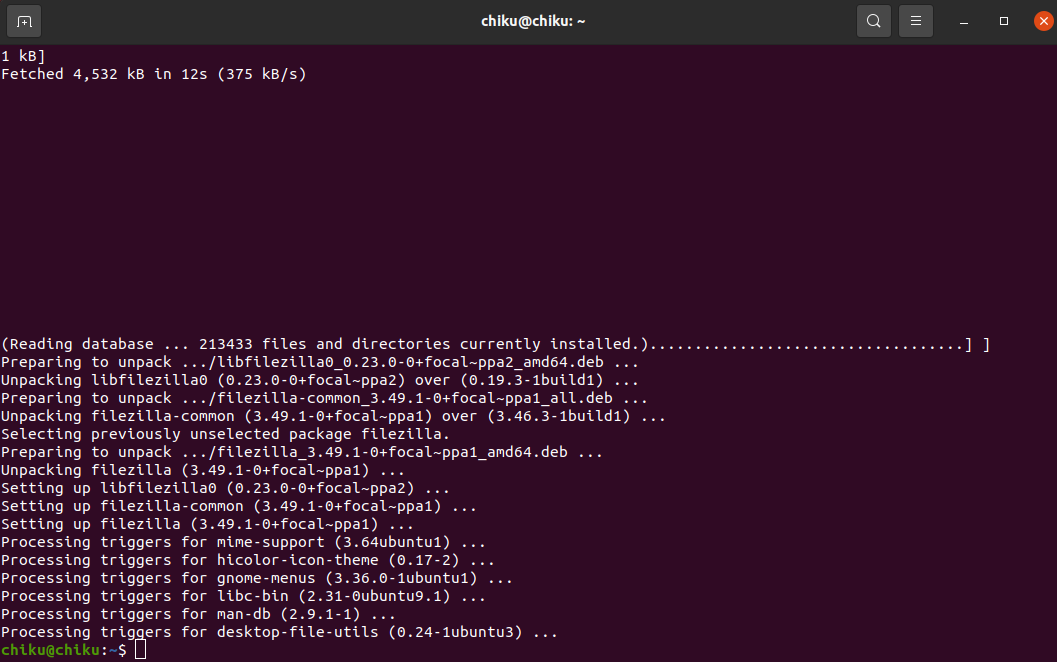
Installation complete
Installation of Wi-Fi FTP Server on Android device
1. On your Android device, open Play Store, and install ‘Wi-fi FTP Server‘.
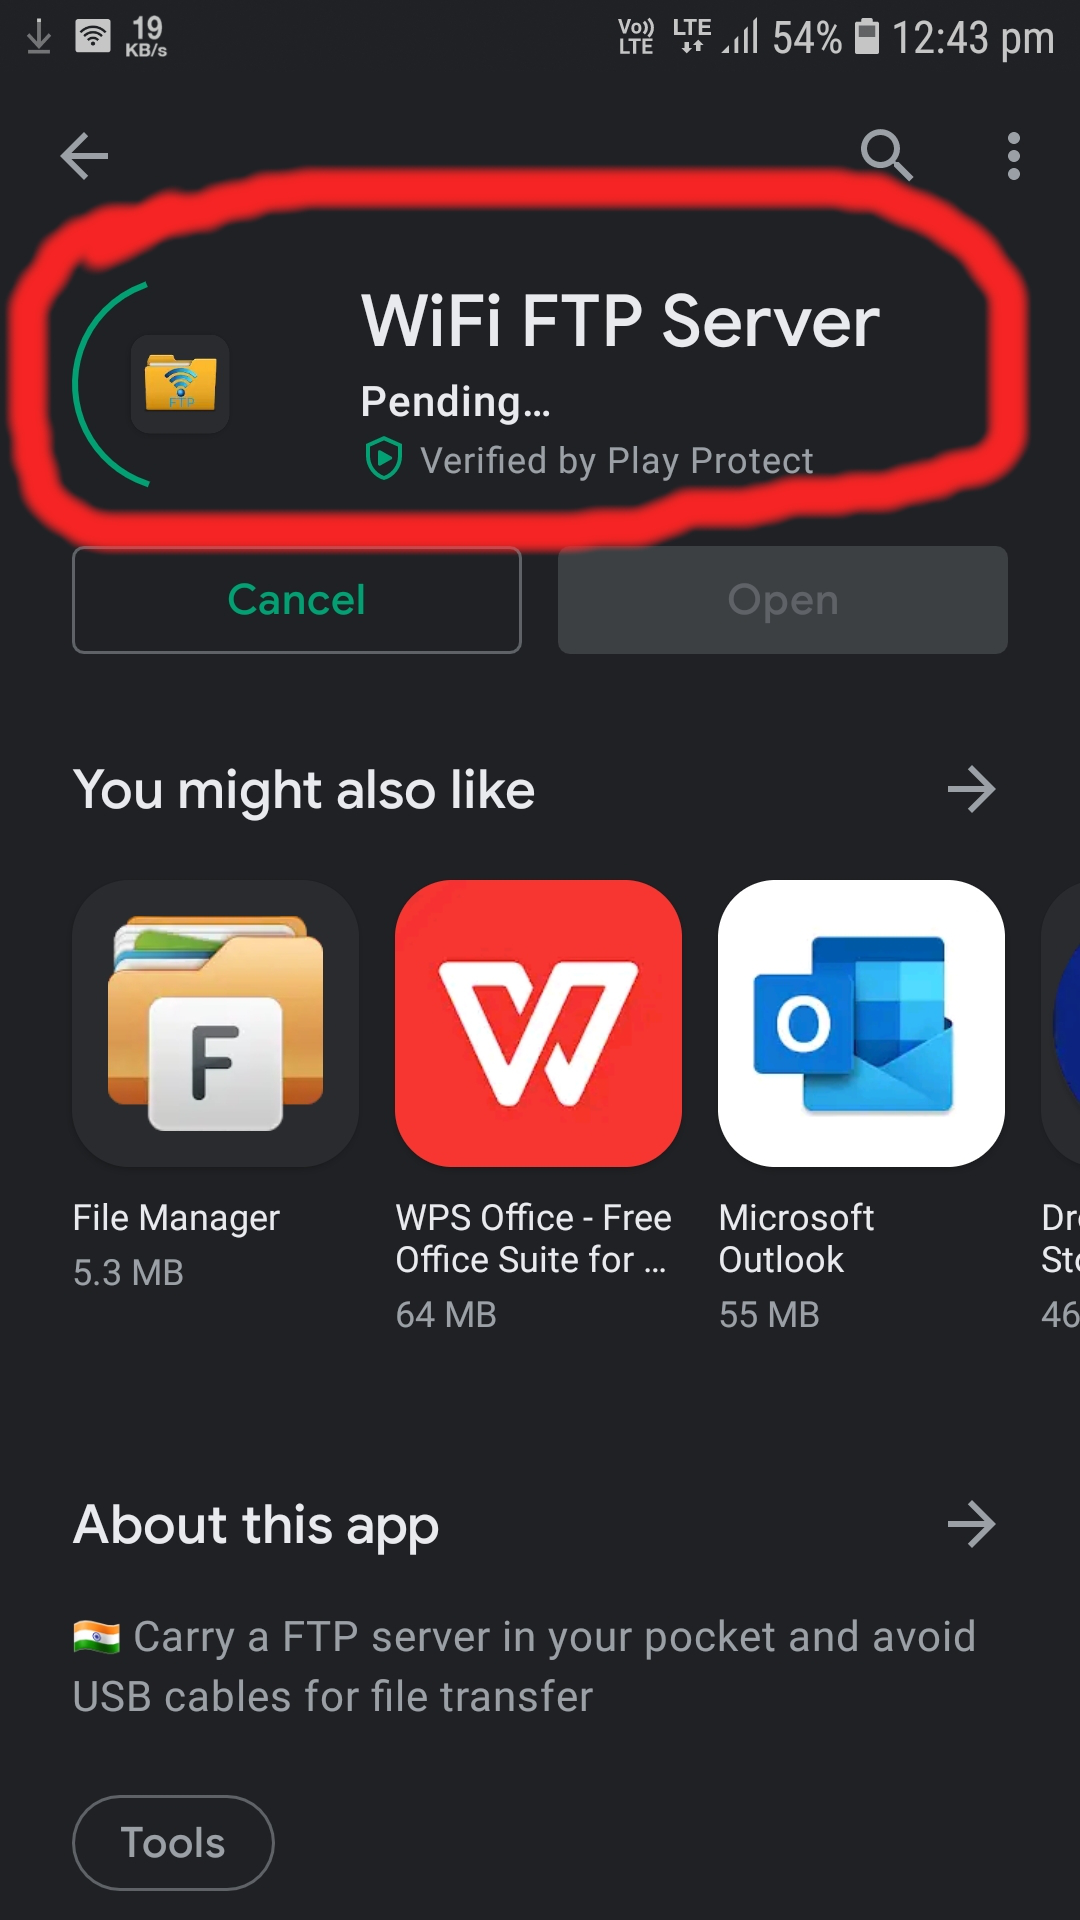
Install Wi-Fi FTP Server.
Setting up the WiFi network
1. Turn on Wi-Fi Hotspot on the Android Device.
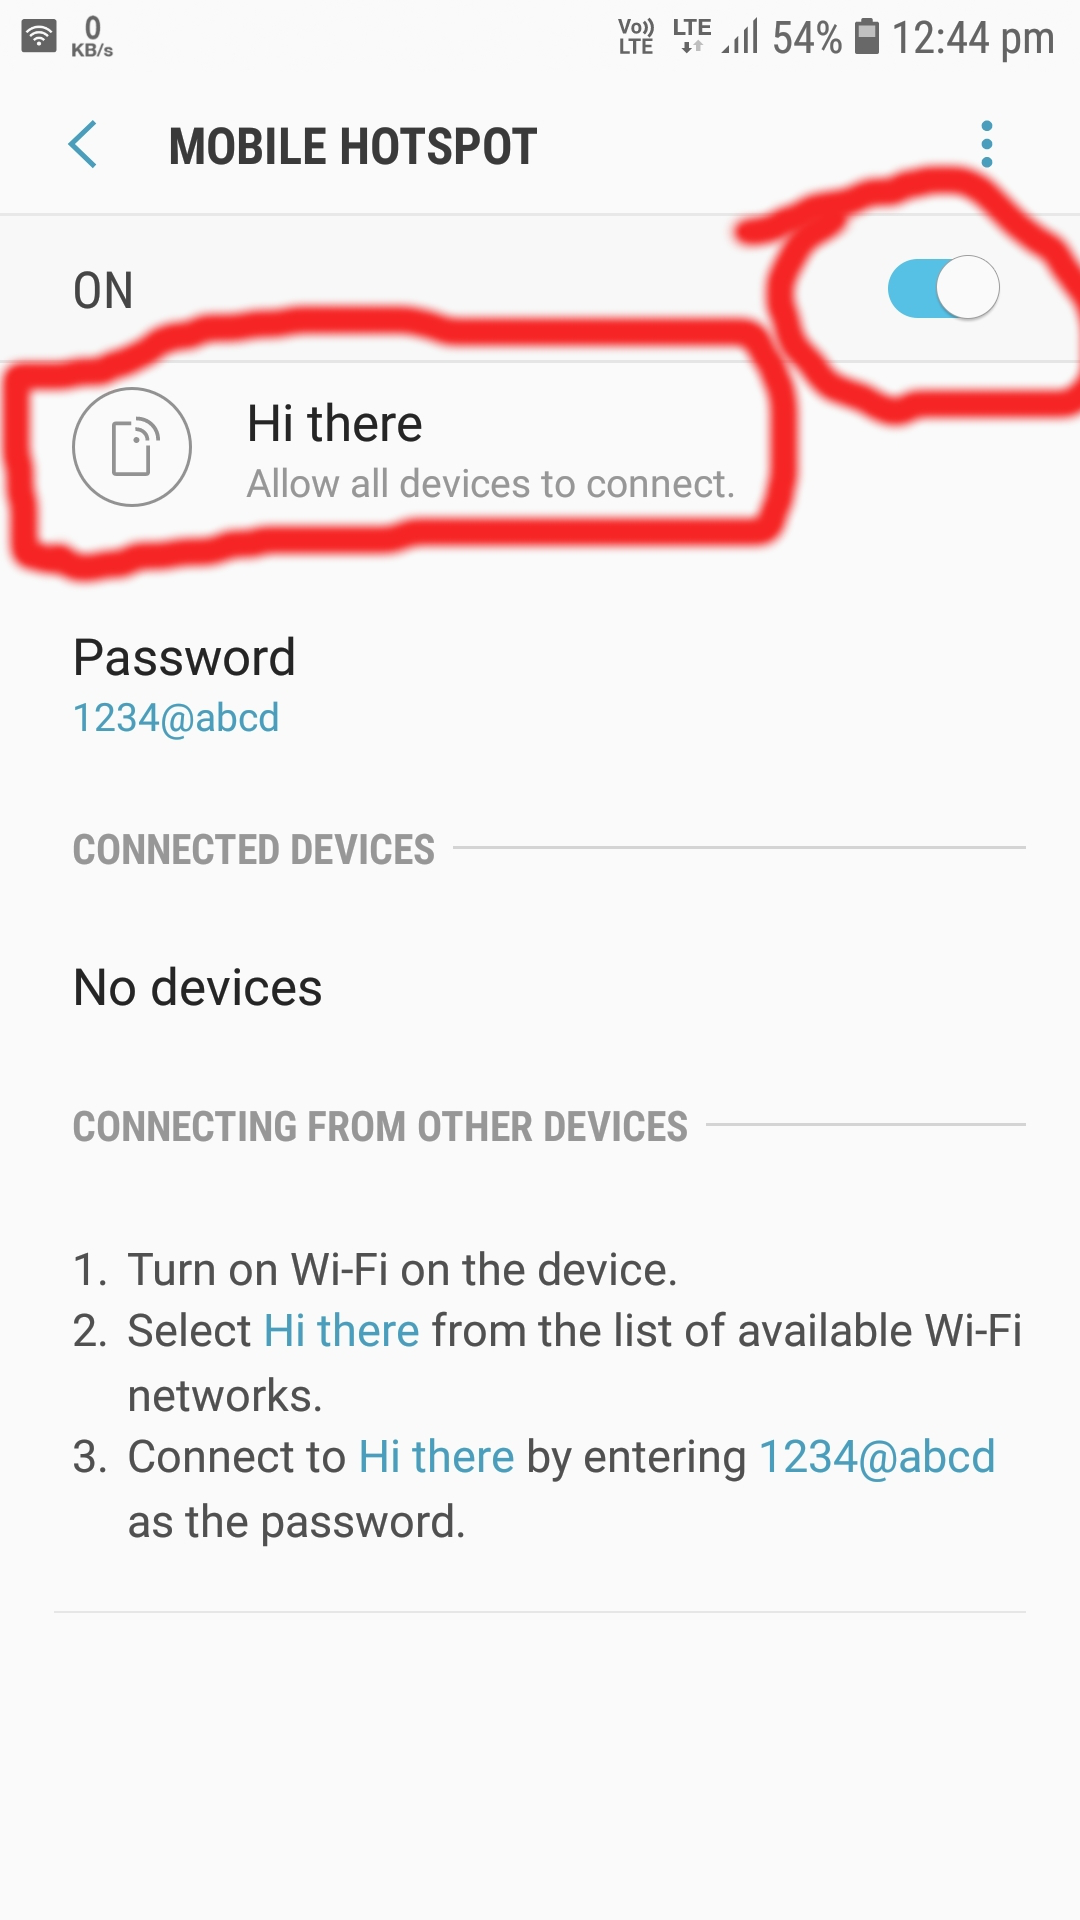
Turn on Hotspot on an Android device.
2. Connect your Ubuntu machine to the Hotspot.
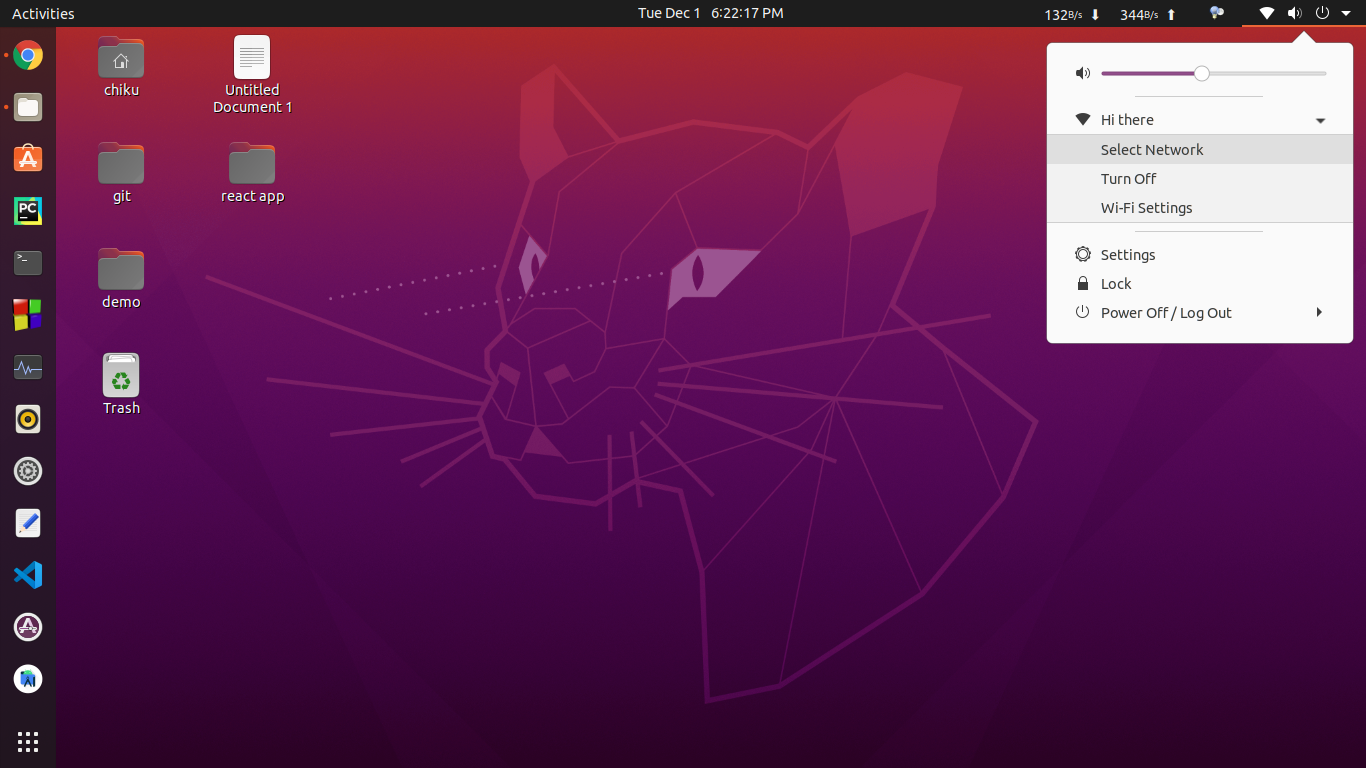
Connect to the hotspot
Setup of Wi-Fi FTP Server
1. Open WiFi FTP Server app which we installed on the Android device.
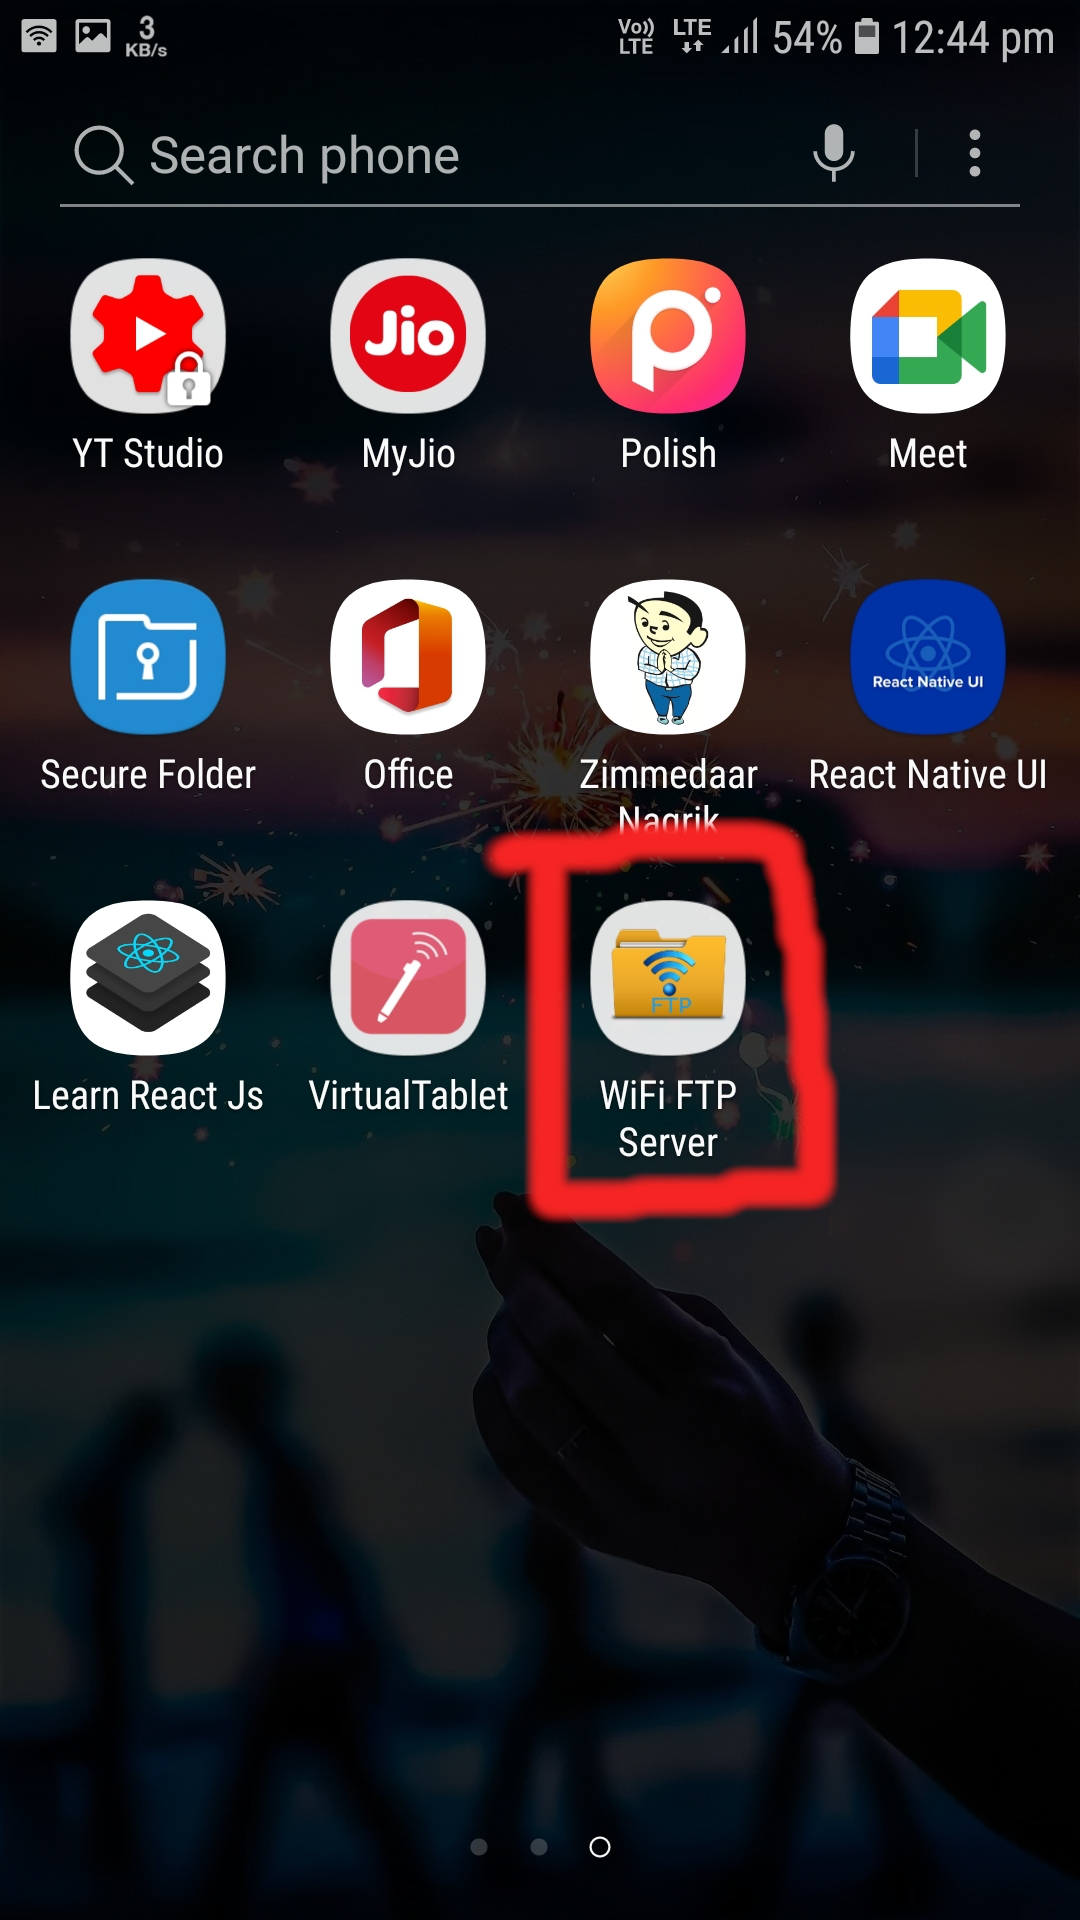
Open the WiFi FTP Server app
2. Click on the Settings icon of the app.
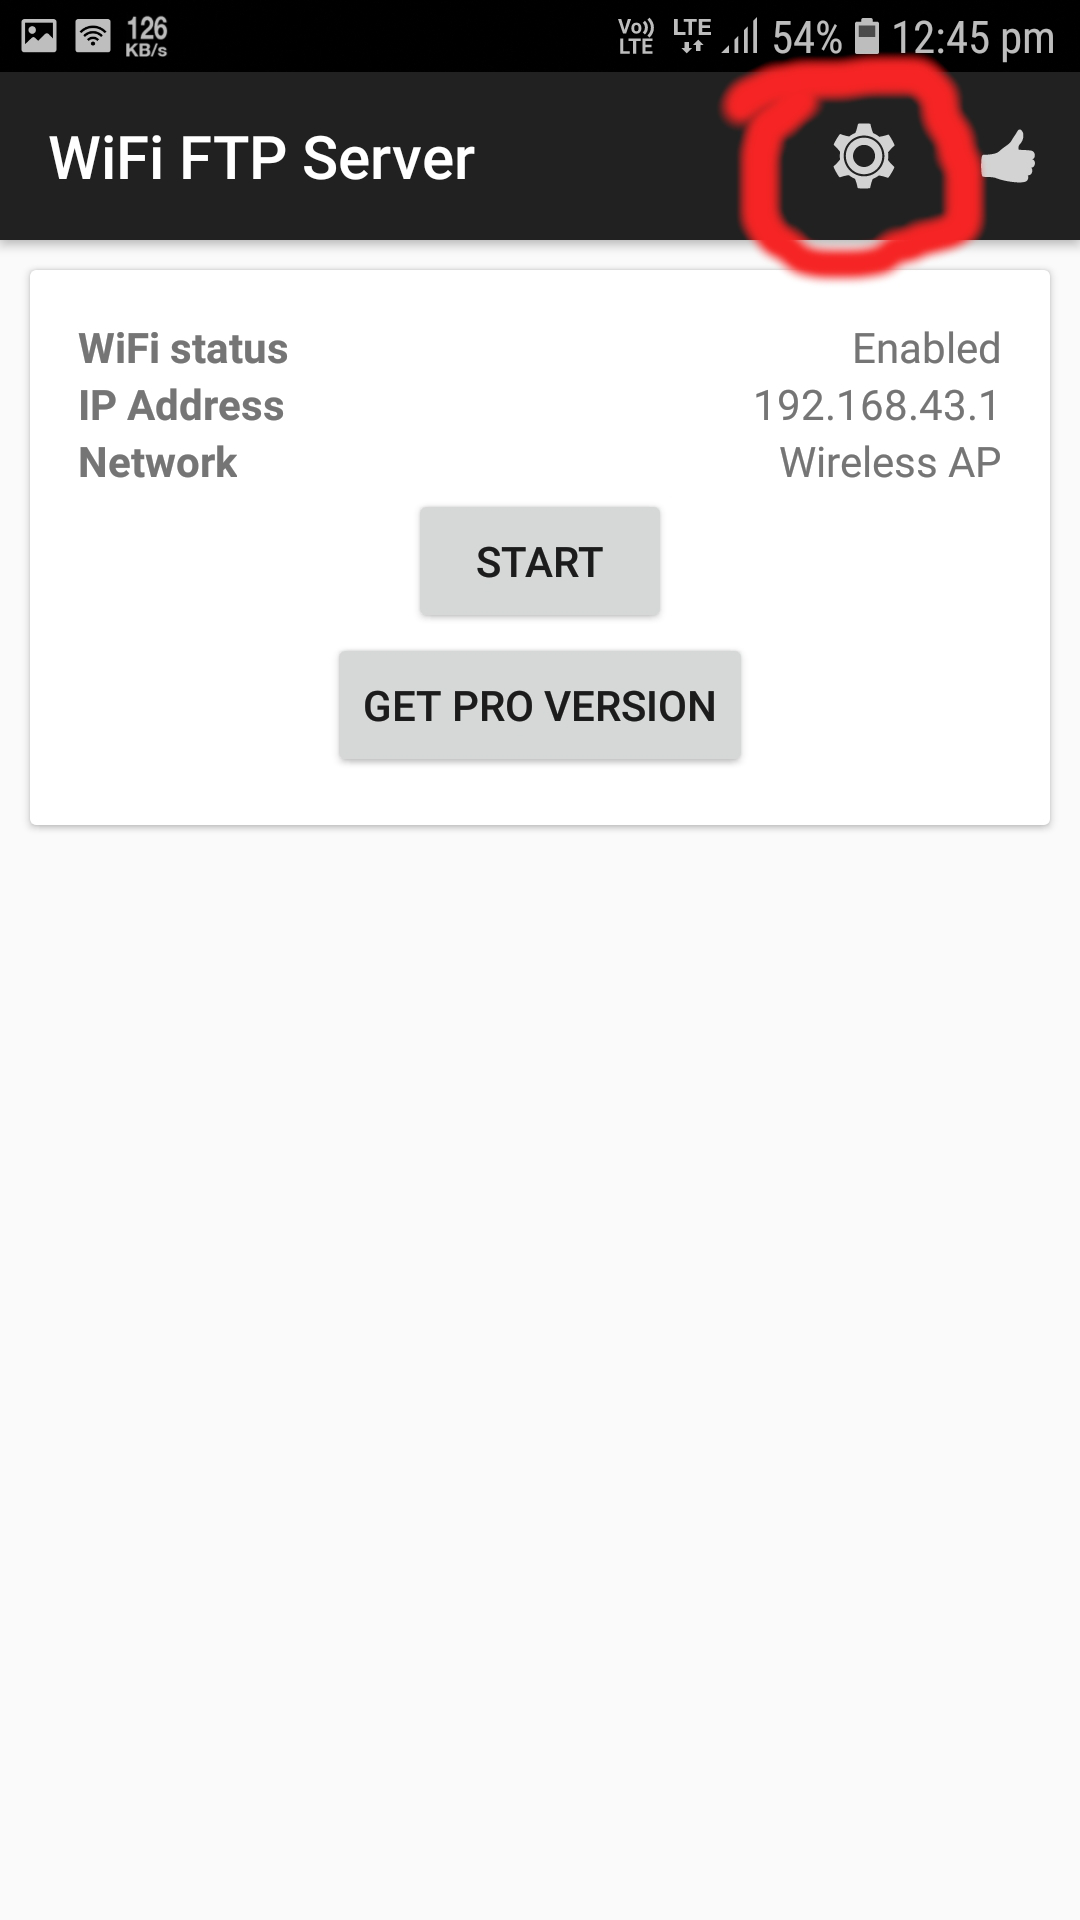
Open Settings inside of the app
3. Anonymous access is enabled by default. Click on the checkbox to disable it.
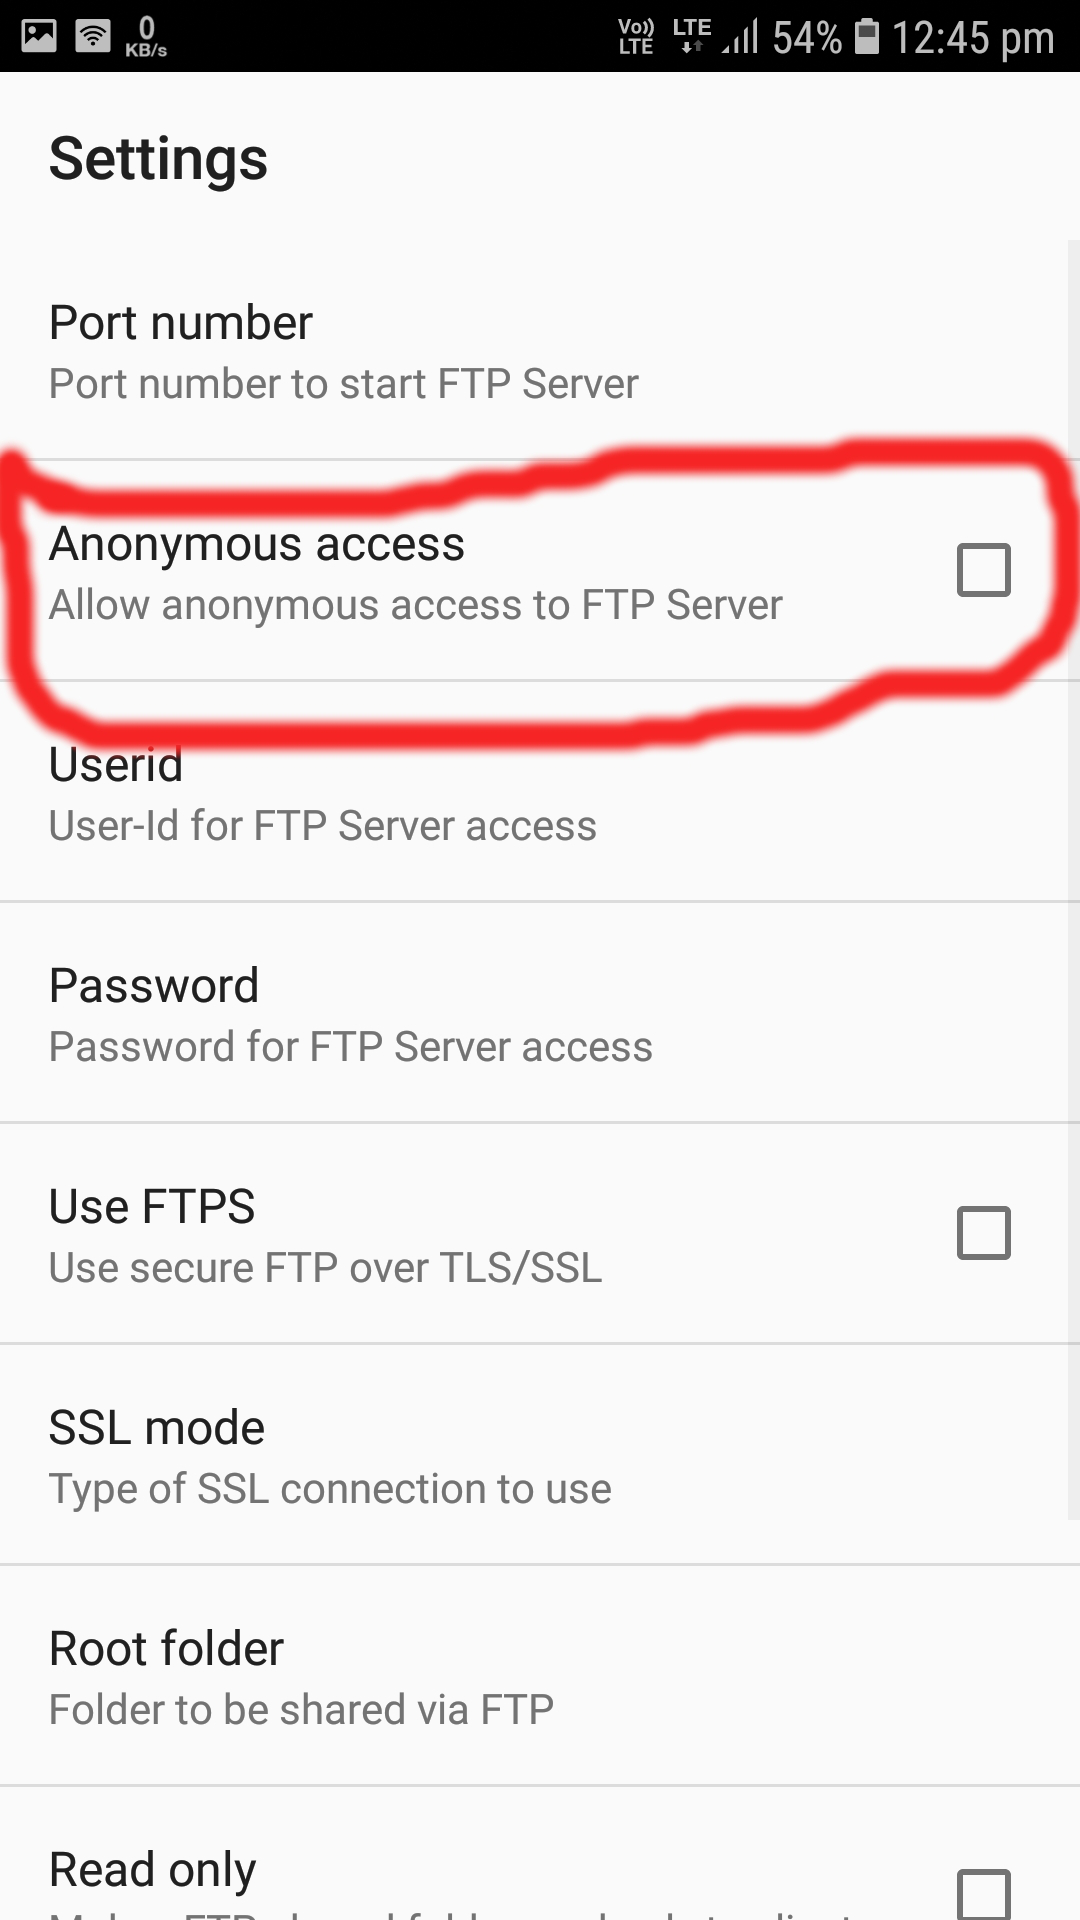
Disable Anonymous access
4. Now we are ready. Press the Back button to return to the home screen of the app and click on Start button.
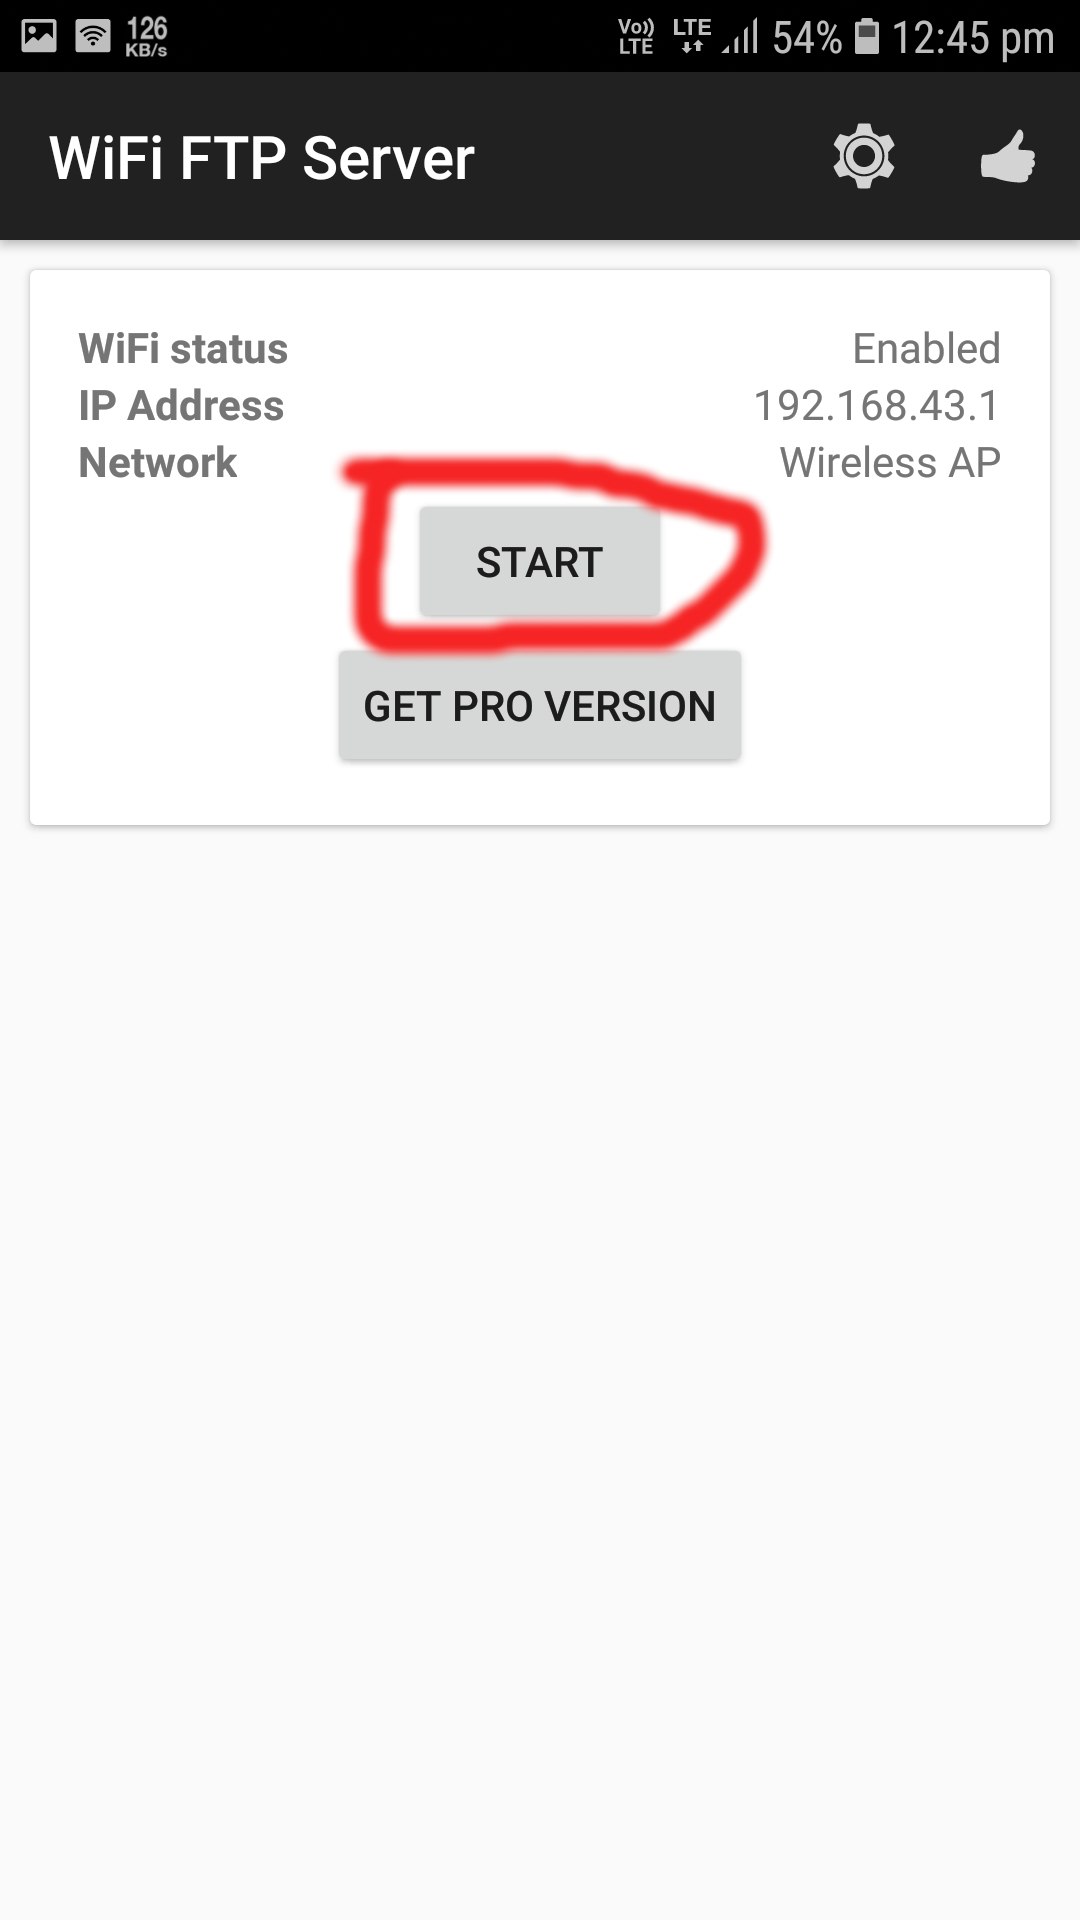
Click on ‘Start’
5. It will ask for permission to access files, so click ALLOW.
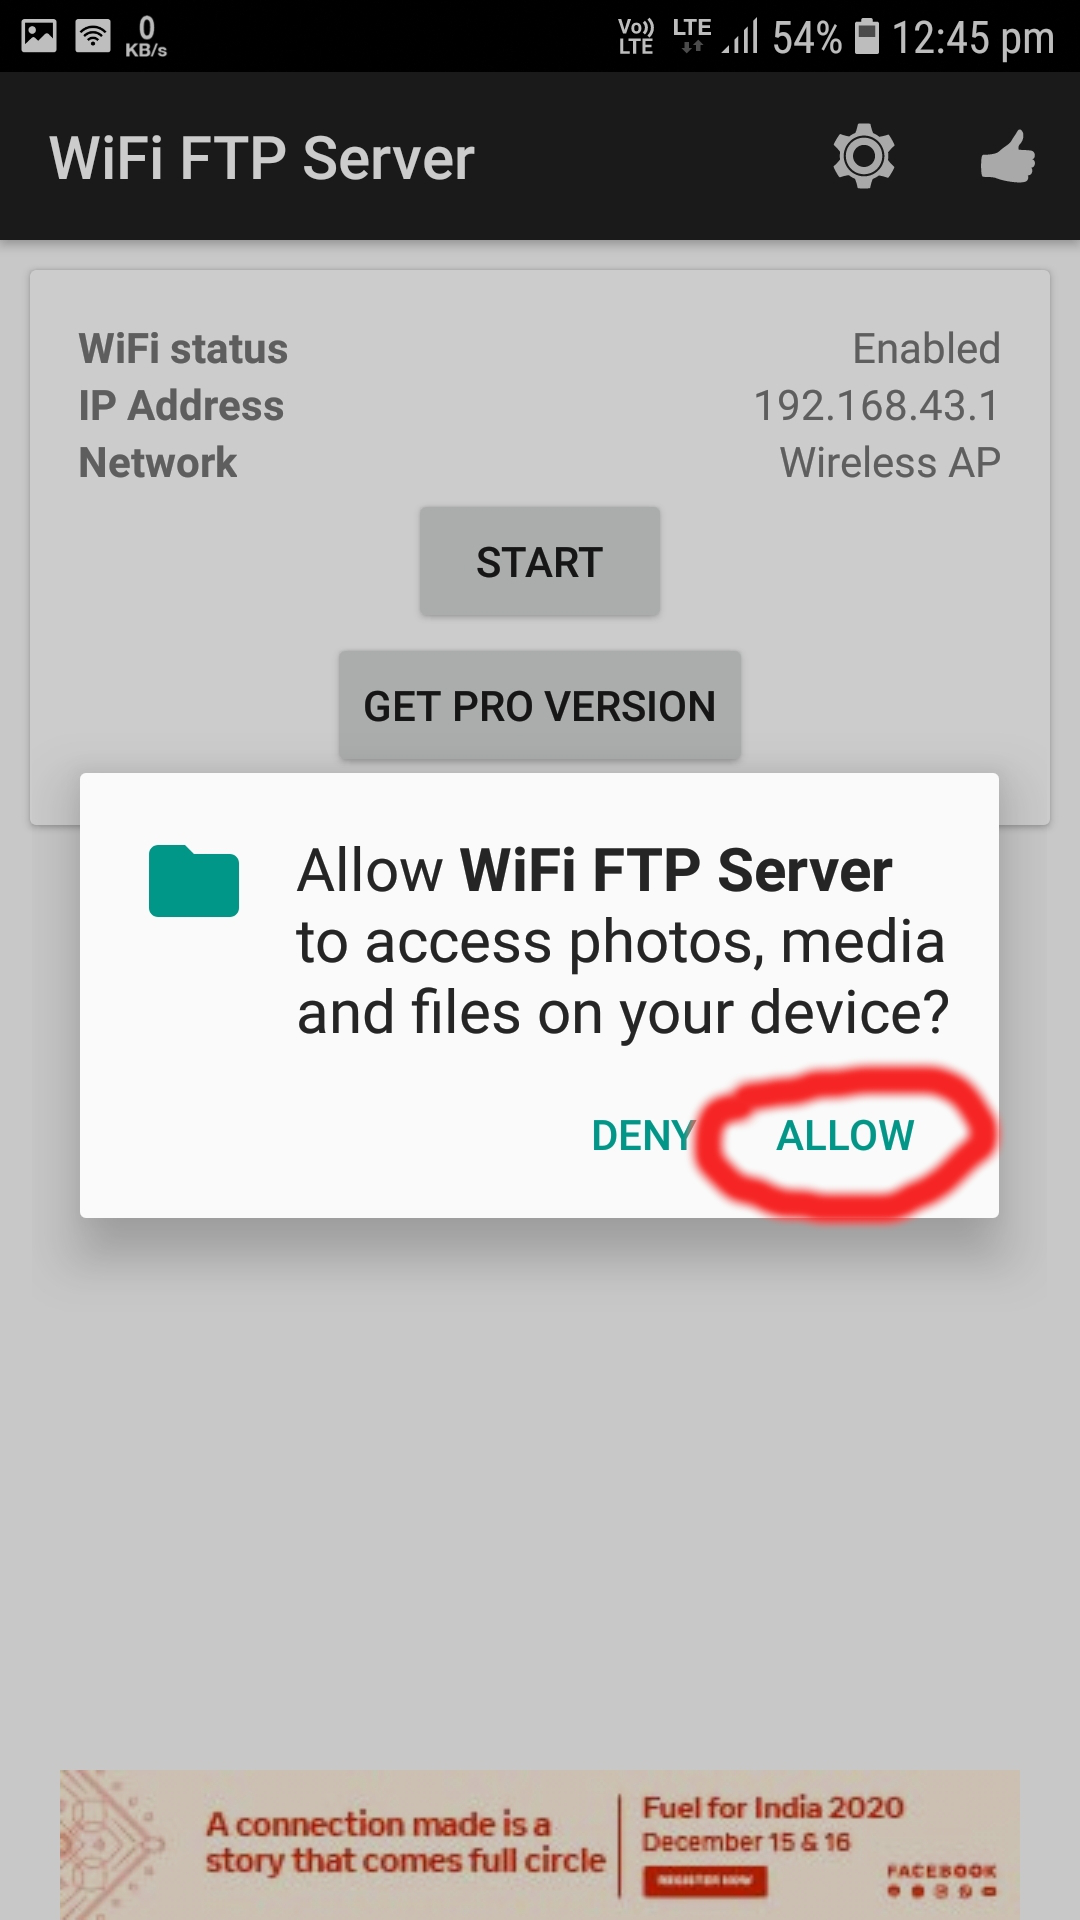
Grant access to local storage
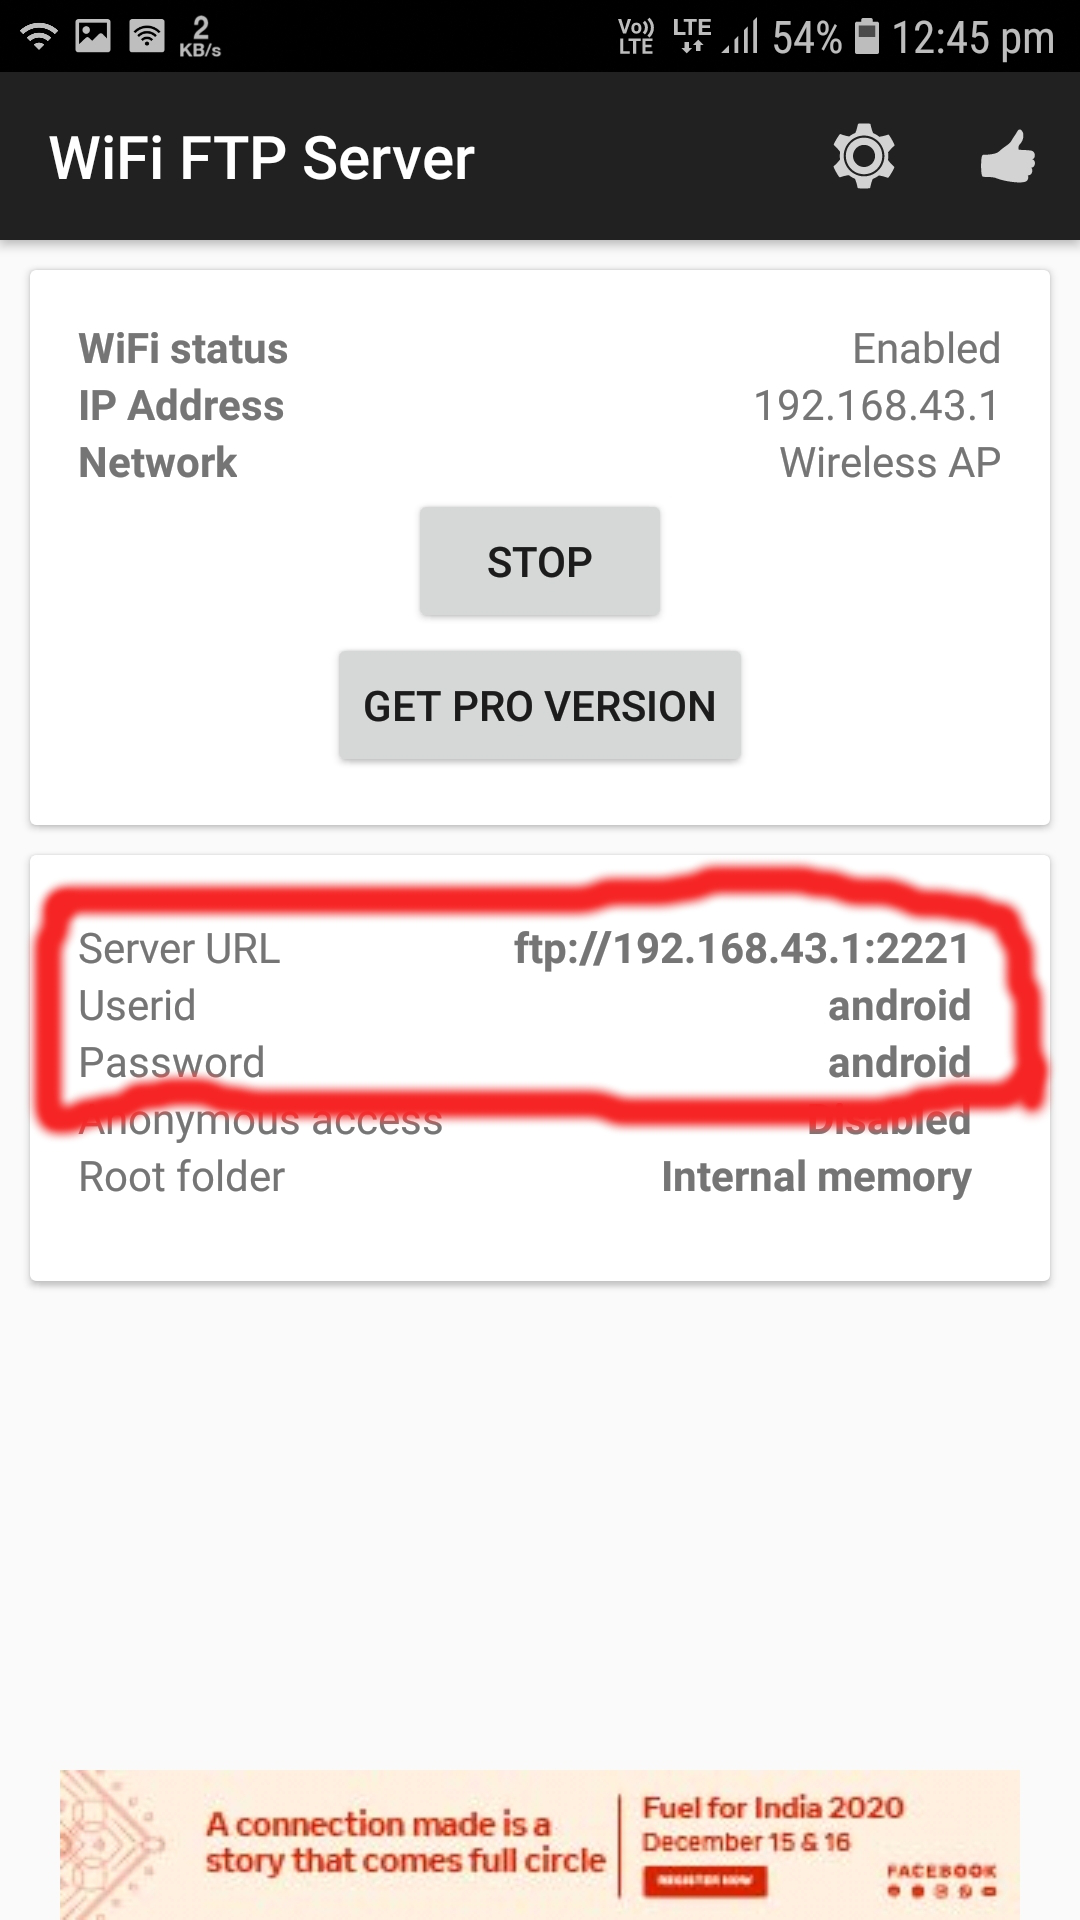
6. Now, note down the Server URL, Userid, and Password.
Note down connection information
In my case,
- Server URL = ftp://192.168.43.1:2221
- Userid = android
- Password = android
Setup of FileZilla
1. Open FileZilla by typing the following command in terminal. To open terminal, press Ctrl+Alt+T.
filezilla
You can also open it from the App list.
Open FileZilla
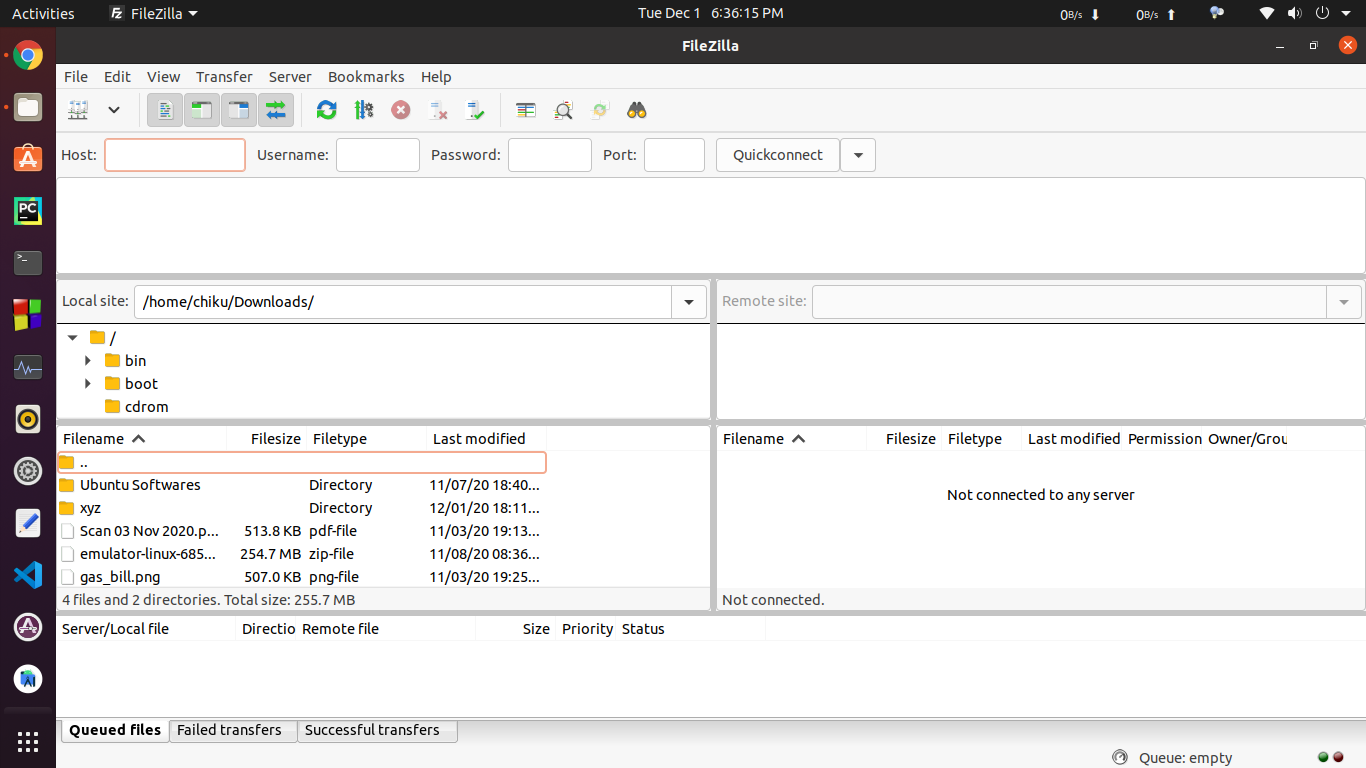
2. Now in FileZilla, you’ll see four input boxes, Host, Username, Password, Port.

Input information
3. In the previous section, we had noted our Server URL, Userid, and Password. In my case Server URL was ftp://192.168.43.1:2221, Userid was android, and Password was android. So, according to this information, the below data is acquired
- Host = ftp://192.168.43.1
- Username = android
- Password = android
- Port = 2221
Using the above points, input the data in the respective boxes in FileZilla.

Input the information
4. Now, click on the Quickconnect button, and if all details are correct, then a confirmation box will appear. Click on OK and the FTP server will be established successfully.
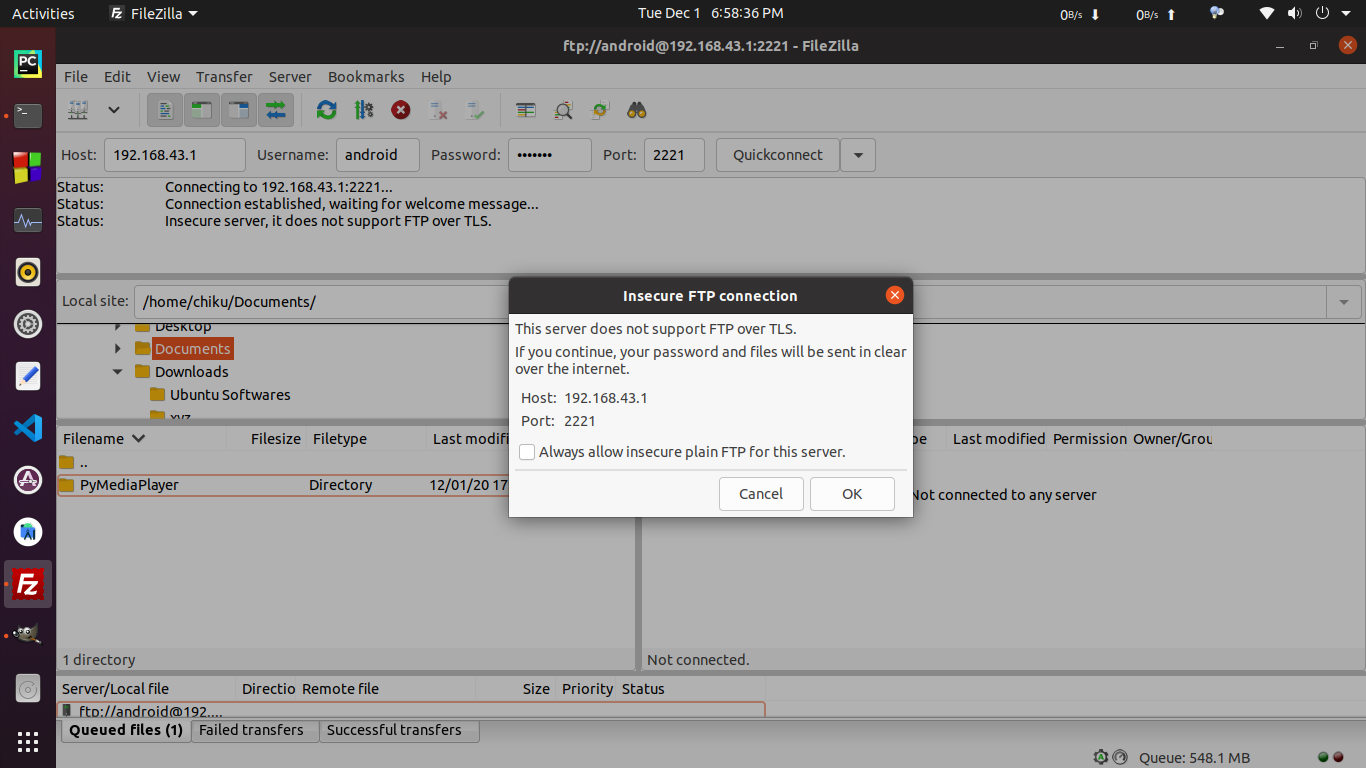
Click on OK
You’ll be able to see all the contents of your Android device on the right side under Remote Site.
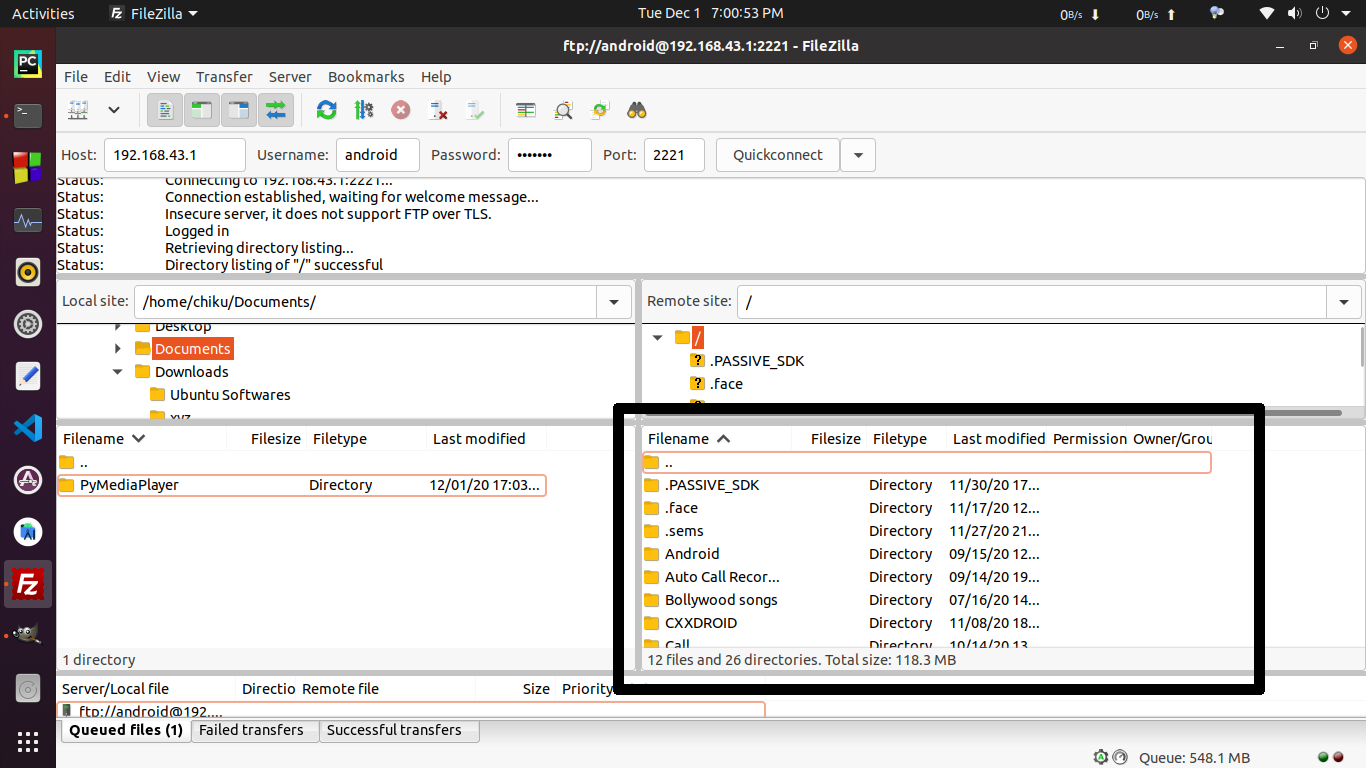
Files of your Android device
You’ll be able to see all the contents of your Ubuntu machine on the left side under Local Site.
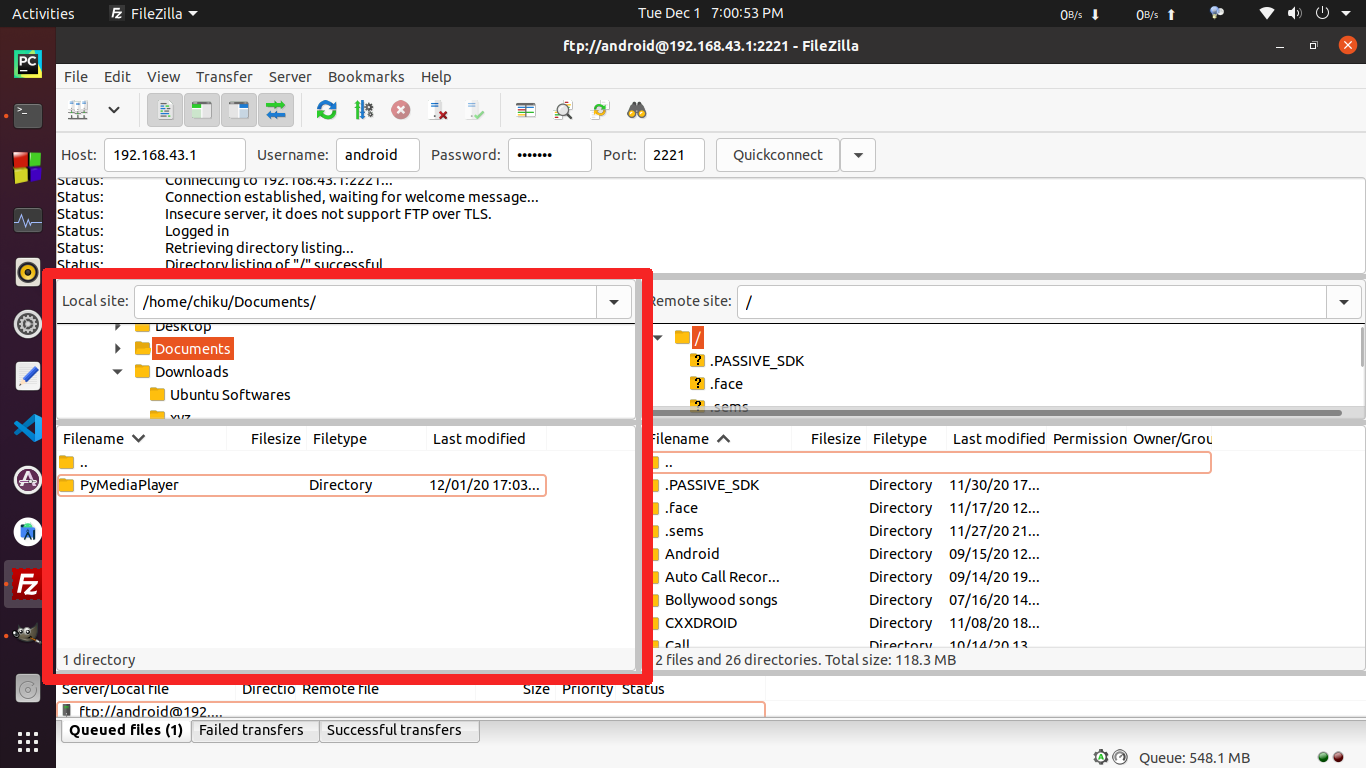
Files of your Ubuntu Machine
5. Now, you can navigate to any folder of your choice on the Local site and Remote site, and then just drag ‘n’ drop the contents from one site to another.
Dragging from the Remote site to the Local Site will download the selected contents from the Remote site.
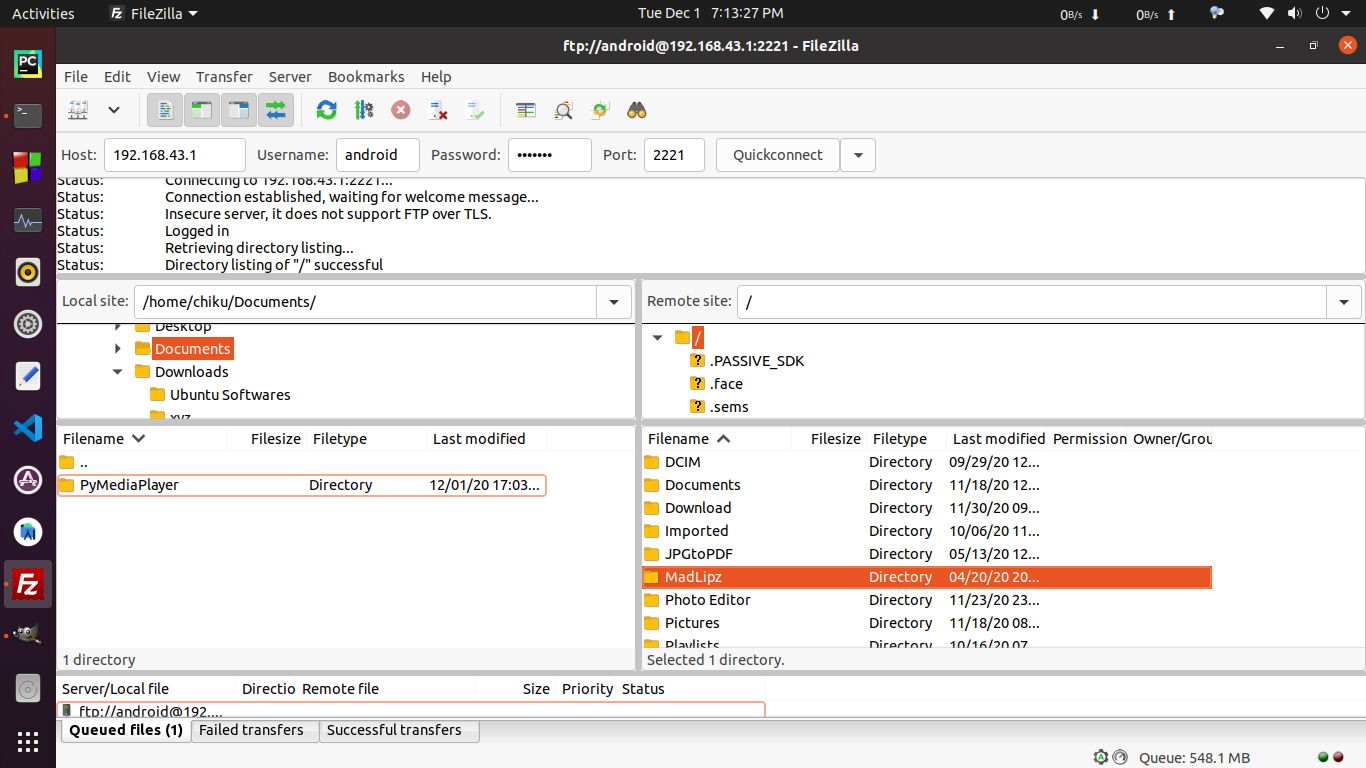
Dragging items from the Remote Site
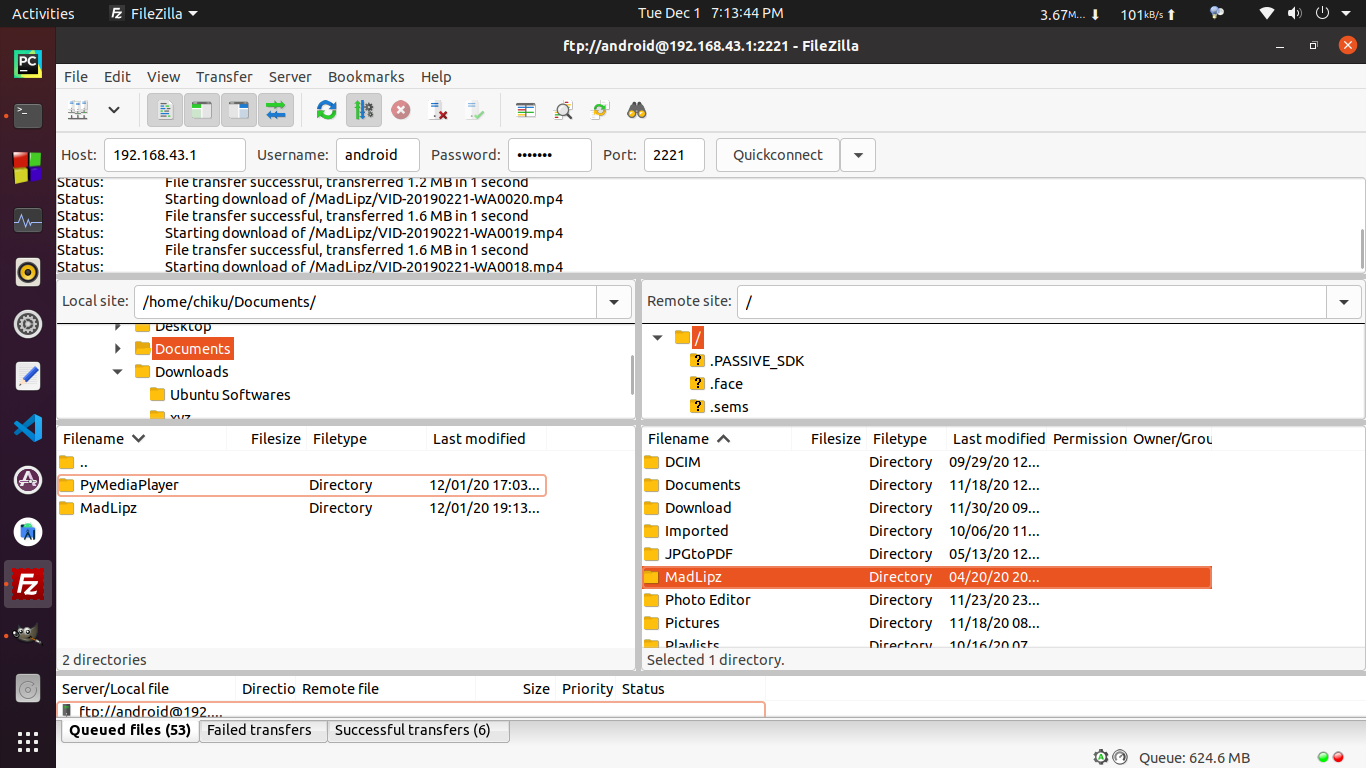
Items getting downloaded to the Local Site
Dragging from the Local Site to the Remote site will upload the selected contents to the Remote site.
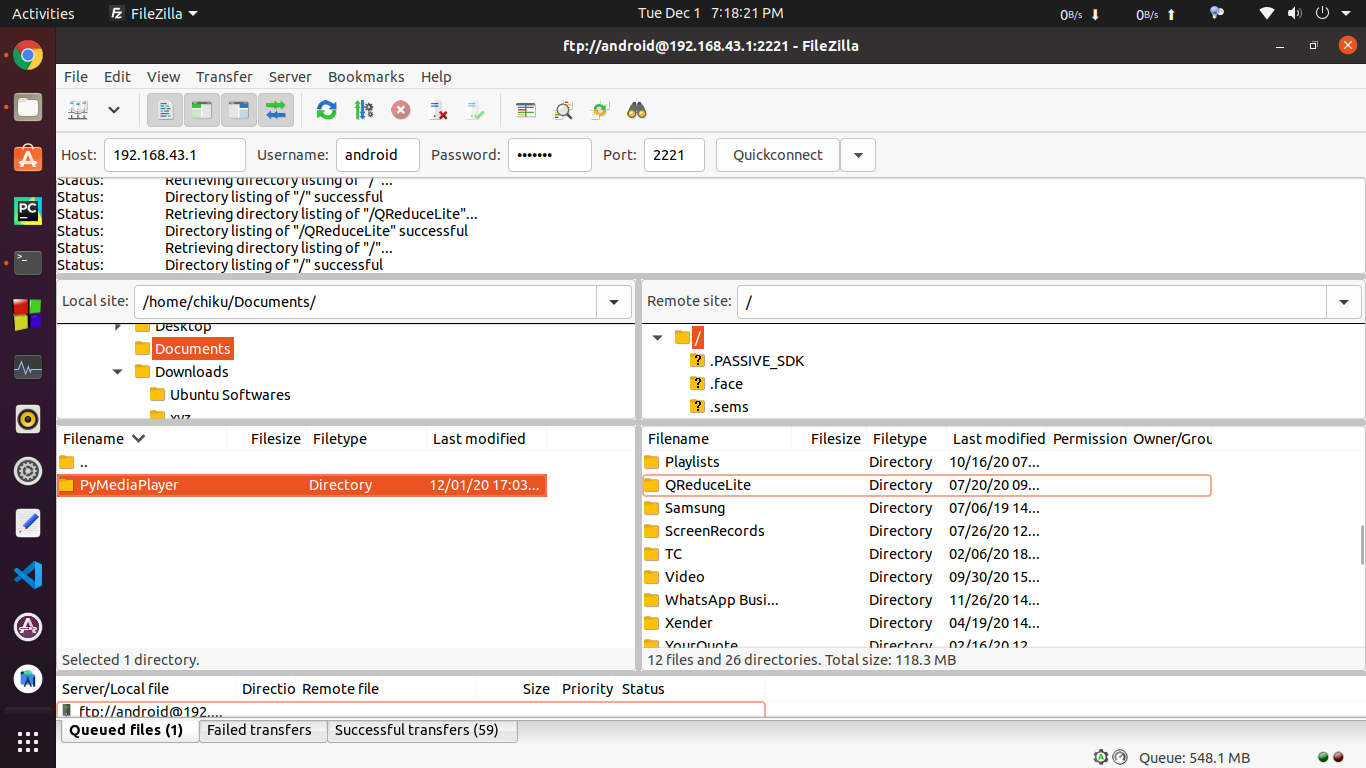
Dragging folder from Local site to Remote site
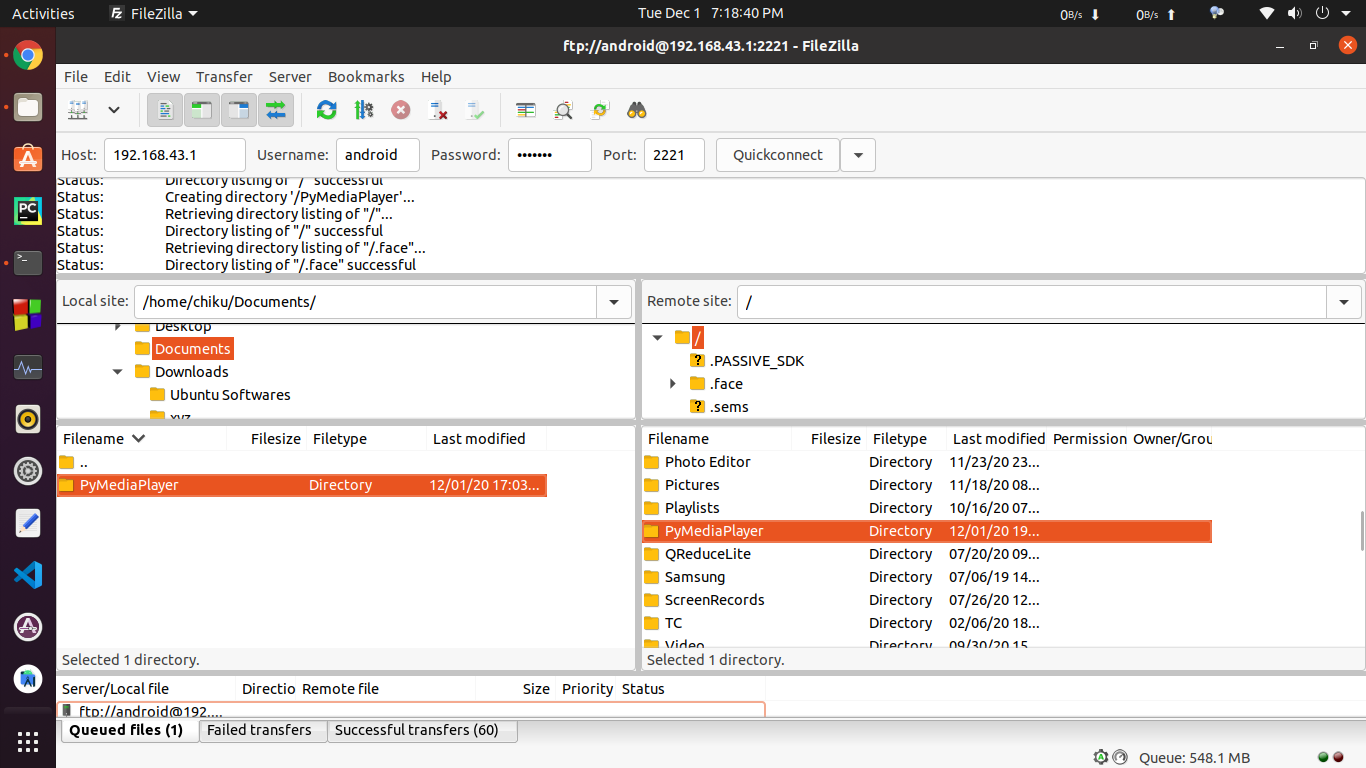
Folder uploaded to the Remote site
You can also delete files from Remote Sites, i.e. Android devices directly from FileZilla.
Note: Be careful because it will actually delete the file from your Android device and the data loss won’t be recovered!
Removal of FileZilla
If you want to delete FileZilla from your machine, then execute the following commands in your terminal.
sudo add-apt-repository --remove ppa:sicklylife/filezilla
sudo apt remove --autoremove filezilla
FileZilla will be successfully removed from your Ubuntu machine.
Share your thoughts in the comments
Please Login to comment...