Handling File Uploads in MERN Applications
Last Updated :
01 Apr, 2024
In the project “Handling File Uploads in MERN” our goal is to implement features that allow users to upload files such as images or documents. Our approach involves setting up a client backend using Node.js and Express.js to manage file uploads, setting up storage of uploaded files, creating an API endpoint to manage file request upload, integrating these functions into the frontend using React.js. Follow security measures to ensure the security of data processing.
Output Preview: Let us have a look at how the final output will look like.

Final Project Output
Prerequisites:
Approach to create File Upload Handler:
- Set Up Backend Server: Use Node.js with Express.js to create a backend server.
- Configure Storage: Choose where to store uploaded files, like the local filesystem or cloud storage.
- Create API Endpoint: Define an endpoint to handle file uploads using Multer middleware.
- Handle File Uploads: Validate and save uploaded files to the designated storage location.
- Return Response: Send a response with metadata about the uploaded file after successful upload.
- Integrate with Frontend: Create a UI component in React.js to allow users to upload files and send POST requests to the backend.
- Display Uploaded Files: Optionally, implement functionality to list and display uploaded files on the frontend.
- Security Considerations: Implement security measures to validate file types, sanitize file names, and restrict access to sensitive files.
Steps to Create the Backend:
Step 1: Create a directory for project
mkdir server
cd server
npm init -y
Step 2: Install necessary dependencies
npm install express multer mongoose gridfs-stream multer-gridfs-storage crypto
Project Structure(Backend):
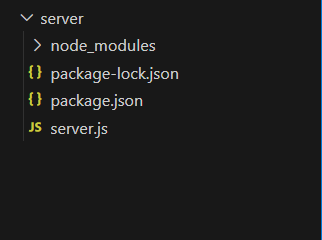
Backend project structure
The updated dependencies in package.json file of backend will look like:
"dependencies": {
    "cors": "^2.8.5",
    "express": "^4.18.3",
    "multer": "^1.4.5-lts.1"
}
Step 3: Create your backend server
Create a file named server.js in the project directory.
JavaScript
const mongoose = require('mongoose');
const express = require('express');
const multer = require('multer');
const path = require('path');
const Grid = require('gridfs-stream');
const crypto = require('crypto');
const GridFsStorage = require('multer-gridfs-storage').GridFsStorage;

const app = express();
const PORT = 5000;

// MongoDB connection
const mongoURI = 'mongodb+srv://<username>:<password>@cluster0.gpvettn.mongodb.net/';
mongoose.connect(mongoURI, {
    useNewUrlParser: true, useUnifiedTopology: true
});
const conn = mongoose.connection;

let gfs;

conn.once('open', () => {
  gfs = Grid(conn.db, mongoose.mongo);
  gfs.collection('uploads');
});

const storage = new GridFsStorage({
  url: mongoURI,
  file: (req, file) => {
    return new Promise((resolve, reject) => {
      crypto.randomBytes(16, (err, buf) => {
        if (err) {
          return reject(err);
        }
        const filename = buf.toString('hex') +
                            path.extname(file.originalname);
        const fileInfo = {
          filename: filename,
          bucketName: 'uploads'
        };
        resolve(fileInfo);
      });
    });
  }
});

const upload = multer({ storage });

app.post('/upload', upload.single('file'), (req, res) => {
  if (!req.file) {
    return res.status(400).send('No file uploaded.');
  }
  res.send('File uploaded successfully.');
});

app.listen(PORT, () => {
  console.log(`Server is running on port ${PORT}`);
});
.png)
mongodb datafile
Steps to Create the Frontend:
Step 1: Create a new directory named client inside your project directory.
mkdir client
cd client
Step 2: Initialize a new React.js project using create-react-app.
npx create-react-app .
Project Structure(Frontend):
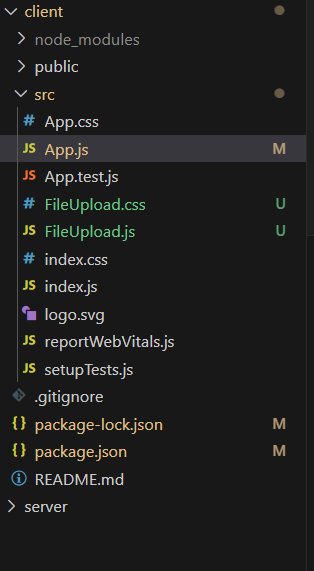
Frontend project structure
Step 3: Create a file upload component
Create a new file named FileUpload.js.
JavaScript
import React, { useState } from 'react';
import axios from 'axios';
import './FileUpload.css';

const FileUpload = () => {
    const [file, setFile] = useState(null);

    const handleFileChange = (e) => {
        setFile(e.target.files[0]);
    };

    const handleSubmit = async (e) => {
        e.preventDefault();
        const formData = new FormData();
        formData.append('file', file);
        try {
            await axios.post('http://localhost:5000/upload', formData, {
                headers: {
                    'Content-Type': 'multipart/form-data'
                }
            });
            alert('File uploaded successfully');
        } catch (error) {
            console.error('Error uploading file:', error);
            alert('Failed to upload file');
        }
    };

    return (
        <div className="file-upload-container">
            <h1 className="upload-heading">GFG File Uploads</h1>
            <form className="file-upload-form" onSubmit={handleSubmit}>
                <input type="file"
                    onChange={handleFileChange}
                    className="file-input" />
                <button type="submit" className="upload-button">
                    Upload
                </button>
            </form>
        </div>
    );
};

export default FileUpload;
Step 4: Add FileUpload.css File for styling.
CSS
.file-upload-container {
  text-align: center;
}

.upload-heading {
  font-size: 36px;
  color: #007bff;
  margin-bottom: 30px;
}

.file-upload-form {
  display: flex;
  flex-direction: column;
  align-items: center;
}

.file-input {
  border: 2px solid #007bff;
  border-radius: 5px;
  padding: 10px;
  margin-bottom: 20px;
}

.upload-button {
  background-color: #007bff;
  color: #fff;
  border: none;
  border-radius: 5px;
  padding: 10px 20px;
  cursor: pointer;
  transition: background-color 0.3s ease;
}

.upload-button:hover {
  background-color: #0056b3;
}
Step 5: Use the FileUpload component
Open the App.js file inside the src directory and replace its contents with the following code:
JavaScript
import React from 'react';
import FileUpload from './FileUpload';

function App() {
  return (
    <div className="App">
      <h1>File Upload</h1>
      <FileUpload />
    </div>
  );
}

export default App;
Step 6: Start the frontend Project
cd client
npm start
Output: The output in the browser will look like.
Handling File Uploads in MERN
Share your thoughts in the comments
Please Login to comment...