Generating meshes in Python
Last Updated :
16 Mar, 2023
In computer graphics and scientific computing, the mesh is an arrangement of points, lines, and surfaces that outline the shape and structure of a 3D object or surface. Making meshes is a critical process in several industries, such as 3D modelling, simulation, visualization, and gaming. In this article, we’ll explore various libraries and techniques for crafting meshes in Python.
Prerequisites:
To comprehend this tutorial, you ought to have a fundamental comprehension of Python programming, linear algebra, and 3D geometry. You also need to have the following Python libraries installed.
- NumPy: for numerical computations and linear algebra
- Matplotlib: for visualization of 3D objects and surfaces
- Pyvista: to fabricate, alter, and render 3D objects and surfaces.
Generating a Simple Mesh:
To generate a simple mesh, we’ll draw upon the NumPy library to concoct a collection of points and numerals that delineate the form and composition of the mesh to bring forth a basic mesh. Let’s now construct a mesh for a cube with sides measuring one.
Python3
import numpy as np
from mpl_toolkits.mplot3d import Axes3D
import matplotlib.pyplot as plt
vertices = np.array([
[-0.5, -0.5, -0.5],
[-0.5, -0.5, 0.5],
[-0.5, 0.5, -0.5],
[-0.5, 0.5, 0.5],
[0.5, -0.5, -0.5],
[0.5, -0.5, 0.5],
[0.5, 0.5, -0.5],
[0.5, 0.5, 0.5]
])
indices = np.array([
[0, 1, 3],
[0, 3, 2],
[0, 2, 4],
[2, 6, 4],
[0, 4, 1],
[1, 4, 5],
[2, 3, 6],
[3, 7, 6],
[4, 6, 5],
[5, 6, 7],
[1, 5, 7],
[1, 7, 3]
])
fig = plt.figure()
ax = fig.add_subplot(111, projection='3d')
for triangle in indices:
ax.plot(vertices[triangle, 0], vertices[triangle, 1], vertices[triangle, 2], 'b-')
plt.show()
|
Output :
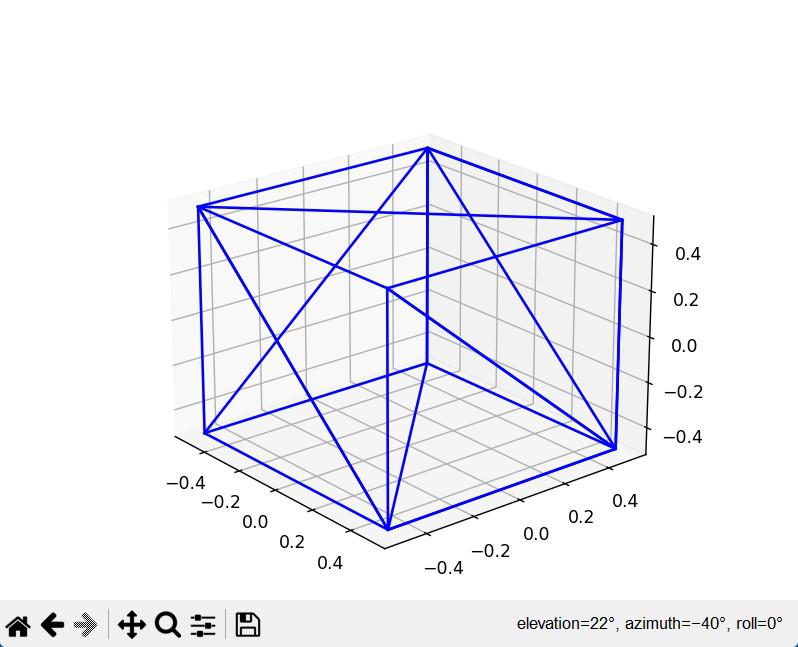
Simple Mesh Output
Generating a Complex Mesh:
Let’s make an example of an altered mesh structure. By making use of the PyVista library, we’ll craft a surface mesh for a 3D equation. Assemble mesh of torus knot with specified magnitude and a number of circles.
Python3
import pyvista as pv
import numpy as np
radius = 2
n1 = 3
n2 = 7
def torus_knot(u, v):
x = (radius + np.cos(n1 * u) * 0.5) * np.cos(n2 * v)
y = (radius + np.cos(n1 * u) * 0.5) * np.sin(n2 * v)
z = np.sin(n1 * u) * 0.5
return x, y, z
u = np.linspace(0, 2 * np.pi, 100)
v = np.linspace(0, 2 * np.pi, 100)
x, y, z = torus_knot(*np.meshgrid(u, v, indexing='ij'))
points = np.column_stack((x.ravel(), y.ravel(), z.ravel()))
mesh = pv.PolyData(points)
mesh.triangulate()
mesh = mesh.extract_surface()
pv.plot(mesh, color='w', smooth_shading=True)
|
Output :
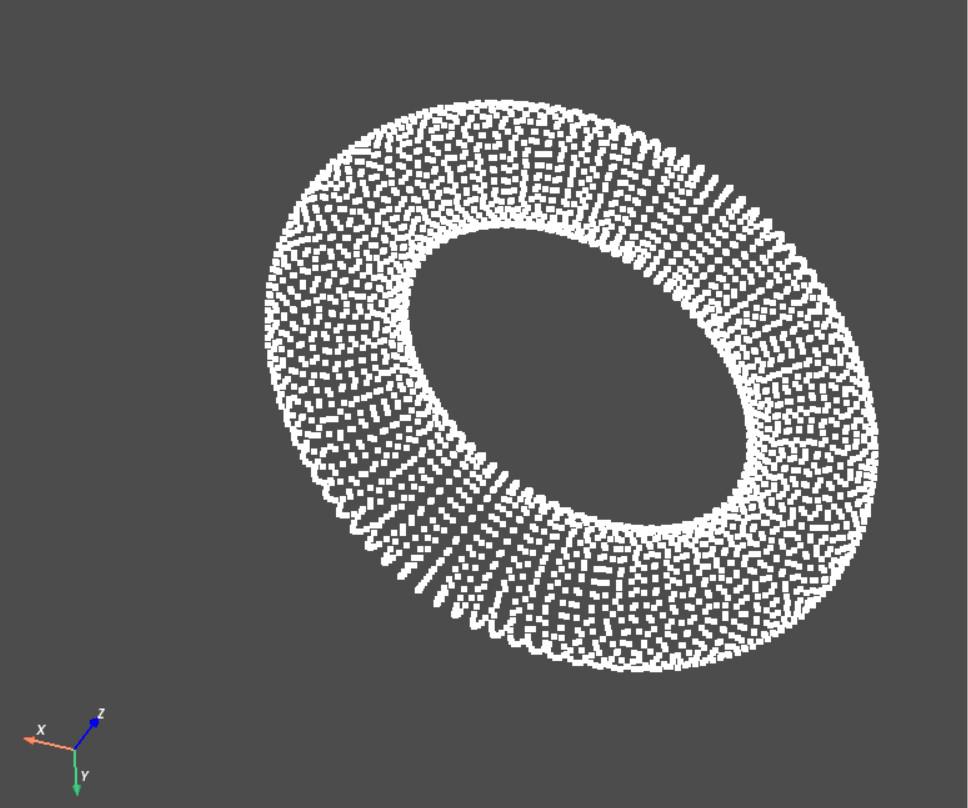
Complex Mesh output
Generating Complex Mesh from Point Clouds:
In the instance below, we’ll apply the PyMesh library to build a mesh from a group of point clouds by means of the PointCloud Mesh Reconstruction method, which applies the Poisson equation to generate a consistent surface from a combination of distributed points.
Python3
import pymesh
import numpy as np
from mpl_toolkits import mplot3d
import matplotlib.pyplot as plt
num_points = 10000
center = np.array([0, 0, 0])
radius = 1
theta = np.random.uniform(0, 2*np.pi, num_points)
phi = np.random.uniform(0, np.pi, num_points)
x = radius*np.sin(phi)*np.cos(theta) + center[0]
y = radius*np.sin(phi)*np.sin(theta) + center[1]
z = radius*np.cos(phi) + center[2]
point_cloud = np.column_stack((x, y, z))
fig = plt.figure()
ax = fig.add_subplot(111, projection='3d')
ax.scatter(x, y, z, c='r', marker='o')
ax.set_xlabel('X')
ax.set_ylabel('Y')
ax.set_zlabel('Z')
plt.show()
mesh = pymesh.PyMesh()
mesh.load_point_cloud_from_array(point_cloud)
mesh.reconstruct(eta=5, with_timing=True)
fig = plt.figure()
ax = fig.add_subplot(111, projection='3d')
ax.plot_trisurf(mesh.vertices[:,0], mesh.vertices[:,1], mesh.vertices[:,2],
triangles=mesh.faces, shade=True, color='w')
ax.set_xlabel('X')
ax.set_ylabel('Y')
ax.set_zlabel('Z')
plt.show()
|
Output :
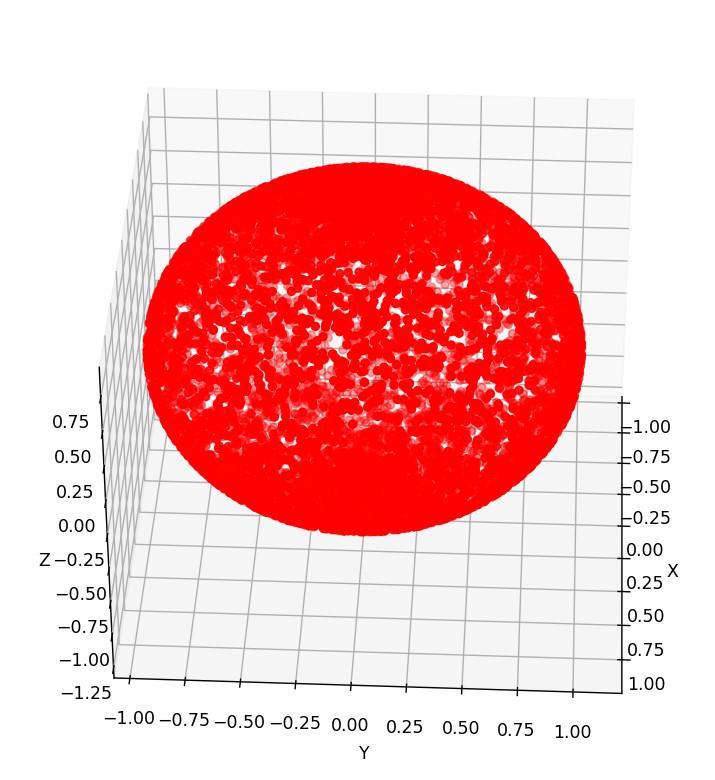
Point Cloud Mesh
The above example demonstrates how to fabricate 10,000 arbitrary points in three-dimensional space using a parameterized equation for a ball. Afterwards, the point sets are exhibited utilizing Matplotlib’s 3D plotting elements. The PointCloud Mesh Reconstruction procedure from PyMesh is utilized to produce a mesh from the point sets, and the eta parameter is adjusted to control the mesh’s detail. Then, a glossy finish and white representation of the eventual mesh are carried out.
It should be kept in mind that the PointCloud Mesh Reconstruction algorithm necessitates a great deal of computation, so running it on a large set of point clouds can be quite time-consuming. The final structure might not be perfect and might require additional handling to get rid of any disturbance or raise its value.
Conclusion :
To sum up, utilizing mesh construction in Python can be an expedient technique for a wide range of duties, such as scientific simulations, computer graphics, and computational geometry. PyMesh, mesh, and meshlab are just a few of the libraries and modules that Python offers to make mesh formation straightforward and attainable. In this context, we looked at three unique Python mesh formation examples, including constructing a basic 2D mesh from a collection of vertices, a more intricate 3D mesh from a set of surfaces using the Delaunay triangulation algorithm, and a complex mesh from a set of point clouds using the PointCloud Mesh Reconstruction algorithm. Each of these examples showed divergent Python libraries and modules, incorporating matplotlib, NumPy, SciPy, and PyMesh. Merging these tools with Python’s potency and flexibility allows us to competently construct complex meshes.
Remembering that mesh production can be a daunting and time-consuming undertaking, and the meshes that originate from it may call for additional work to make sure they’re up to scratch in terms of performance and quality. Python can be an advantageous tool for constructing meshes for a variety of needs when accompanied by the right tools and techniques.
Share your thoughts in the comments
Please Login to comment...