Difference between structural and attribute directives
Last Updated :
16 Apr, 2024
Structural directives manipulate the DOM layout by adding, removing, or replacing elements, while attribute directives modify the appearance or behavior of elements without affecting their structure. Directives in Angular are nothing but the classes that allow us to add and modify the behavior of elements. Using directives in angular we can modify the DOM (Document Object Module) styles, handle user functionality, and much more.
There are mainly two types of directives Structural Directives and Attribute Directives. In this article let us learn more about these directives
Structural Directives
In Angular, structural directives are a type of directive that modify the layout of the DOM by adding, removing, or replacing elements based on certain conditions. We have three built-in structural directives namely : *ngIf, *ngFor, *ngSwitch.
Features of Structural Directives :
- Control Rendering: They conditionally render templates based on expressions, allowing you to show or hide content based on certain conditions.
- Iteration: They enable you to loop through collections and generate multiple instances of a template for each item in the list.
- Altering the DOM layout : Structural directives allow us to add or remove elements from DOM based on the truthiness of the expression.
1. *ngIf Directive
This directive helps us to conditionally include or remove elements from the DOM. Using ngIf directive we can create dynamic user interfaces.
Syntax :
*ngIf="Expression"
2. *ngFor Directive
This directive helps us to iterate over Arrays, Objects, Lists etc and display a template for each item in the collection. This is generally and efficient way used to dynamically display the data over the repeated items. This is similar to for loop in our programming languages.
Syntax :
*ngFor="let <item> of Collection"
3. *ngSwitch Directive
This directive helps us to conditionally display an element from different section of elements based on given expression. It is similar to switch case in our programming languages.
Syntax:
<element [ngSwitch]="expression">
      <some-element *ngSwitchCase*="value"> Contents... </some-element>
      <some-element *ngSwitchCase="value"> Contents... </some-element>
      <some-element *ngSwitchCase> Contents... </some-element>
      <some-element *ngSwitchDefault>Default value...</some-element>
</element>
Example demonstrating all three structural directives :
HTML
<!-- app.component.html -->

<div *ngIf="showExample">
    <p>Programming Languages:</p>
    <div *ngFor="let item of items">
        <li>item</li>
    </div>
    <div [ngSwitch]="status">
        <p *ngSwitchCase="'active'">Status : Active</p>
        <p *ngSwitchCase="'inactive'">Status : Inactive</p>
        <p *ngSwitchDefault>Status : Undefined</p>
    </div>
</div>
//app.component.ts

import { Component } from '@angular/core';

@Component({
    selector: 'app-root',
    templateUrl: './app.component.html',
    styleUrls: ['./app.component.scss'],
})
export class AppComponent {
    items = ['Java', 'Python', 'C'];
    status = 'active';
    showExample = true;
}
Output:
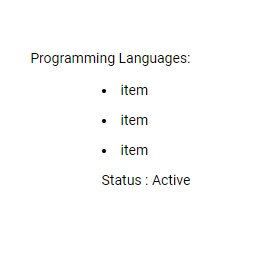
In the above example, we have seen the usage of *ngIf, *ngFor and *ngSwitch. Using ngIf on `showExample` property, to determine whether to show the content , and iterating over an `items` array using *ngFor, and a `status` property used with *ngSwitch to conditionally display different messages based on its value.
Attribute Directives
In Angular, Attribute directives are used within html tags to modify the appearance of elements, components or directives. They are used for Dynamic Styling, DOM Manipulation etc.
Features of Attribute Directives :
- Dynamic Styling: Attribute directives can be used to dynamically apply styles to HTML elements based on certain conditions.
- DOM Manipulation: They enable you to interact with and manipulate the DOM based on user actions or application state changes.
- Reusability: Attribute directives promote code reuse by encapsulating behavior that can be applied to multiple elements across the application.
- Enhanced Functionality: They allow you to extend HTML with custom functionality, improving the overall user experience.
We have 3 main built in attribute directives: ngClass, ngStyle and ngModel.
1. ngClass
This attribute is used to conditionally give the classes to the elements based on the value binded to ngClass directive.
Syntax:
<element [ngClass]="expression"></element>
2. ngStyle
This attribute is used to dynamically apply the styles to elements based on the value binded to ngStyle directive. It helps us to modify the appearance of elements on conditional basis. We can also use ngStyles to override in
Syntax:
<element [ngStyle]="expression"></element>
3. ngModel
This attribute is generally used to bind form control data to a class variable . This allows a two way binding and this is most commonly used directive with forms. It also comes with few basic validations like required,minLength , maxLength which can be directly used in our input tags.
To use this directive we need to import Forms Module in our module file.
Syntax:
<input name="name" [(ngModel)]="name"/>
Example demonstrating all three attribute directives :
HTML
<!-- app.component.html -->

<form>
  <div>
    <label>Name: </label>
    <input
      type="text"
      name="name"
      minlength="4"
      [(ngModel)]="name"
      #nameInput="ngModel"
      required
      [ngClass]="{ 'is-invalid': nameInput.touched && nameInput.invalid }"
    />
    <div *ngIf="nameInput.touched && nameInput.invalid">
      Minimum length of name is 4 characters
    </div>
  </div>
  <div>
    <label>Age: </label>
    <input
      type="number"
      name="age"
      [(ngModel)]="age"
      #ageInput="ngModel"
      required
      [ngStyle]="{
        'border-color': ageInput.invalid && ageInput.touched ? 'red' : ''
      }"
    />
    <div *ngIf="ageInput.touched && ageInput.invalid">Age is required</div>
  </div>
</form>
//app.component.ts

import { Component } from '@angular/core';

@Component({
    selector: 'app-root',
    templateUrl: './app.component.html',
    styleUrls: ['./app.component.scss'],
})
export class AppComponent {
    name: string = '';
    age!: number;
}
Output:
.gif)
In this example we have used all the three attribute directives , and displayed the errors using ngClass , ngStyle. We have stored the values of the fields using ngModel .
Differences between structural and attribute directives
Structural Directives | Attribute Directives |
|---|
They alter the structure of the DOM by adding , removing or manipulating elements.
| They change the behaviour or appearance of an element, component, or other directive
|
Prefixed with an asterisk (*) in the template.
eg: *ngIf, *ngFor
| Used as attributes in the template.
eg : `[ngClass]`, `[ngStyle]`
|
Used for conditionally displaying elements or iterating over a collection.
| Used for applying dynamic styles, modifying existing behaviour
|
Generally, only one structural directive can be applied to a single element at a time.
| We can combine multiple attribute directives on a single element.
|
Ex : *ngIf, *ngFor, *ngSwitch
| Ex : [ngClass] , [ngStyle] , [ngModel]
|
Share your thoughts in the comments
Please Login to comment...