In this chapter, we will create Django API views for HTTP requests and will discuss how Django and Django REST framework process each HTTP request.
- Creating Django Views
- Routing URLs to Django views and functions
- Launching Django’s development server
- Making HTTP requests using the command-line tool
- Making HTTP requests with Postman
Creating Django Views
In the previous chapters, you have seen how to create a model and its serializer. Now, let’s look at how to process HTTP requests and provide HTTP responses. Here, we will create Django views to process the HTTP requests. On receiving an HTTP request, Django creates an HttpRequest instance and it is passed as the first argument to the view function. This instance contains metadata information that has HTTP verbs such as GET, POST, or PUT. The view function checks the value and executes the code based on the HTTP verb. Here the code uses @csrf_exempt decorator to set a CSRF (Cross-Site Request Forgery) cookie. This makes it easier to test the code, which doesn’t portray a production-ready web service. Let’s get into code implementation.
Python3
from django.http import HttpResponse
from django.views.decorators.csrf import csrf_exempt
from rest_framework.renderers import JSONRenderer
from rest_framework.parsers import JSONParser
from rest_framework import status
from taskmanagement.models import TaskManagement
from taskmanagement.serializers import TaskMngSerializer
class JSONResponse(HttpResponse):
def __init__(self, data, **kwargs):
content = JSONRenderer().render(data)
kwargs['content_type'] = 'application/json'
super(JSONResponse, self).__init__(content, **kwargs)
@csrf_exempt
def task_list(request):
if request.method == 'GET':
task = TaskManagement.objects.all()
task_serializer = TaskMngSerializer(task, many=True)
return JSONResponse(task_serializer.data)
elif request.method == 'POST':
task_data = JSONParser().parse(request)
task_serializer = TaskMngSerializer(data=task_data)
if task_serializer.is_valid():
task_serializer.save()
return JSONResponse(task_serializer.data, \
status=status.HTTP_201_CREATED)
return JSONResponse(task_serializer.errors, \
status = status.HTTP_400_BAD_REQUEST)
@csrf_exempt
def task_detail(request, pk):
try:
task = TaskManagement.objects.get(pk=pk)
except TaskManagement.DoesNotExist:
return HttpResponse(status=status.HTTP_404_NOT_FOUND)
if request.method == 'GET':
task_serializer = TaskMngSerializer(task)
return JSONResponse(task_serializer.data)
elif request.method == 'PUT':
task_data = JSONParser().parse(request)
task_serializer = TaskMngSerializer(task, data=task_data)
if task_serializer.is_valid():
task_serializer.save()
return JSONResponse(task_serializer.data)
return JSONResponse(task_serializer.errors, \
status=status.HTTP_400_BAD_REQUESTS)
elif request.method == 'DELETE':
task.delete()
return HttpResponse(status=status.HTTP_204_NO_CONTENT)
|
Let’s evaluate the code. Here we have two functions.
- task_list()
- task_detail()
Note: Later we will add the security and throttling rules for our RESTFul web service. And, also we need to remove repeated codes. Now the above code is necessary to understand how basic things work.
task_list()
The task_list() function is capable of processing two HTTP verbs – GET and POST.
If the verb is GET, the code retrieves all the task management instances.
if request.method == ‘GET’:
task = TaskManagement.objects.all()
task_serializer = TaskMngSerializer(task, many=True)
return JSONResponse(task_serializer.data)
- It retrieves all the tasks using TaskManagement.objects.all() method,
- serializes the tasks using TaskMngSerializer(task, many=True),
- the data generated by TaskMngSerializer is passed to the JSONResponse, and
- returns the JSONResponse built.
Note: The many=True argument in TaskMngSerializer(task, many=True) specifies that multiple instances have to be serialized.
If the verb is POST, the code creates a new task. Here the new task is provided as JSON data in the body of the HTTP request.
elif request.method == ‘POST’:
task_data = JSONParser().parse(request)
task_serializer = TaskMngSerializer(data=task_data)
if task_serializer.is_valid():
task_serializer.save()
return JSONResponse(task_serializer.data, \
status=status.HTTP_201_CREATED)
return JSONResponse(task_serializer.errors, \
status = status.HTTP_400_BAD_REQUEST)
- Uses JSONParser to parse the request,
- Serialize the parsed data using TaskMngSerializer,
- If data is valid, it is saved in the database, and
- returns the JSONResponse built (contains data and HTTP_201_CREATED status).
task_detail()
The task_detail() function is capable of processing three HTTP verbs – GET, PUT, and DELETE. Here, the function receives the primary key as an argument, and the respective operation is done on the particular instance that has the same key.
If the verb is GET, then the code retrieves a single task based on the key. If the verb is PUT, the code updates the instance and saves it to the database. if the verb is DELETE, then the code deletes the instance from the database, based on the pk value.
JSONResponse()
Apart from the two functions explained, the code has a class called JSONResponse.
class JSONResponse(HttpResponse):
def __init__(self, data, **kwargs):
content = JSONRenderer().render(data)
kwargs[‘content_type’] = ‘application/json’
super(JSONResponse, self).__init__(content, **kwargs)
It renders the data in JSON and saves the returned byte string in the content local variable.
Routing URLs to Django views and functions
Now, it’s necessary to route URLs to view. You need to create a new Python file name urls.py in the taskmanagement folder (restapi\taskmanagement) and add the below code.
Python3
from django.conf.urls import url
from taskmanagement import views
urlpatterns = [
url(r'^taskmanagement/$',views.task_list),
url(r'^taskmanagement/(?P<pk>[0-9]+)$', views.task_detail),
]
|
Based on the matching regular expression the URLs are routed to corresponding views. Next, we have to replace the code in the urls.py file in restapi folder (restapi\restapi\urls.py). At present, it has the root URL configurations. Update the urls.py file with the below code.
Python3
from django.conf.urls import url, include
urlpatterns = [
url(r'^',include('taskmanagement.urls')),
]
|
Launching Django’s development server
After activating the virtual environment, you can run the below command to start the server.
python manage.py runserver
Sharing the screenshot below.
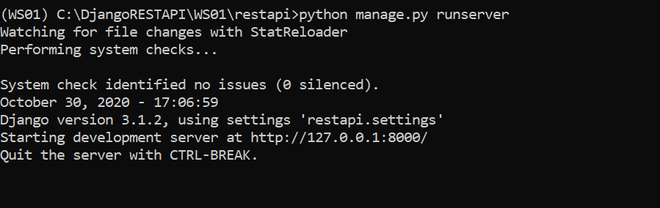
Development server
Making HTTP requests using the command-line tool
Let’s make use of the command-line tools that we installed in Chapter 1.
HTTP GET request
The HTTP GET requests are used to retrieve the task details from the database. We can use GET requests to retrieve a collection of tasks or a single task.
Retrieve all elements
The below curl command retrieves a collection of tasks.
curl -X GET localhost:8000/taskmanagement/
Output:
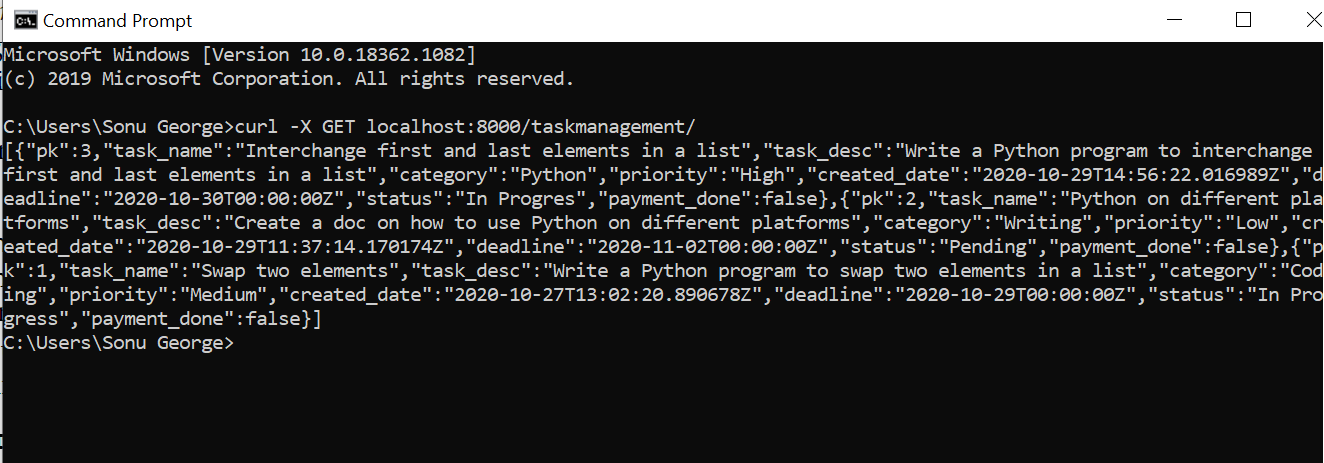
On executing the command, Django creates an HttpRequest instance and it is passed as the first argument to the view function. The Django routes the URL to the appropriate view function. Here the views have two methods, task_list and task_detail. Let’s look into the URL pattern, which is configured in taskmanagement\urls.py file
urlpatterns = [
url(r’^taskmanagement/$’,views.task_list),
url(r’^taskmanagement/(?P<pk>[0-9]+)$’, views.task_detail),
]
Here the URL (localhost:8000/taskmanagement/) matches the URL pattern for views.task_list. The task_list method gets executed and checks the HTTP verb. Since our HTTP verb for the request is GET, it retrieves all the tasks.
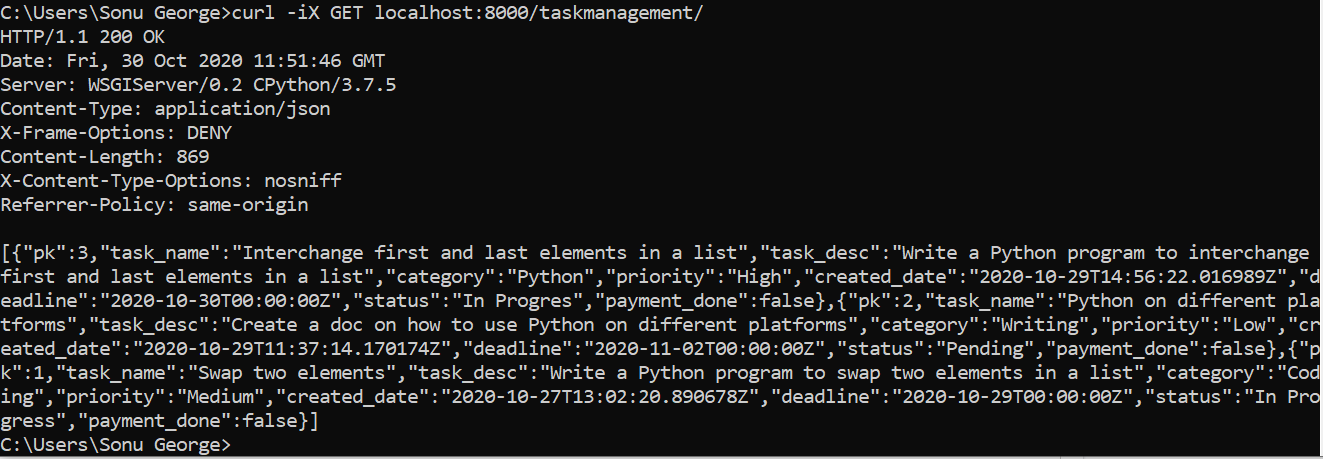
Let’s run the command to retrieve all the tasks by combining the -i and -X options. Here the benefit is that it shows the HTTP response header, status, Content-Type, etc.
curl -iX GET localhost:8000/taskmanagement/
Output:
So far we have executed the cURL command. Now we will look at the HTTPie utility command to compose and send HTTP requests. For this, we need to access the HTTPie utility prompt installed in the virtual environment. After activating the virtual environment, run the below command.
http :8000/taskmanagement/
The command sends the request: GET http://localhost:8000/taskmanagement/.
Output:
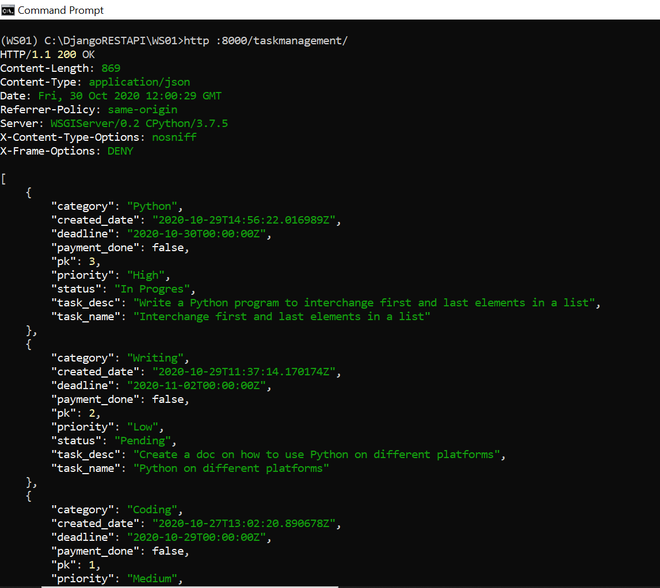
HTTPie utility GET request – retrieve all tasks
Retrieve Single Element
Now you are familiar with the command to retrieve a collection of tasks. Next, let’s understand how to retrieve a task based on a task id. Here, we will pass the task id along with the URL. Since the URL has a parameter, Django routes the URL to the task_detail function. Let’s execute the commands.
The HTTPie utility command to retrieve a single task.
http :8000/taskmanagement/2
The above command sends the request: GET http://localhost:8000/taskmanagement/2.
Output:
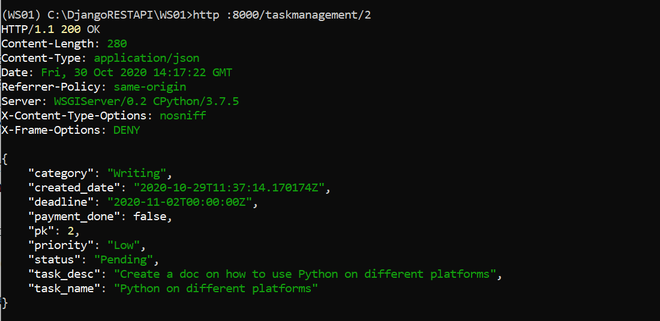
Retrieve a single element using HTTPie utility
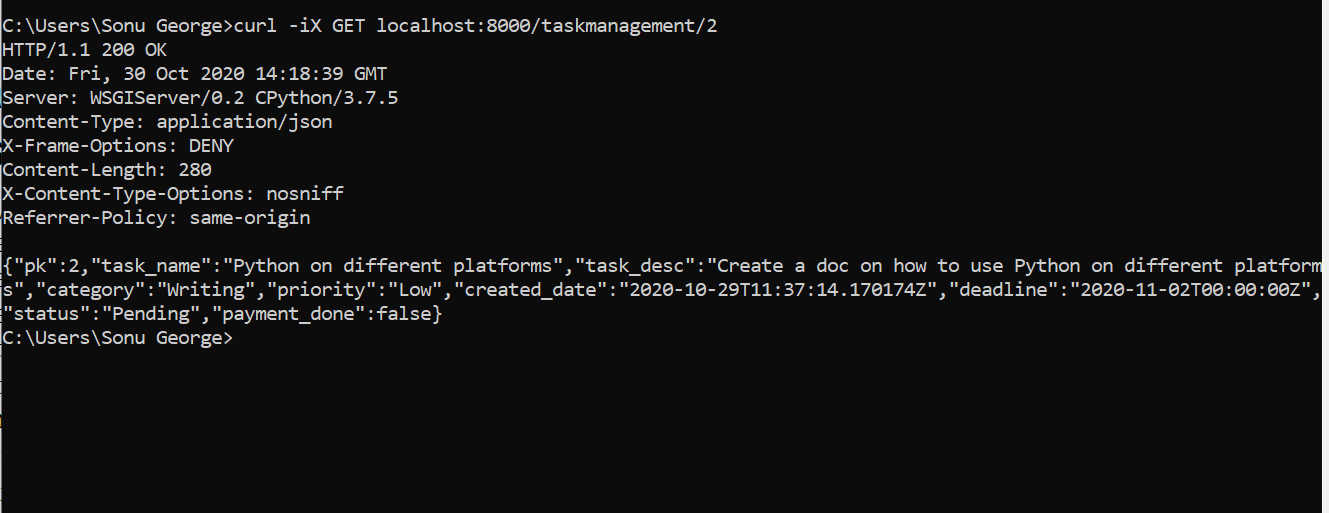
The equivalent curl command as follows:
curl -iX GET localhost:8000/taskmanagement/2
Output:
Let’s try to retrieve an element that is not in the database.
http :8000/taskmanagement/5
The output as follows
HTTP/1.1 404 Not Found
Content-Length: 0
Content-Type: text/html; charset=utf-8
Date: Fri, 30 Oct 2020 14:32:46 GMT
Referrer-Policy: same-origin
Server: WSGIServer/0.2 CPython/3.7.5
X-Content-Type-Options: nosniff
X-Frame-Options: DENY
HTTP POST Request
We use POST requests to create a task. The HTTPUtilityPie command to create a new ask as follows.
http POST :8000/taskmanagement/ task_name=”Document XYZ” task_desc=”Document Description” category=”Writing” priority=”Low” created_date=”2020-10-30 00:00:00.000000+00:00″ deadline=”2020-11-03 00:00:00.000000+00:00″ status=”Pending” payment_done=false
Here the URL request (http POST :8000/taskmanagement/ ) matches the regular expression (taskmanagement/$). Hence, it calls the function task_list, and the POST verb satisfies the condition to execute the code for the task creation.
Output:
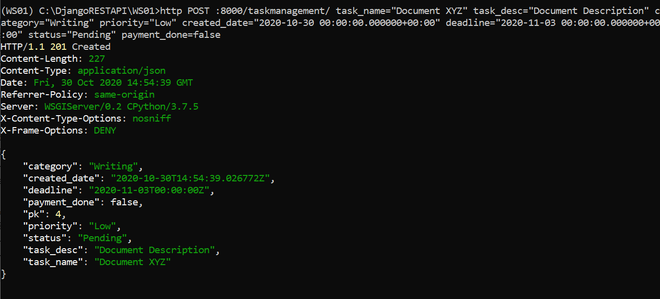
POST Request using HTTPUtilityPie
Let’s create another instance using the curl command. The curl command for POST request as follows
curl -iX POST -H “Content-Type: application/json” -d “{\”task_name\”:\”Task 01\”, \”task_desc\”:\”Desc 01\”, \”category\”:\”Writing\”, \”priority\”:\”Medium\”, \”created_date\”:\”2020-10-27 13:02:20.890678\”, \”deadline\”:\”2020-10-29 00:00:00.000000+00:00\”, \”status\”:\”Completed\”, \”payment_done\”: \”true\”}” localhost:8000/taskmanagement/
Output:
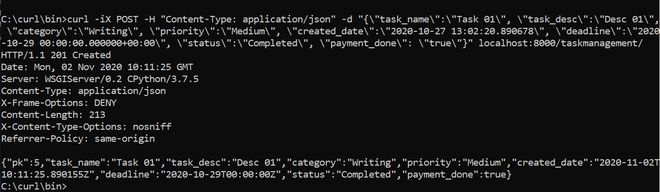
POST Request using curl
Here the data required to create a new task is specified after -d and the usage of -H “Content-Type: application/json” signifies the data is in JSON format.
{
“task_name”:”Task 01″, “task_desc”:”Desc 01″, “category”:”Writing”, “priority”:”Medium”, “created_date”:”2020-10-27 13:02:20.890678″, “deadline”:”2020-10-29 00:00:00.000000+00:00″, “status”:”Completed”, “payment_done”: “true”
}
HTTP PUT Request
We make use of PUT request to update an existing task. Here we pass the id of the task that needs to be updated along with the URL. Since the URL has a parameter, Django sends the URL instance to the task_detail function in views. And, executes the code that holds the condition for the PUT verb.
The HTTPie utility command to update the task:
http PUT :8000/taskmanagement/1 task_name=”Swap two elements” task_desc=”Write a Python program to swap two elements in a list” category=”Writing” priority=”Medium” created_date=”2020-10-27 13:02:20.890678″ deadline=”2020-10-29 00:00:00.000000+00:00″ status=”Completed” payment_done=true
Output:
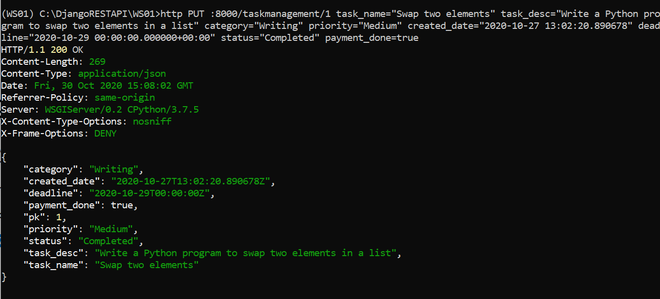
PUT
The equivalent CURL command as follows
curl -iX PUT -H “Content-Type: application/json” -d “{\”task_name\”:\”Swap two elements\”, \”task_desc\”:\”Write a Python program to swap two elements in a list\”, \”category\”:\”Writing\”, \”priority\”:\”Medium\”, \”created_date\”:\”2020-10-27 13:02:20.890678\”, \”deadline\”:\”2020-10-29 00:00:00.000000+00:00\”, \”status\”:\”Completed\”, \”payment_done\”: \”true\”}” localhost:8000/taskmanagement/1
HTTP DELETE Request
The HTTP DELETE Request is used to delete a particular task from the database. Let’s look at the HTTPie utility command.
http DELETE :8000/taskmanagement/4
Output:
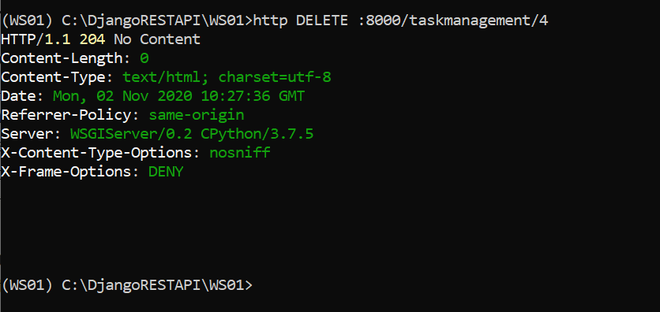
Delete Request
The equivalent curl command as follows:
curl -iX DELETE localhost:8000/taskmanagement/4
Making HTTP requests with Postman
So far, we took advantage of command-line tools to compose and send HTTP requests. Now, we will make use of Postman. Postman REST client is a Graphical User Interface (GUI) tool that facilitates composing and sending HTTP requests to the Django development server. Let’s compose and send GET and POST requests.
GET Request
You can select GET in the drop-down menu, type the URL (localhost:8000/taskmanagement/) in the URL field, and hit the Send button. The Postman will display the information in the output Body section. The below screenshot shows the JSON output response.
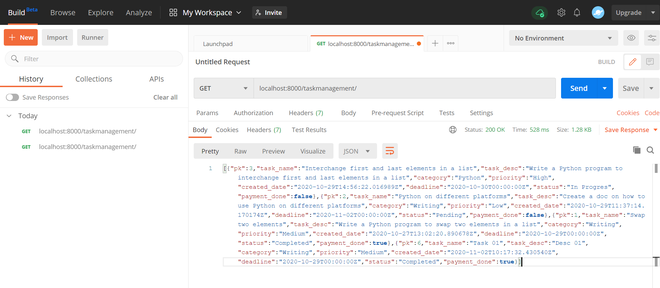
HTTP GET request using Postman
You can click the Header tab to view the header details. Sharing the screenshot below:
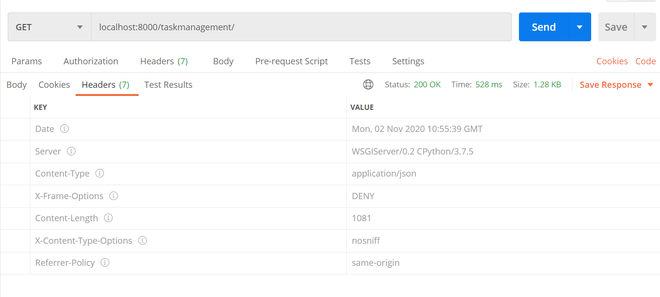
Header
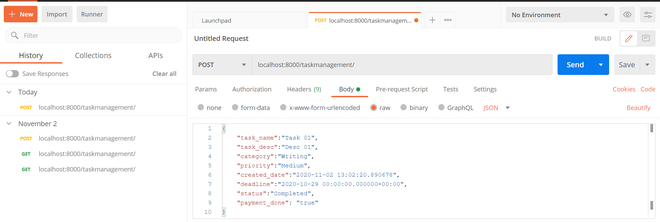
POST Request
Now let’s send a POST request using the Postman GUI tool. Follow the below steps:
- Select the POST verb from the drop-down menu,
- Type the URL in the URL field (localhost:8000/taskmanagement/)
- Select the Body section (in the input section)
- Check the raw radio button and also select JSON in the dropdown menu on the right side of the GraphQL button
- Enter the following lines {“task_name”:”Task 01″, “task_desc”:”Desc 01″, “category”:”Writing”, “priority”:”Medium”, “created_date”:”2020-11-02 13:02:20.890678″, “deadline”:”2020-10-29 00:00:00.000000+00:00″, “status”:”Completed”, “payment_done”: “true”} in the body (input section). and hit send.
Sharing the screenshot below.
Summary
In this article, we created a Django API view for HTTP requests to interact with the SQLite database through the RESTFul web service. We worked with GET, POST, PUT, and DELETE HTTP verbs. We have seen how to send and compose HTTP requests using command-line tools (curl and HTTPie) and the GUI tool (POSTMAN).
Share your thoughts in the comments
Please Login to comment...