Deploy Flask App on AWS EC2 Windows
Last Updated :
24 Apr, 2024
Do you want to host a Windows-based Python Flask application on Amazon Web Services (AWS) Elastic Compute Cloud (EC2)? Flask is a frequently utilized framework for building web apps, APIs, and prototypes because of its ease of use and versatility. AWS EC2 provides virtual machines that are scalable, allowing you complete control over your deployment environment. Using Windows and Internet Information Services (IIS) as the web server, we’ll take you step-by-step through the process of deploying a Flask application on AWS EC2.
What is Flask?
Flask is a Python-based web framework that is lightweight and adaptable. It offers necessary components like routing and templating in place of a cumbersome, opinionated solution. It is popular for smaller applications, quick prototyping, and developing RESTful APIs because of its simplicity.
Common Applications for Flask:
- Simple Websites: Create portfolio sites, blogs, and landing pages without adding unnecessary framework overhead.
- APIs: Provide interfaces via which programs can communicate with data.
- Prototyping: Test concepts for web applications quickly.
- Learning Tool: Flask is an excellent tool for learning web development topics due to its simplicity.
With the versatile virtual servers offered by Amazon Elastic Compute Cloud (EC2), you have complete control over your deployment environment. For developers accustomed to working with the Windows ecosystem, deploying a Flask project on AWS EC2 with Windows provides a comfortable setting.
This tutorial takes you step-by-step through the entire process.
Key Concepts Of Flask App And AWS EC2 Windows
The following are the key concepts of Flask App And AWS EC2 Windows:
- Flask is a Python web framework that offers necessary resources for creating online applications.
- EC2: Resizable virtual machines are available in the cloud through Amazon Web Services’ (AWS) Elastic Compute Cloud, or AWS EC2.
- Windows Server: Microsoft operating system Windows Server is intended for use in server environments.
- IIS: Windows Server comes with a web server called IIS (Internet Information Services).
- wfastcgi: A module that makes use of the WSGI interface to allow IIS to execute Python applications.
How To Deploy Flask App On AWS EC2 Windows: A Step-by-Step Guide
Step 1: Create an EC2 Instance

- Click “Launch instance” and choose a Windows Server AMI (Amazon Machine Image). Popular options include Windows Server 2019 or 2022.

- Select an instance type suitable for your app’s workload.
- Configure security groups to allow inbound traffic on ports 80 (HTTP) and any other ports your application needs.
- Launch your instance and wait for it to start.
Step 2: Connect to Your Instance
- Use Remote Desktop Protocol (RDP) to connect to your Windows instance. Get the public IP address or DNS name from the EC2 console and use your chosen RDP client (Remmina on Ubuntu).
 Step 3: Install Python and Flask
- Download and install the Python installer from the official website https://www.python.org/downloads/windows/
- Open a PowerShell window on the EC2 instance.
- Install Flask using pip: ‘pip install Flask’
Step 4: Setup Your Flask Application
- Create a directory for your application (e.g., ‘C:\myflaskapp’).
- Inside the directory, create a file named ‘main.py’ with your Flask application code:
Python3
from flask import Flask

app = Flask(__name__)

@app.route('/')
def hello_world():
    return 'Hello, from Flask on Windows EC2!'

if __name__ == '__main__':
    app.run()
Step 5: Install and Configure IIS
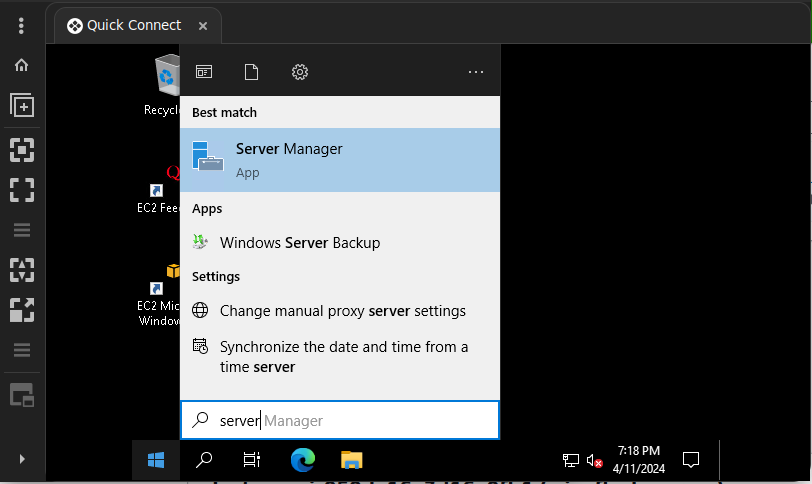
- The below screenshot illustrates about the server manager Dashbaord With Loal server configuration.


- Click Next>Next and go to Server Selection
- Install “Web Server (IIS)” and include the “CGI” role service.


- Click Add Features and Install
 Step 6: Install wfastcgi
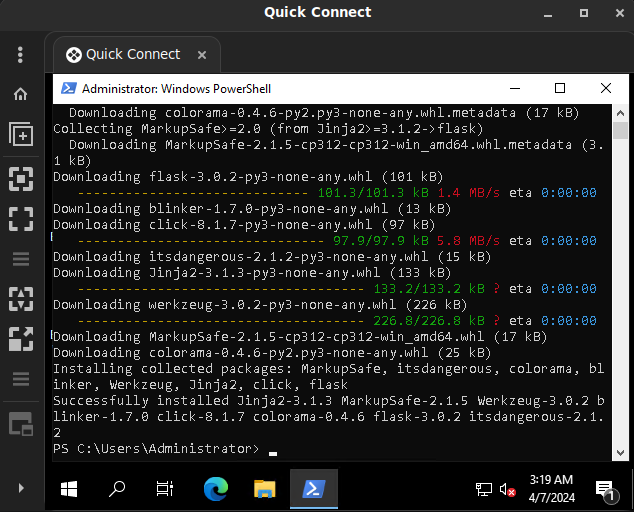
- From PowerShell, install it: ‘pip install wfastcgi’

- Then run the following command to enable it in the current environment.
wfastcgi-enable
Output:

Copy the path from the output
Step 7: Create Web Configuration File
- Create a file web.config next to your main flask app file “app.py”.
XML
<?xml version="1.0" encoding="utf-8"?>
     <configuration>
     <system.webServer>
       <handlers>
        <add name="Python FastCGI"
           path="*"
           verb="*"
           modules="FastCgiModule"
           scriptProcessor="c:\users\Adminstrator\desktop\demoflask\env\scripts\python.exe|c:\users\Adminstrator\desktop\demoflask\env\lib\site-packages\wfastcgi.py"

           resourceType="Unspecified"
           requireAccess="Script" />
       </handlers>
     </system.webServer>
     <appSettings>
       <!-- Required settings -->
       <add key="WSGI_HANDLER" value="main.app" />
       <add key="PYTHONPATH" value="C:\Users\Adminstrator\Desktop\DemoFlask\myProject" />
     </appSettings>
     </configuration>
Step 8: Configure IIS Handler
- Open IIS Manager.
- Expand your ‘Sites’, right-click on “Default Web Site”, and select “Add Application.”
- Set an alias (e.g., ‘myflaskapp’) and the physical path to your application’s directory.
- Go to “Handler Mappings,” and add a Module Mapping:
Request Path: '*'
Module: 'FastCgiModule'
Executable: 'C:\Python3x\python.exe|C:\Adminstrator\root\scripts\wfastcgi.py' (Adjust for your Python installation path)
Step 9: Test Your Application
- Click browse from the right pane to browse your site locally.
- Access your app’s URL using your EC2 instance’s public IP address and the alias you set (e.g., ‘http://ec2-public-ip/myflaskapp’)
Deploy Flask App On AWS EC2 Windows – FAQs
Is using a custom domain name permitted?
Indeed, you may utilize AWS Route 53 and other services to use a custom domain name. The DNS and routing will be managed by an application that you create with an Amazon Route 53 Controller domain controller.
How can I make this process automatic?
Use tools like AWS CloudFormation or Terraform to automate this entire process. With these platforms, you may provide your infrastructure automatically after defining it in a more declarative, resource-driven manner. Using Terraform, for instance, you might write a configuration script that lists all the resources (load balancers, instances, etc.) that are required, and then you could run the script to launch everything.
Can I scale my Flask application on AWS EC2?
Yes, you can expand your application horizontally by adding extra instances behind a load balancer or vertically by resizing your EC2 instance.
How can I keep my Flask application on EC2 secure?
To manage incoming and outgoing traffic to your EC2 instance, you can set up security groups in AWS. For safe communication, think about putting SSL/TLS encryption into place as well.
Can I use EC2 to deploy databases in addition to my Flask application?
Indeed, you may use PostgreSQL, MySQL, or Amazon RDS databases to store and manage data in conjunction with your Flask application on EC2.
Can my Flask application be integrated with other AWS services?
Of course! To improve the functionality and scalability of your Flask application, you may connect a variety of AWS services, such as serverless computing with AWS Lambda, NoSQL database storage with Amazon DynamoDB, and static file storage with Amazon S3.
Share your thoughts in the comments
Please Login to comment...